
Getting Started with the New Control Flow
Angular 17 ships with a new built-in control flow that changes how templates handle conditional rendering and list iteration. This post walks through building a Pokemon gallery that relies entirely on these new blocks. The new syntax replaces structural directives in most scenarios, aiming to make template authoring more natural and straightforward. One notable advantage: since these blocks are part of the framework itself, no imports are required when working with standalone components.
| New Control Flow | Structure directive equivalence | Purpose |
| @if, @else if and @else | NgIf, NgElse and NgTemplate | Show and hide component by condition |
| @for, @empty | NgFor | Iterate an array of data with a fallback when array is empty |
| @switch, @case and @default | NgSwitch, NgSwitchCase and NgSwitchDefault | Match a value against cases and a default case when none of them matches |
Demo Overview
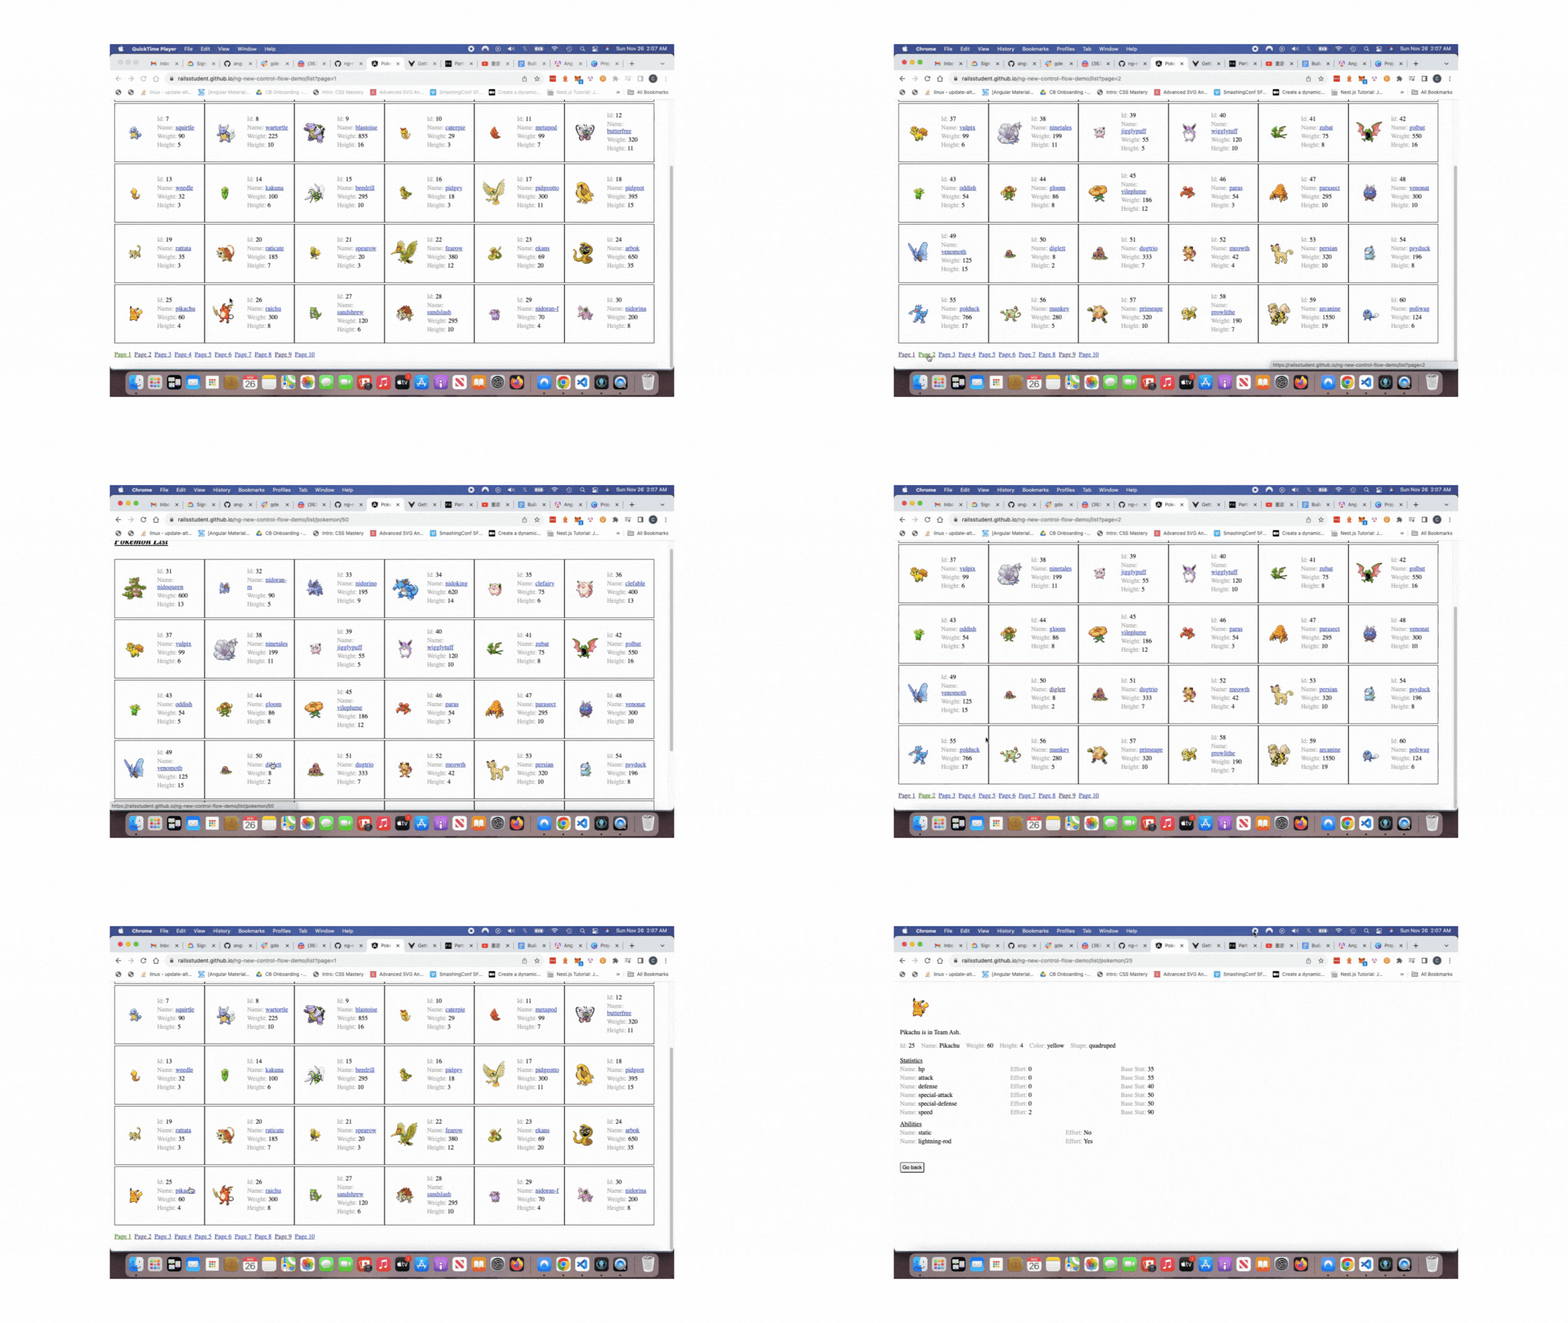
The gallery showcases 300 Pokemon entries distributed across 10 paginated views, with 30 cards per page. Cards are arranged using a flexbox layout, presenting each Pokemon's id, name, weight, and height. Clicking a Pokemon name routes the user to a detail page equipped with additional physical characteristics.
Setting Up Routing
To begin, routes were established for both the PokemonListComponent and the PokemonComponent.
// app.routes.ts

export const routes: Routes = [
    {
        path: 'list',
        loadComponent: () => import('./pokemons/pokemon-list/pokemon-list.component')
            .then((m) => m.PokemonListComponent),
        title: 'Pokemon List'
    },
    {
        path: 'list/pokemon/:id',
        loadComponent: () => import('./pokemons/pokemon/pokemon.component')
            .then((m) => m.PokemonComponent),
        title: 'Pokemon Details'
    },
    {
        path: '',
        pathMatch: 'full',
        redirectTo: '/list?page=1',
    },
    {
        path: '**',
        redirectTo: '/list?page=1',
    }
];
These routes were then passed into the provideRouter function, enabling the withComponentInputBinding option as well.
// app.config.ts

export const appConfig: ApplicationConfig = {
  providers: [
    provideHttpClient(),
    provideRouter(routes, withComponentInputBinding())
  ]
};
// main.ts
bootstrapApplication(AppComponent, appConfig)
.catch((err) => console.error(err));Rendering the Pokemon List
A dedicated PokemonListComponent was created to handle the browser-side display of all Pokemon entries.
The component uses a signal named pokemons to hold the full collection.
// pokemon-list.component.ts

pokemons = toSignal(
    toObservable(this.currentPage).pipe(switchMap(() => this.pokemonListService.getPokemons())),
    { initialValue: [] as DisplayPokemon[] }
  );
Inside the inline template, the @for block iterates through the Pokemon array. The track keyword identifies each item by its unique id. This is a notable improvement over ngFor, as tracking is now a required parameter, significantly improving performance when handling lengthy lists.
@for (pokemon of pokemons(); track pokemon.id) {
   <app-pokemon-card [pokemon]="pokemon" />
}
Similar to NgFor, the @for block exposes several implicit variables for context within the loop.
@for (ability of abilities; track ability.name; let idx = $index) {
   <div class="abilities">
       <label for="ability_name">
         <span>{{ idx + 1 }}. Name: </span><span id="ability_name" name="ability_name">{{ ability.name }}</span>
       </label>
       <label for="ability_isHidden">
         <span>Effort: </span><span id="ability_isHidden" name="ability_isHidden">{{ ability.isHidden ? 'Yes' : 'No' }}</span>
       </label>
   </div>
} @empty {
   <p>No Ability</p>
}
In the loop above, $index is mapped to a local idx variable to render sequential row numbers. Additional implicit values, including $count, $first, $even, and $odd, are also accessible.
Showcasing Individual Pokemon Details
Selecting a Pokemon name directs the user to the PokemonComponent, where ownership, abilities, statistics, and more detailed physical data are displayed.
// pokemon.component.ts

@if (pokemonDetails$ | async; as pokemonDetails) {
    <app-pokemon-physical [pokemonDetails]="pokemonDetails" />
    <app-pokemon-statistics [statistics]="pokemonDetails.stats" />
    <app-pokemon-abilities [abilities]="pokemonDetails.abilities" />
}
An observable, pokemonDetails$, holds the Pokemon data. The @if block unwraps this observable and assigns the result to the pokemonDetails variable. This value is then forwarded as an input to the PokemonPhysicalComponent, PokemonStatisticsComponent, and PokemonAbilitiesComponent.
// pokemon-statistics.component.ts

@for (stat of statistics; track stat.name) {
      <div class="stats">
        <label for="stat_name">
          <span>Name: </span><span id="stat_name" name="stat_name">{{ stat.name }}</span>
        </label>
        <label for="stat_effort">
          <span>Effort: </span><span id="stat_effort" name="stat_effort">{{ stat.effort }}</span>
        </label>
        <label for="stat_baseStat">
          <span>Base Stat: </span><span id="stat_baseStat" name="stat_baseStat">{{ stat.baseStat }}</span>
        </label>
      </div>
 } @empty {
      <p>No statistics</p>
 }

export class PokemonStatisticsComponent {
  @Input({ required: true })
  statistics!: Statistics[];
}
When the statistics array contains entries, the @for block cycles through them to present each data point. An @empty block catches the case where the array is empty, displaying “No Statistics” instead. Elements are tracked by stat.name, as each name is guaranteed to be distinct.
The same @for/@empty pattern handles the display of special abilities. Since a Pokemon cannot have duplicate abilities, the ability itself serves as a reliable unique key for tracking. An empty abilities list will trigger the "No Ability" placeholder text.
// pokemon-abilities.component.ts

@for (ability of abilities; track ability.name) {
   <div class="abilities">
       <label for="ability_name">
          <span>Name: </span><span id="ability_name" name="ability_name">{{ ability.name }}</span>
       </label>
       <label for="ability_isHidden">
          <span>Effort: </span><span id="ability_isHidden" name="ability_isHidden">{{ ability.isHidden ? 'Yes' : 'No' }}</span>
       </label>
   </div>
} @empty {
   <p>No Ability</p>
}

export class PokemonAbilitiesComponent {
  @Input({ required: true })
  abilities!: Ability[];
}
Finally, the @switch block is employed to identify the owners of several well-known Pokemon. Pikachu, Staryu, Steelix, and Meowth are all famous characters, with owners who are either central protagonists or antagonists in the series. When the Pokemon type matches a known case, a custom affiliation pipe renders the corresponding owner. For any type not specifically matched, a fallback case displays the message "Your team is unknown". The @default case should essentially never be reached, as the unknown case effectively covers all Pokemon with less prominent roles.
// affiliation.pipe.ts

@Pipe({
  name: 'affiliation',
  standalone: true
})
export class AffiliationPipe implements PipeTransform {
  transform(name: string, team: string): string {
    return `${name} is in Team ${team}.`;
  }
}
export type PokemonAffiliation = {
type: 'pikachu',
owner: 'Ash',
} | {
type: 'meowth',
owner: 'Rocket',
} | {
type: 'staryu',
owner: 'Misty',
} | {
type: 'steelix',
owner: 'Brock',
} | {
type: 'unknown',
warningMessage: 'Your team is unknown',
}When the value of affiliation.type matches pikachu, meowth, staryu, or steelix, the type of PokemonAffiliation narrows down to an owner property. This property is then supplied to the custom pipe for rendering. For unknown types, the type narrows to a warningMessage property, resulting in the "Your team is unknown" text. This functionality works because @switch performs type narrowing within HTML templates.
// pokemon-affiliation.component.ts

@switch (affiliation.type) {
     @case ('pikachu') {
       <p>{{ affiliation.type | affiliation:affiliation.owner }}</p>
     } @case ('meowth') {
       <p>{{ affiliation.type | affiliation:affiliation.owner }}</p>
     } @case ('staryu') {
       <p>{{ affiliation.type | affiliation:affiliation.owner }}</p>
     } @case ('steelix') {
       <p>{{ affiliation.type | affiliation:affiliation.owner }}</p>
     } @case ('unknown') {
       <p>{{ affiliation.warningMessage }}</p>
     } @default {
       <p>This should not appear</p>
     }
}

export class PokemonAffliationComponent {
 @Input({ required: true })
 affiliation!: PokemonAffiliation;
}
And that's it — a straightforward Pokemon gallery built with the new control flow. The syntax is more instinctive than structural directives, and it is easier to grasp and recall. While directives like NgIf, NgSwitch, and NgFor are not deprecated, it wouldn't be surprising to see the new control flow become the more common choice in Angular 17 and beyond.
Further Reading and References
- Source Code: https://github.com/railsstudent/ng-new-control-flow-demo
- Live Demo: https://railsstudent.github.io/ng-new-control-flow-demo/list?page=1
- Official Docs on Control Flow: https://angular-dev-site.web.app/guide/templates/control-flow
- Angular Team Presentation: https://www.youtube.com/watch?v=QrEH53tSUf0&t=1684s