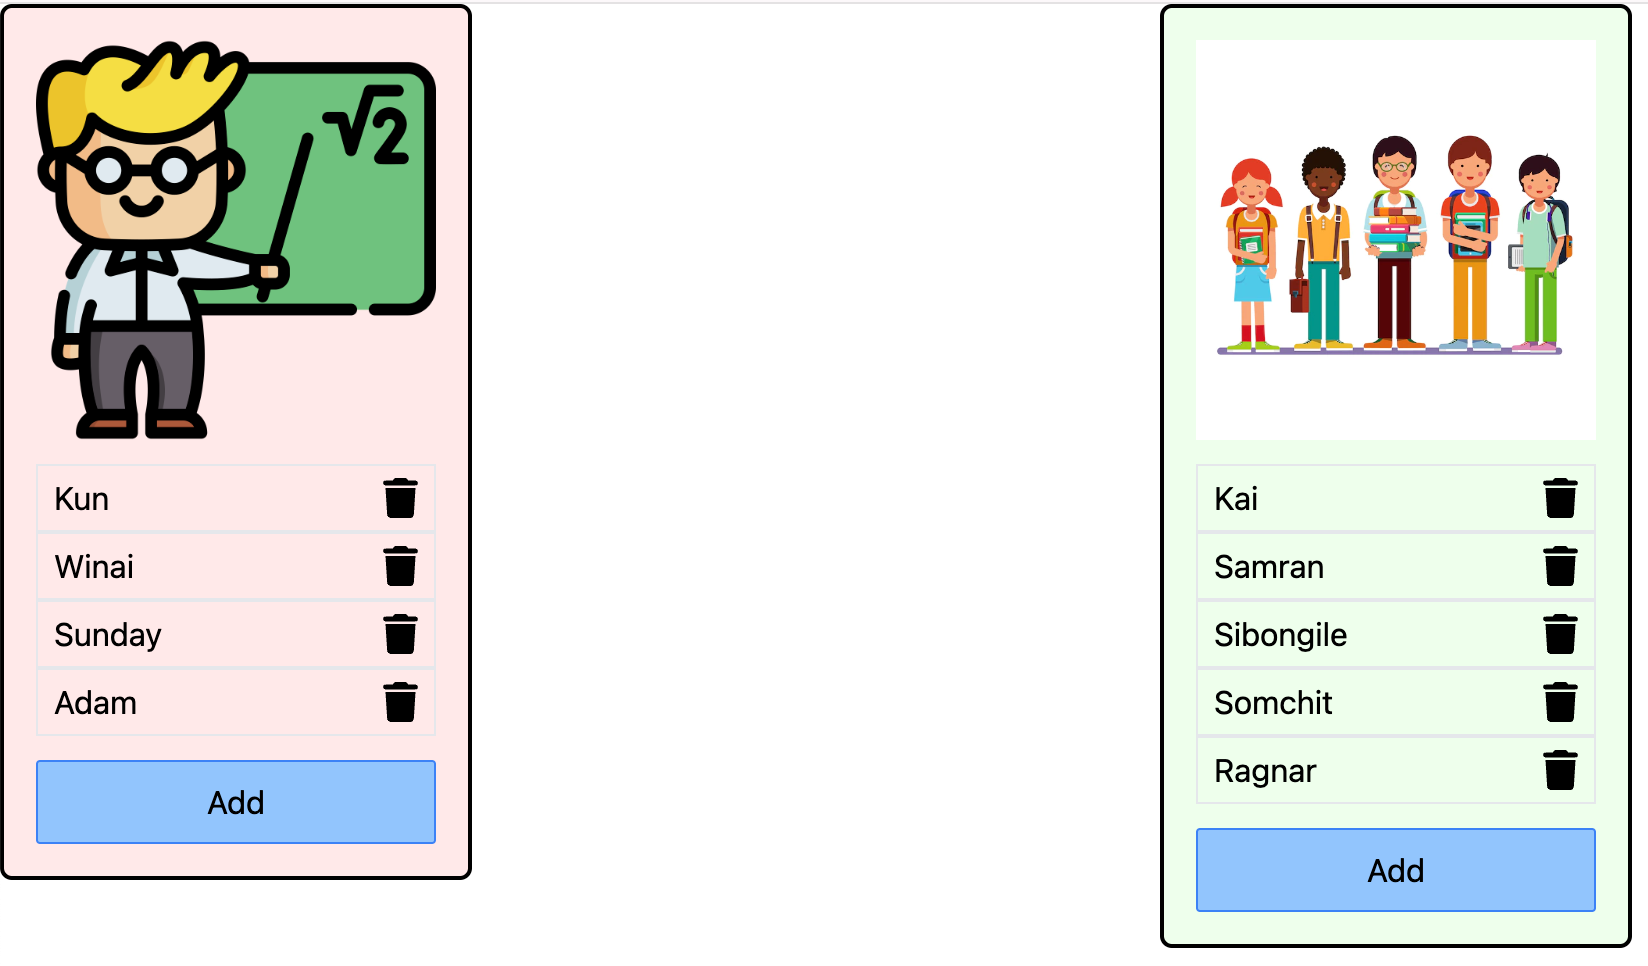
Modern web development demands components that are both reusable and adaptable. Angular addresses this with a robust mechanism called ng-content. It lets developers transfer content from a parent component into a child component, which simplifies the creation of dynamic, highly customizable UI elements. In this post, we’ll break down what ng-content is, examine its internal mechanics, and see how it can improve your Angular projects.
Understanding ng-content
ng-content serves as an Angular directive dedicated to content projection. This technique lets the parent component define what content appears inside the child component. It’s especially valuable when constructing reusable components where the inner content is decided externally.
Mechanics Behind ng-content
Placed inside a child component, ng-content functions as a dynamic loading zone. At runtime, Angular swaps out this marker for the actual content supplied by the parent. Such an approach boosts both flexibility and component reusability significantly.
Getting Started with ng-content
We’ll dive into a straightforward demonstration to illustrate the fundamental application of ng-content.
Defining the Child Component (alert.component.html)
<div class="alert">
  <ng-content />
</div>
Parent Component (app.component.html)
<app-alert>
  <p>This is an important alert message!</p>
</app-alert>
The <ng-content /> element inside alert.component.html serves as an insertion point here. Whatever appears between the opening and closing
<div class="alert">
  <p>This is an important alert message! </p>
</div>
Supporting multiple ng-content slots with defaults ng-content
Beyond a single projection point, Angular lets you set up several placeholders inside one component. You achieve this with the select attribute, which creates named slots that the parent can target individually.
Card component template (card.component.html)
<div class="card">
  <ng-content select="card-header"></ng-content>
  <ng-content select="card-content"></ng-content>
  <ng-content select="card-footer"></ng-content>
</div>
Parent Component (app.component.html)
<app-card>
  <card-header>
    <h2>Header Content</h2>
  </card-header>
  <card-content>
    <p>This is the main content of the card.</p>
  </card-content>
  <card-footer>
    <button>Footer Button</button>
  </card-footer>
</app-card>
The position of each projected section is dictated by the selector tag.
Here, content marked as card-header in the parent will be placed inside the child component wherever the select="card-header" attribute appears.
When Angular fails to identify a proper select entry point for incoming content from the parent, it can rely on a default projection slot—a standard <ng-content> </ng-content> element.
That setup looks like this
Child Component (card.component.html)
<div class="card">
  <ng-content select="card-header"></ng-content>
  <ng-content select="card-content"></ng-content>
  <ng-content select="card-footer"></ng-content>
  <!-- capture anything except "card-header, card-content and card-footer" -->
  <ng-content></ng-content>
</div>
Parent Component (app.component.html)
<app-card>
  <card-header>
    <h2>Header Content</h2>
  </card-header>
  <card-content>
    <p>This is the main content of the card.</p>
  </card-content>
  <card-footer>
    <button>Footer Button</button>
  </card-footer>
  <p>This will be projected into default ng content in the child</p>
</app-card>
The examples covered so far only hint at what ng-content can do for reusability. Its real power comes into play when you pair it with ng-template.
Consider a card component designed to render information about either a student or a teacher. We’ll look at how one and the same card can serve both types of data, without any conditional logic such as @if.
Take the student component as our starting point.
student-card.component.ts
import { AsyncPipe } from '@angular/common';
import { ChangeDetectionStrategy, Component, inject } from '@angular/core';
import {
  FakeHttpService,
  randStudent,
} from '../../data-access/fake-http.service';
import { StudentStore } from '../../data-access/student.store';
import { CardComponent } from '../../ui/card/card.component';
import { ListItemComponent } from '../../ui/list-item/list-item.component';

@Component({
  selector: 'app-student-card',
  template: `
    <app-card [items]="students()" (add)="addStudent()" class="bg-light-green">
      <img src="assets/img/student.webp" width="200px" />
      <ng-template #rowRef [cardRow]="students()" let-student>
        <app-list-item (delete)="deleteStudent(student.id)">
          {{ student.firstName }}
        </app-list-item>
      </ng-template>
    </app-card>
  `,
  standalone: true,
  styles: [
    `
      .bg-light-green {
        background-color: rgba(0, 250, 0, 0.1);
      }
    `,
  ],
  imports: [CardComponent, ListItemComponent, AsyncPipe],
  changeDetection: ChangeDetectionStrategy.OnPush,
})
export class StudentCardComponent {
  private http = inject(FakeHttpService);
  private store = inject(StudentStore);

  students = this.store.students;

  constructor() {
    this.http.fetchStudents$.subscribe((s) => this.store.addAll(s));
  }

  addStudent() {
    this.store.addOne(randStudent());
  }

  deleteStudent(id: number) {
    this.store.deleteOne(id);
  }
}
It is time to examine the teacher component.
teacher-card.component.ts
import { AsyncPipe } from '@angular/common';
import { ChangeDetectionStrategy, Component, inject } from '@angular/core';
import {
  FakeHttpService,
  randTeacher,
} from '../../data-access/fake-http.service';
import { TeacherStore } from '../../data-access/teacher.store';
import { CardComponent } from '../../ui/card/card.component';
import { ListItemComponent } from '../../ui/list-item/list-item.component';

@Component({
  selector: 'app-teacher-card',
  template: `
    <app-card [items]="teachers()" class="bg-light-red" (add)="addTeacher()">
      <img src="assets/img/teacher.png" width="200px" />
      <ng-template #rowRef [cardRow]="teachers()" let-teacher>
        <app-list-item (delete)="deleteTeacher(teacher.id)">
          {{ teacher.firstName }}
        </app-list-item>
      </ng-template>
    </app-card>
  `,
  styles: [
    `
      .bg-light-red {
        background-color: rgba(250, 0, 0, 0.1);
      }
    `,
  ],
  standalone: true,
  imports: [ListItemComponent, AsyncPipe, CardComponent],
  changeDetection: ChangeDetectionStrategy.OnPush,
})
export class TeacherCardComponent {
  private http = inject(FakeHttpService);
  private store = inject(TeacherStore);

  teachers = this.store.teachers;

  constructor() {
    this.http.fetchTeachers$.subscribe((t) => this.store.addAll(t));
  }

  addTeacher() {
    this.store.addOne(randTeacher());
  }

  deleteTeacher(id: number) {
    this.store.deleteOne(id);
  }
}
What stands out in this example is the #rowRef (template reference), which the child component then picks up.
Now, let's look at the child component—the card component.
app-card.component.ts
import { NgTemplateOutlet } from '@angular/common';
    import {
  ChangeDetectionStrategy,
  Component,
  contentChild,
  input,
  output,
  TemplateRef,
} from '@angular/core';

@Component({
  selector: 'app-card',
  template: `
    <ng-content select="img" />

    <section>
      @for (item of items(); track item.id) {
        <ng-template
          [ngTemplateOutlet]="rowTemplate()!"
          [ngTemplateOutletContext]="{ $implicit: item }"></ng-template>
      }
    </section>

    <button
      class="rounded-sm border border-blue-500 bg-blue-300 p-2"
      (click)="add.emit()">
      Add
    </button>
  `,
  standalone: true,
  imports: [NgTemplateOutlet],
  host: {
    class: 'border-2 border-black rounded-md p-4 w-fit flex flex-col gap-3',
  },
  changeDetection: ChangeDetectionStrategy.OnPush,
})
export class CardComponent<T extends { id: number }> {
  items = input.required<T[]>();
  add = output();
  rowTemplate = contentChild<TemplateRef<unknown>>('rowRef'); // Signal<ElementRef|undefined>
}
Take a look at how the contentChild decorator is used to reach the projected content coming from both the student card and teacher card components. This gives us direct access to the rowRef template that the parent components provide.
Thanks to this approach, there is no need to rely on @if statements or create extra components and variables—we can simply display the teacher's or student's content based on what is projected.
For the complete working example, check out this link to see the full implementation.
Project Link
This article draws its inspiration from a specific challenge found here.
https://angular-challenges.vercel.app/challenges/angular/1-projection/
Looking for more details? There are additional resources worth exploring.
MDN Docs