A while back, I shared a video walking through the Angular CDK Portal module and the scenarios where it can be helpful. One of the first comments asked: "How do you pass data into a ComponentPortal factory?" That is a fair question, and this article explains the answer.
Before diving in—if you are not yet familiar with the Portal module, it is worth watching the video referenced above first. I am also basing this article on the same project used in that video.
With that context in place, let us return to the core problem: supplying data to a ComponentPortal.
Setting up the project
Since the article relies on an existing repository, the first step is to clone it from GitHub. Run the following commands in your terminal:
git clone https://github.com/DMezhenskyi/angular-cdk-portal-example.git
cd angular-cdk-portal-example/
git checkout provide-data-to-component-portal
git checkout -b my-solution 7ae90c8cf2f2addcd8316d37431f7dee97cea3e
code .
Those commands do the following: 1) clone the repository from GitHub, 2) move into the project directory, 3) check out the "provide-data-to-component-portal" branch, 4) create a fresh "my-solution" branch from the commit that represents the starting point of the app, and 5) open the project in VS Code.
Once the editor is open, install the dependencies and launch the local development server from the integrated terminal:
npm install
npm run start
With that done, the setup is complete.
Working through the solution
A good starting point is to inspect what arguments ComponentPortal accepts. Open users-page.component.ts and hover over ComponentPortal—the tooltip should resemble this:
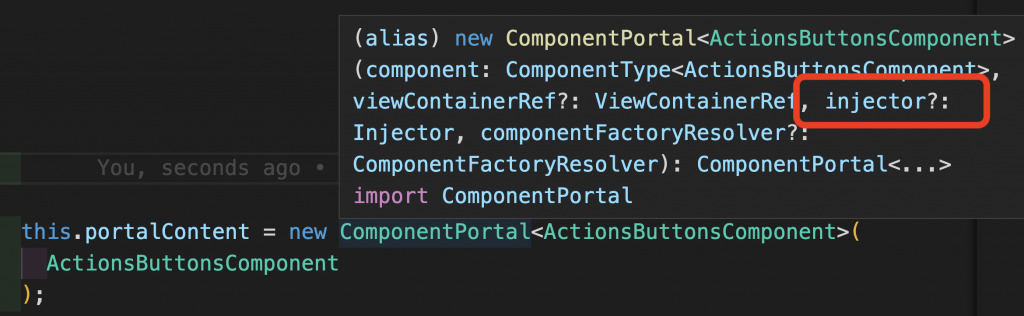
You will notice there is no dedicated "inputs" parameter. However, the third argument is an Injector, which hints that Dependency Injection is the intended way to handle this. The approach here is to construct a custom injector. Let us put that into practice.
@Component({
  selector: 'app-users-page',
  templateUrl: './users-page.component.html',
  styleUrls: ['./users-page.component.scss'],
})
export class UsersPageComponent implements OnInit, OnDestroy {
  //...
  constructor(private portalBridge: PortalBridgeService) {}

  ngOnInit(): void {
    const portalInjector = Injector.create(); // <-- Created Injector
    this.portalContent = new ComponentPortal<ActionsButtonsComponent>(
      ActionsButtonsComponent
    );
    this.portalBridge.setPortal(compPortal);
  }
  //...
}
That works, but the current injector is not useful yet—it does not provide any values. Let us improve it by adding a Dependency Provider. First, create an injection token in a dedicated file:
import { InjectionToken } from '@angular/core';

export const DATA_TOKEN = new InjectionToken<string>('portal-data');
Now return to users-page.component.ts and update the injector to provide the newly created DATA_TOKEN with a string value:
const portalInjector = Injector.create({
  providers: [{ provide: DATA_TOKEN, useValue: 'Hello from Portal' }],
});
Then pass this configured injector as the third argument to ComponentPortal. Note: the second argument (for viewContainerRef) is not needed here, so pass null in its place.
this.portalContent = new ComponentPortal<ActionsButtonsComponent>(
  ActionsButtonsComponent,
  null, // it is viewContainerRef which is optional
  portalInjector
);
The final step is to consume the token inside ActionsButtonsComponent—inject DATA_TOKEN just like any other dependency and read its value.
export class ActionsButtonsComponent implements OnInit {
  // This is how we inject tokens
  constructor(@Inject(DATA_TOKEN) private data: string) {

  ngOnInit(): void {
    console.log(this.data);
  }
}
Navigate to http://localhost:4200/users and the setup should work.
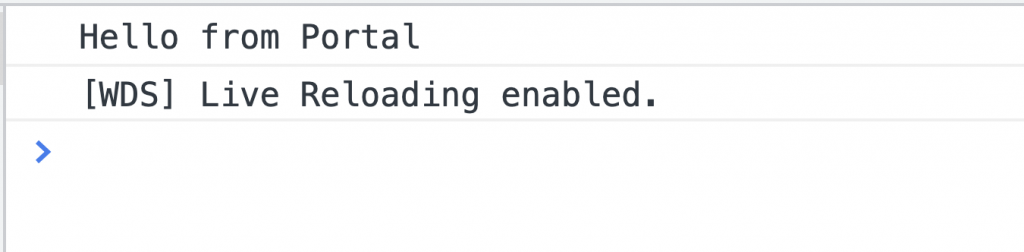
If you encounter an error about the "async pipe not found," simply restart with npm run start. The full source code is available here.
This technique is not limited to strings—any object, class, or service can be provided. When assembling a custom injector, you can also pass a parent injector as the second parameter if your scenario requires it. To understand why the parent injector matters, see the video on Dependency Injection internals.
That wraps up the solution. For more content, subscribe to the YouTube channel or explore the video courses.

Advanced Angular Forms – Deep Dive
Check out this Advanced Angular Forms course from a Google Developer Expert in Angular.