
Unpacking the Angular Compiler
I'm a huge fan of Angular and the creative things it enables, so I figured it would be a fun challenge to dig into the compiler that ships with Angular 4, work out how it operates, and recreate a slice of the compilation pipeline myself.
That investigation turned into my ng-conf 2017 talk, "DiY Angular Compiler", and because the whole process was so enjoyable, I want to share some of those insights in written form too.
Here is "A Deep, Deep, Deep, Deep, Deep Dive into the Angular Compiler!"
Like most of my writing, this piece works best if you can code along as you read. So before we jump in, make sure your machine has a few prerequisites ready:
First up, you'll want node.js and npm (or yarn) available on your system.
You'll also need a current Angular CLI (version 1.2.0 or higher). To confirm which CLI version you have, run:
ng -v
That command should print something like this:
@angular/cli: 1.2.0
If yours is older, install the latest version with:
npm i -g @angular/cli
We'll also lean on a handy utility called source-map-explorer. If it's not already installed, you can fetch it like so:
npm i -g source-map-explorer
Cutting the Compiler Out
To kick off our deep (deep, deep, deep…) exploration of the Angular Compiler, let's spin up a fresh project. Head to whatever directory you prefer and execute:
ng new compiler-playground
This one takes a bit, but when it's done you'll have a new Angular app waiting in the compiler-playground folder. Move into that directory and then run:
ng build
That produces a dist folder holding your compiled application. However, the JavaScript payloads there are surprisingly heavy: look inside dist and you'll spot a vendor.bundle.js sitting at roughly 2 megs. That's certainly not something we want to ship!
Opening up vendor.bundle.js reveals tons of unminified JavaScript. Running uglify on it shrinks things dramatically, down to about 650kb. Even so, that's a chunky file for what is essentially a "hello world" app.
This is where source-map-explorer shines — it lets you see exactly what's occupying space inside your bundle. Give it a try with:
source-map-explorer dist/vendor.bundle.js
After a short pause, you'll see a visualization resembling this:

The "compiler" module turns out to be nearly half the bundle — close to 1MB, or 320kb minified, that gets downloaded by every visitor.
Happily, dropping that compiler is trivial. Just execute:
ng build -prod --sourcemaps
The compiler portion vanishes thanks to Angular's AoT ("Ahead of Time") compilation mode. With AoT, the build process handles the compile step rather than the browser at runtime, so the compiler can be eliminated entirely from the final output. That saves real processing time when your page loads.
Now the dist directory shows a vendor file reduced to 310kb, and source-map-explorer confirms the giant compiler chunk has disappeared:

We can trim another 30% off by dropping the forms and http modules when they're not needed — it would be nice if the build tooling eventually pruned unused code automatically (a practice known as "tree-shaking"). After cutting those modules and enabling compression, the file lands at roughly 79kb.
Just remember: your exact numbers may shift depending on the Angular release and your particular configuration.
So what is that Angular compiler actually doing? Why can we remove it without breaking our app — and why does it need to exist in the first place?
To answer that, we should walk through some of Angular's internals.
How Angular Uses Templates and Views
Our templates declare what the view should display — essentially, we write HTML to outline the DOM structure and bind it to data. When the app boots, Angular must build the matching DOM tree and populate it from data. So if your template contains <h1>{{title}}</h1>, Angular runs something like the following, assuming your component controller is named ctrl:
const h1Element = document.createElement('h1');
h1Element.innerText = ctrl.title;
Beyond that, Angular keeps an eye on the title property and refreshes the element whenever its value changes.
In AngularJS (anything before "Angular," i.e. the 1.x editions), the browser handled DOM construction — it parsed your HTML and produced the DOM tree — and then AngularJS walked the elements, recognized directives and text bindings, and replaced them with the actual values (the relevant AngularJS code).
That design came with a set of headaches.
For starters, browsers aren't always consistent. The same HTML can be parsed into different DOM structures by different browsers (see this example), and Angular would have to compensate. Additionally, browsers handle errors poorly — they often auto-close or reposition elements to mask a mistake, and even when they flag an error, there's no line number provided. That makes coming across bugs a real puzzle, typically solved by guess-and-check until the problem surfaces.
There's also the server-side rendering problem. Relying on a browser for template parsing means you need one available to produce HTML for clients or search engines — making server rendering a delicate, error-prone endeavor (see this discussion or this one).
Additionally, HTML treats tag names and attribute names in a case-insensitive fashion — what's more, the original case isn't preserved: tag names get uppercased and attributes are lowercased. Confirm this for yourself by running:
document.createElement('h1').nodeName
You'll get "H1" in uppercase. This quirk gave us the kebab-case convention (ng-if, ng-model, etc.) so central to AngularJS, as opposed to the camelCase typical in JavaScript.
So relying on the browser's HTML parser means inconsistent results, weak error reporting, no server-side rendering support, and losing attribute case information.
The compiler steps in to fix all of that — it does the HTML parsing itself, off the browser. The payoff is uniform parsing on every platform, the ability to run parsing on the server (it's just JavaScript interpreting your templates), detailed error info, and tags/attributes keeping their case. There's also some great tooling benefits, which we'll touch on soon.

The Angular Compiler: Performance Above All
The compiler is genuinely impressive work, as we'll see momentarily. It doesn't come out of nowhere — more than a megabyte of code and over a year of focused effort went into it. Its job isn't just parsing templates; it also emits finely-tuned code for creating and updating the DOM with minimal CPU and memory usage.
The compiler’s raison d'être has always been small memory footprint, quick initial load, and rapid change detection. Here's the research that preceded the Angular 4 compiler: Generating Less Code.
The Angular team is also investing in tighter integration with the Closure compiler, which applies heavy optimizations to JavaScript, yielding smaller bundles and faster runtime. This is a big part of why I'm so into Angular — there's an exceptionally capable team continuously refining the platform's internals, so apps get faster and better without any extra effort from us.
Enough background; let's look at the compiler in action!
Invoking the Compiler
Add this line to the "scripts" section of your package.json:
"scripts": {
  ...,
  "compile": "ngc"
}
Then execute:
npm run compile
Wait a few seconds and you'll notice the project folder is suddenly housing a bunch of new files. Your app.component.html has morphed into app.component.ngfactory.ts, your app.module.ts produced app.module.ngfactory.ts, and your CSS files turned into shims. We'll inspect each of these next.
Components (View Creation & Change Detection)
?: 00:27:00, if you want to follow along ?
With just a 3-line HTML template, the compiler generates app.component.ngfactory.ts, and that file is full of cryptic code at first glance. This output is tailored for machines, not human readers — so it takes a bit of patience and some reverse engineering. TypeScript makes the process more pleasant, though.

The most obvious feature is the barrage of three-to-four-letter method names, all beginning with ɵ (Greek Theta), like ɵvid. Angular reserves the ɵ prefix to flag framework-private APIs; these are not for direct use, since they can change between versions — in fact, breaking changes are nearly certain.
The abbreviated names exist to keep bundle size down. But Ctrl+click one (in Visual Studio Code or WebStorm) and you'll see the real name. ɵvid expands to viewDef, the function responsible for view definition.
Edit your template (app.component.html) and rerun the compiler (npm run compile) to see the changes ripple through the output. For instance, make your template read:
<h1>Hi, {{title + title}}</h1>
Then check what the compiled output looks like for that version.
Almost everything happens in the View_AppComponent_0 method, split into two halves. The first half constructs the view — declaring every element, attribute, text node, and so on — while the second half handles change detection. That split is what keeps Angular fast: the construction portion executes once when the view initializes, leaving just the dense change-detection code to run on every check.

Heads up: I'm leaving Styles out of this article, but if that topic interests you, I cover it in my talk at
?: 00:34:18.
Modules
?: 00:40:38.
Applications are organized into components and services through modules. This arrangement sets up the framework for how components are resolved and how dependency injection operates: the compiler consults modules to determine which components are usable by other components. In contrast to AngularJS, pipes and components aren't globally accessible; instead, they're only accessible within the module that declared them or imported them from another module. This design choice helps avoid naming conflicts when working on large-scale Angular applications.
Let's explore how Angular implements Dependency Injection. One might assume there's a Map or object that connects each class name or token to its corresponding implementation. That's exactly what AngularJS relied on. The downside of using objects is that their indices get converted to strings automatically, which restricted us to string tokens for dependency injection.
Angular takes a different path entirely. Beyond strings, classes and other objects can now serve as dependency injection tokens. So what's the mechanism behind this?
Looking at the app.module.ngfactory.ts file, you'll encounter an extensive getInternal() method. This is where Angular's dependency injection actually lives. My first assumption was that this design was chosen for performance — maybe a sequence of if statements represented the fastest way to handle Value mappings in JavaScript at the time?
After consulting the Angular team, I learned that the real motivation is improved dead-code elimination. The Closure compiler can identify unused services through this pattern and strip their implementations from the final bundle.
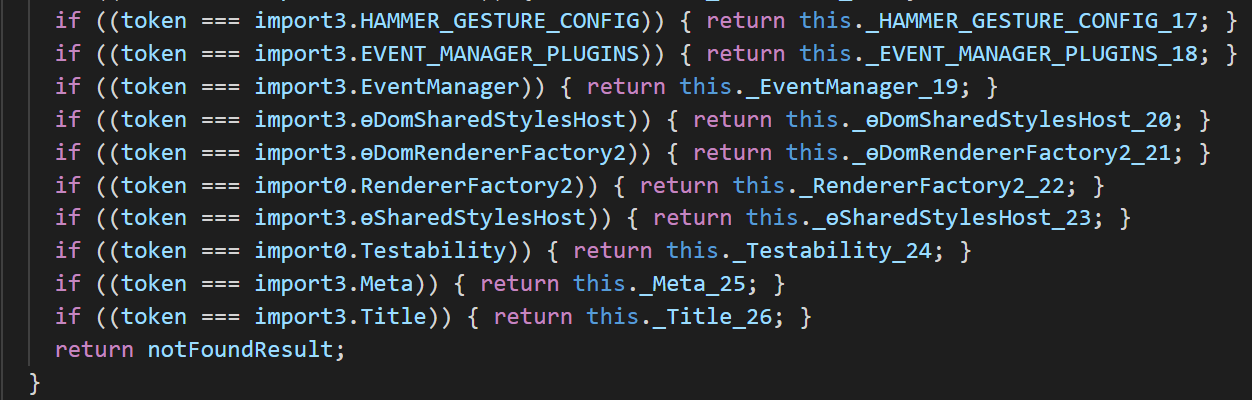
Upon finding a match, the corresponding if statement triggers a getter. On the first invocation, this getter creates the service instance; on subsequent calls, it returns the already-created instance. At its core, dependency injection boils down to a series of if statements.

When a service depends on another service, this relationship is established during compilation. This allows us to locate the required dependency before instantiating the service, then pass it into the constructor:

If you're eager to learn more, Tobias Bosch's ng-conf 2017 talk on the Angular 4.0 Compiler is an outstanding resource. He handled much of the compiler's engineering, so his insights are definitely worth your time.
Some Fun with Tooling
The tooling possibilities built around the Angular Compiler could fill many pages, but one tool deserves special attention: Language Services.
With Angular Language Services, you can execute the compiler within your preferred IDE—whether that's WebStorm, Visual Studio Code, or others—unlocking features like autocomplete and detailed template error reporting. If you haven't tried them yet, you absolutely should; they'll dramatically boost your Angular productivity. For VSCode users, the extension is available here.
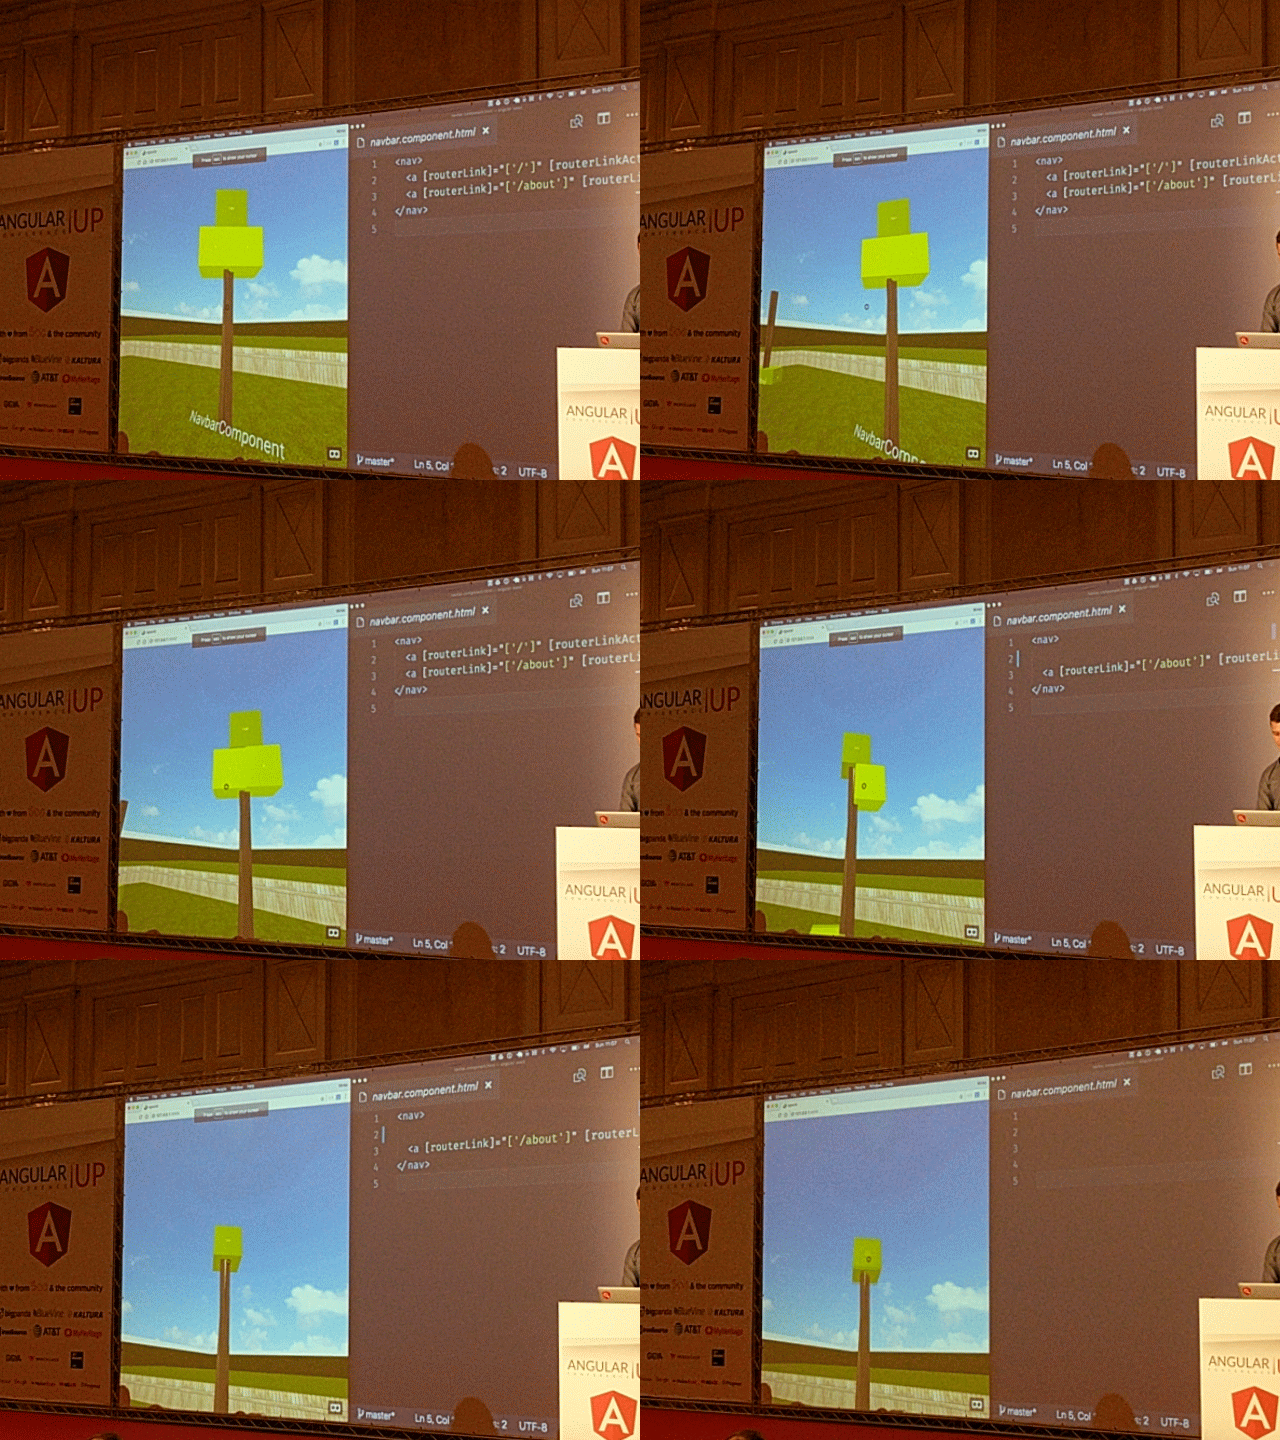
Minko Gechev showcased some fascinating applications in his ng-conf 2017 presentation: Mad Science with the Angular Compiler. Beyond building compiler-based tools for automated Angular version migration and app structure visualization, he even constructs a 3D model of applications where components render as... trees!

Playtime: Do It Yourself!
This post has only skimmed the surface of the Angular Compiler—there's plenty more to uncover. If you prefer learning by doing, I'll leave you with three hands-on exercises that simulate compiler transformations manually. Each one gives you direct experience with the compiler's internal operations.
To get started, let's switch to using the compiled code so you can modify it and observe the effects.
First, run ng serve and confirm the app loads at http://localhost:4200. Once you alter the app entry point, the angular webpack plugin will throw an error (this happens only during webpack initialization). You could bypass it with ng eject and swapping in the plain typescript plugin, but that's beside the point.
With the app running, update src/main.ts to import AppModuleNgFactory and invoke bootstrapModuleFactory (?: 00:52:45). The code should resemble:
import { enableProdMode } from '@angular/core';
import { platformBrowserDynamic } from '@angular/platform-browser-dynamic';
import { AppModuleNgFactory } from './app/app.module.ngfactory';
import { environment } from './environments/environment';
if (environment.production) {
  enableProdMode();
}
platformBrowserDynamic().bootstrapModuleFactory(AppModuleNgFactory);
That's all there is to it! Angular now executes your compiled code. To confirm this, edit app.component.html (adding some text, for instance)—the app will refresh but your changes won't appear, since you're running the compiled version directly and template compilation no longer happens in the browser (?: 00:54:15). You can double-check by editing your component factory (?: 00:55:10).
For these exercises, work directly in the .ngfactory files. Avoid editing the HTML and re-running the compiler—that would be too easy ?
Leverage the typings as you go (hover or ctrl/cmd-click on functions in the compiled files to see their signatures); this will speed up your understanding considerably.
Exercise 1 — Uppercase Title
Adjust the component factory so the title displays in uppercase (like APP WORKS!).
Bonus: Render a second copy of the title beneath the heading without uppercase. The browser-rendered HTML should look like
<h1>APP WORKS!</h1>
app works!
Solution ?: 1:02:50.
Exercise 2 — Dependency Injection
Generate a new Emoji service with this CLI command:
ng generate service emoji
Next, insert this line in emoji-service.ts, right before the constructor() {}:
cat = '?';
Finally, update app.component.ts's constructor to inject and utilize this service:
constructor(emoji: EmojiService) {
  this.title += emoji.cat;
}
(don't forget to import EmojiService at the file's top).
Naturally, this won't work—emoji will be undefined in the component. You'll need to modify the compiled files to both register the service as a component dependency and provide it in the module's dependency injection.
Hints:
- Add the service to the component dependencies list in the directive definition (
ɵdid) withinapp.component.factory.ts. - Add the service to the
getInternal()method inapp.module.ngfactory.ts
Solution ?: 1:30:05.
Exercise 3 — ngOnInit
Add an ngOnInit() method to AppComponent:
ngOnInit() {
    this.title = 'onInit was run!';
  }
Why doesn't Angular execute it? How can you fix this?
Hints:
- Examine the view flags (the first argument to the
ɵdidcall in the component factory). The flag definitions are located here. - Incorporate the component into the change detection cycle by supplying a view update function as the 3rd argument to the
ɵvidcall insideView_AppComponent_Host_0, mirroring the function passed toɵvidinView_AppComponent_0. - If bit-wise operations in JavaScript are unfamiliar, or you'd like additional hints, check ?: 1:35:50.
Solution ?: 1:49:00.
Takeaways
The Angular compiler represents remarkable engineering achievement. This post aimed to give you the opportunity to explore it and grasp its inner workings. You've only seen a fraction—there's far more to discover—but armed with the ability to run the compiler, inspect its output, and decode its magic, you're well-equipped for continued exploration.
Gratitude goes to the Angular team for consistently advancing Angular's capabilities and performance, with special thanks to Tobias Bosch and Igor Minar for addressing my numerous questions during my investigation of this compiler masterpiece. Additional appreciation to Pascal Precht ʕ•̫͡•ʔ for reviewing this post and providing valuable feedback.