Understanding Appwrite
Appwrite is an open-source backend server that accelerates development for web, mobile, and Flutter applications while maintaining strong security standards. The platform handles essential backend operations including authentication, database management, file storage, and additional services, eliminating the requirement for substantial custom server code. Its modular design and active community make it flexible enough to support diverse project requirements.
First Phase: Deploying Your Appwrite Instance
There are two primary routes for getting Appwrite operational. You can configure a private server through the standard installation procedure, or alternatively take advantage of one-click deployment options offered by several cloud providers. These include DigitalOcean, Gitpod, Akamai Compute, and AWS Marketplace. For those just starting out, Gitpod provides a free tier with 50 monthly usage hours and no credit card requirement, which is sufficient for evaluating Appwrite's capabilities. Once you authenticate with your GitHub account, the installation runs automatically and finishes within a few minutes.

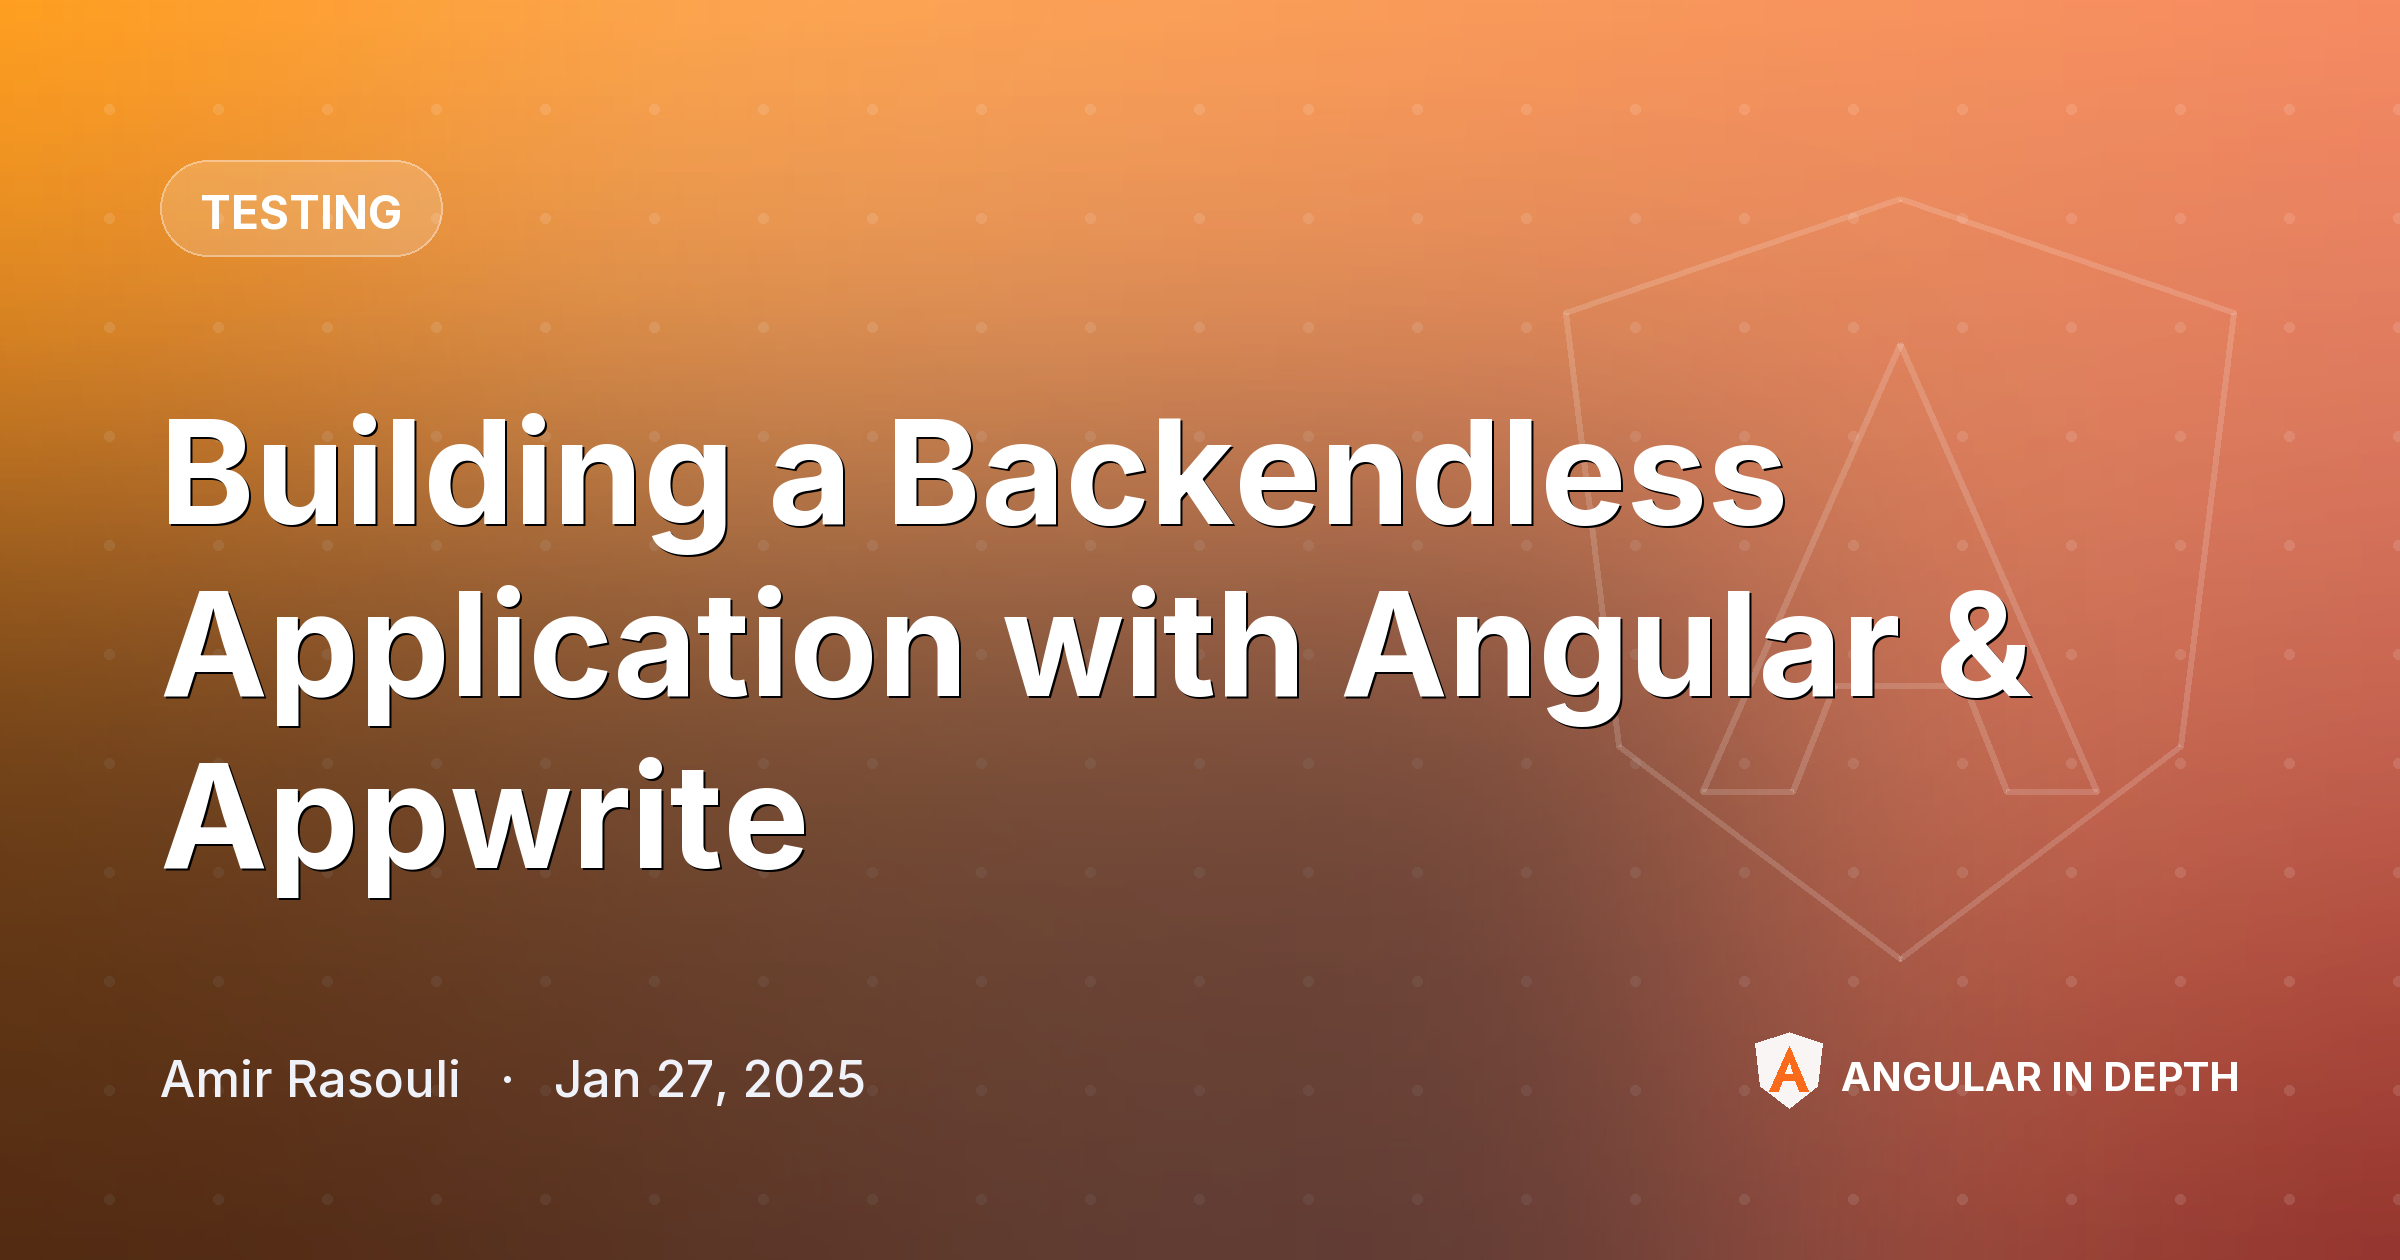
You have the choice of working with a locally installed professional IDE or using Gitpod's cloud-based code editor. By clicking the More Actions button and selecting the Open In Browser option, you'll access the interface shown in the image. The two files requiring your attention are .env and docker-compose.yml. I strongly recommend reviewing both of these files thoroughly before proceeding.

The _APP_CONSOLE_WHITELIST_ROOT configuration in the .env file deserves special consideration. As documented by Appwrite, this setting controls whether new users can register through the Appwrite console. With this option active, only a single user can complete the registration form, and any additional users must be invited to the project. The default state keeps this feature enabled.
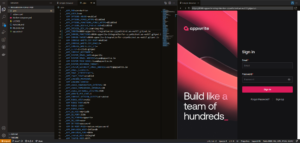
Failing to configure this properly means your service remains accessible to others, consuming your server resources unnecessarily. For guidance on the remaining environment variables, consult the official Appwrite documentation on environment settings. We'll set those aside for now and work through the initial setup steps.
Following the registration process, my details are stored in the database, providing me access to the Appwrite instance running on my dedicated server.

The first organizational step involves creating an organization, which might represent your company name or another unique identifier. Each organization carries both a name and an ID — while the name can be modified later, the ID remains permanent. If you omit a custom ID, Appwrite generates one automatically.
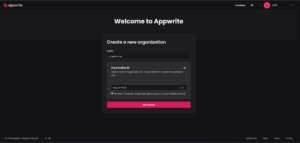
Within organizations, you'll work with projects. Creating a project is the next step, and this corresponds to the actual application you're building. Projects follow the same naming conventions as organizations, with editable names and immutable IDs.
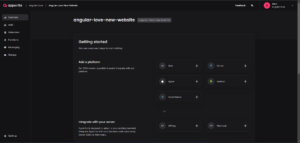
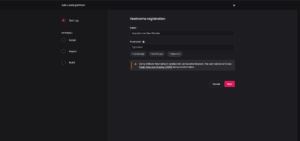
This section particularly interests me. Given that Angular targets web applications, we select Web from the Add a platform area, which takes us to the configuration page.
Here you'll specify the Name and Hostname for your Angular app. Since I'm operating on shared hosting, that's the hostname I've defined. Should you have a dedicated domain available, such as angular.love, enter that address instead.
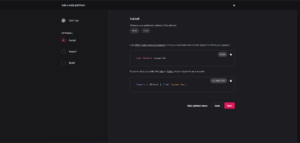
Appwrite provides an official client library to simplify integration. The package installs through NPM and offers straightforward usage. While a CDN variant exists, it isn't the recommended approach.
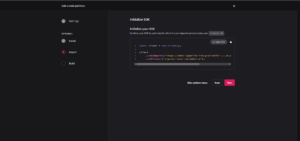
With the NPM package installed in your Angular project, the final configuration step connects the package to your Appwrite server. The following setup accomplishes this.
At this stage, we have a capable backend with numerous features that's also relatively simple to learn. However, the real work involves applying these tools together with Angular, which we'll demonstrate shortly.
Second Phase: Connecting Angular to Appwrite
With your Appwrite server confirmed operational, the next step is connecting it to your Angular app. This particular session covers user authentication, walking you through the complete process with explanations of the relevant code and UI elements for implementation.
Appwrite offers file storage, notifications, messaging, its own database solution, server-side scripting, and numerous other capabilities. This guide concentrates specifically on authentication. The remaining features are covered in Appwrite's documentation or upcoming tutorials in this series.
Here's the layout of the Angular application we're building. When you encounter difficulties, return to this overview to identify the specific file that requires modification.
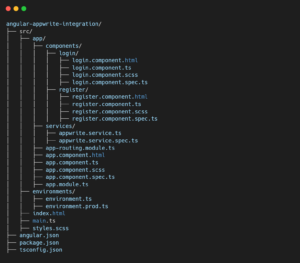
The foundation of any Angular project starts with creating a new project scaffold.

Although Appwrite is already configured on our server, the Angular SDK still needs to be added. Fetch the Appwrite package via NPM at this point.

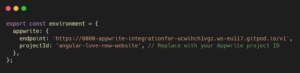
To expose the appropriate endpoints from my personal server, I define the required addresses in the environment files.
The following command generates the environment files I use.

My configuration appears as follows. Thanks to Angular 17's newer syntax, services are now provided via the 'providedIn' property instead of relying on the older module-based approach.
Though not required, I find creating a dedicated service beneficial. This keeps the codebase organized and centralizes the Appwrite method calls for easy access.
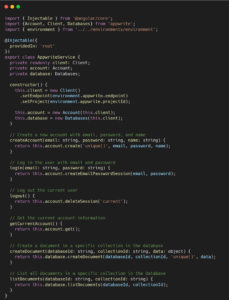
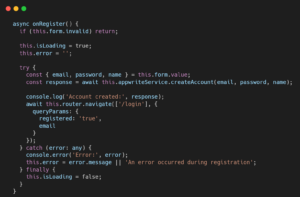
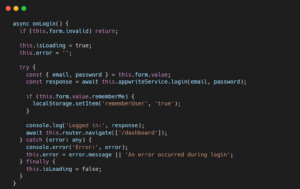
At present, only createAccount and login are in active use. The remaining entries serve demonstration purposes, and this list isn't exhaustive. These two methods are brought into the RegisterComponent and LoginComponent components accordingly.
Advantages of Angular with Appwrite
- Simplifies backend infrastructure
- Accelerates the development cycle
- Reduces expenses for startups and smaller teams
- Delivers reliable and scalable infrastructure
- Maintains adaptability through composable features
Common Pitfalls and Recommended Approaches
This section examines typical obstacles developers encounter when working with Appwrite and outlines practical strategies for overcoming them. The following compilation pairs frequent issues with corresponding solutions to help you handle these situations effectively.
Handling traffic spikes and scalability
-
- Employing a content delivery network (CDN) such as Cloudflare
- Utilizing caching mechanisms for frequently accessed data
- Implementing data preloading techniques
- Applying lazy-loading strategies within Angular
Protecting data from external threats
-
- Employing TLS for secure information transmission
- Mitigating DDoS attacks through CDN usage and Appwrite's internal configurations
- Regularly rotating database credentials
- Disabling inactive network ports
- Enforcing authorization rules throughout every layer of the system
Working with extensive datasets
-
- Leveraging Appwrite's built-in search optimization capabilities
- Applying well-designed caching strategies for data retrieval
- Taking advantage of database indexing features
- Implementing Angular's virtual scrolling for rendering large collections
Handling user administration and permissions
-
- Configuring collection-level access controls within each database
- Establishing permissions for individual functions
- Utilizing Appwrite's integrated antivirus protection and assigning appropriate permissions to storage buckets
- Exercising caution when generating private keys and assigning them the minimal necessary privileges
- Storing sensitive information—such as third-party API tokens—within environment variables
Overcoming authentication complexity
-
- Appwrite ships with nearly all essential authentication mechanisms out of the box. This makes implementing user authentication and management remarkably straightforward.
- For projects requiring a bespoke or intricate login workflow, Appwrite's custom token authentication feature proves invaluable.
- Poorly managed session handling can result in users receiving a 401 error from Appwrite following a successful login. This indicates that an existing active session is preventing the creation of a new one.
- Enabling TLS is mandatory. Without it, certain browser-side resources will fail to load, and the authentication flow will encounter errors.
Managing user profiles and data updates
-
- There are no restrictions on modifying user details, and you can adjust any field at any time. This flexibility is particularly advantageous if you have developed your own administration interface, although the default Appwrite dashboard remains available—though it is not recommended for long-term daily use.
- For executing complex queries across your dataset, it is advisable to query the database directly. Behind the scenes, Appwrite relies on MariaDB to handle data storage, while Redis plays a vital role in supporting operations like task queuing and caching.
Addressing limited data analytics capabilities
-
- Appwrite's native dashboard offers a wealth of information for reviewing your project's status, including the following metrics:
-
-
- Database summary — the total count of databases along with comprehensive details for each
- Collection overview — the total count of collections and detailed information for each
- User statistics — the total number of registered users and how many are currently online
- System performance — the volume of incoming requests and overall bandwidth consumption
-
- Debugging underlying system problems requires familiarity with Docker and Docker Compose. You should anticipate needing to use the command line interface to resolve complex issues. Sometimes a straightforward reset may suffice, but at other times you will need to examine the logs more thoroughly. I encountered this firsthand when my domain's TLS certificate was not being issued; after inspecting the logs, I discovered that Let's Encrypt was responding with a Too many requests error.
Navigating service updates and maintenance
-
- Working with a self-hosted solution affords you complete oversight, making upgrades more manageable because you know exactly which components require changes and what the outcomes and trade-offs will be. This is not the case with platforms like Appwrite that you do not control, where modifications carry greater risk. Before making any alterations, ensure you have a system backup in place—ideally a full backup of the entire operating environment.
- Data migration presents another substantial hurdle. Appwrite's own migration utility frequently fails, and even when it succeeds, it can cause significant side effects. For instance, timestamps indicating when records were created or modified may be reset. Additionally, functions, collections, or buckets may be imported incompletely or incorrectly, which is a recurring problem. The recommended workaround is to perform manual backups. By creating a manual backup of Appwrite through Docker, you can mitigate many of these difficulties.
- The Functions feature within Appwrite allows you to build highly customized functionality for your system. The availability of multiple programming languages and the straightforward implementation process are major advantages. However, altering Appwrite's core code directly is extremely challenging. There are two general strategies for addressing this:
-
- Create your own fork of the Appwrite repository and modify it (not advised)
- Raise a request with the Appwrite community, though this requires waiting for a response.
Challenges with building and consuming custom APIs
-
- To illustrate, consider this scenario. Appwrite natively supports one-time password (OTP) authentication, where an SMS message is delivered to a user's phone, they submit the code, and authentication then proceeds to register the user. However, at the time of this writing, there is no built-in mechanism for delivering the code via a voice call. Modifying Appwrite's core to add this feature would be extremely difficult. The recommended approach is to utilize Appwrite's Functions capability, specifically the custom token login feature discussed earlier.
- A notable benefit of Appwrite is the ability to invoke your functions without relying on the official Appwrite SDK. This is achieved by assigning a unique subdomain to each function and configuring its access controls. Once set up, you can trigger the function using a standard HTTP request.
Considering the learning curve associated with backend services
-
- Adopting any new technology requires an investment in learning. While Appwrite is not difficult to grasp, becoming proficient takes time, which translates into financial costs for organizations. This expense encompasses not only training your team but also refactoring a considerable amount of existing code. Based on your organization's specific circumstances and team composition, you will need to weigh whether the transition is worthwhile.
- Straightforward projects do not demand elaborate solutions. If your goal is to build a simple or moderately complex website without intricate business logic, it is unlikely that you will encounter the majority of the issues discussed in this article.
Final Thoughts
Building a backendless application using Angular and Appwrite proves to be a simpler process that also delivers impressive performance and growth potential. By combining Appwrite's suite of services with Angular's component-based architecture, developers are able to create efficient and well-organized web applications in a shorter timeframe.
For a complete breakdown of the integration process between Angular and Appwrite, including all the relevant source code and methodology, refer to the project repository: AngularAppwriteIntegration.
This repository provides a fully self-contained application demonstrating how to rapidly configure an Appwrite backend for an Angular project. All the code is available for you to examine, adapt, and enhance.