Not long ago, I got the chance to build a small app from scratch. Since I was the sole developer on a volunteer project, I had full control over the tech stack. A key objective was leveraging the new signals while keeping the benefits of RxJS. This write-up covers a slice of that work, specifically some patterns I used along the way.
Why focus on pagination, you may wonder? Because it's a perfect case study for blending signals with observables, letting each shine where it's strongest. Plus, I couldn't find any existing tutorial that covers these exact technologies together. 😅
The Stack 🛠
Firebase 🔥
Firebase was my pick because it covers everything I need: authentication, file storage, and a real-time database. It removes much of the backend burden, making development much smoother.
NgRx SignalStore 🚦
Deciding on the state management was tough, as I lean toward avoiding third-party dependencies unless necessary. After weighing several libraries through articles and small experiments, I settled on SignalStore because it checked all the boxes. Another option was signalsSlice, but while it's more lightweight, it doesn't offer the same level of functionality as SignalStore.
Getting Started 🚀
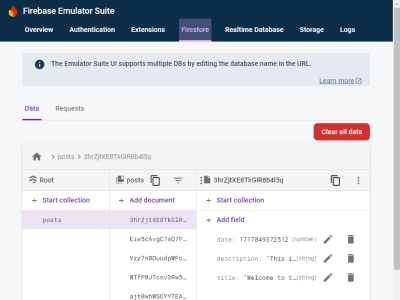
It's not mandatory, but if you'd like to follow along closer, you can clone this repository with the working example and use it as a reference throughout. It comes configured with Firebase emulators that have sample data, plus setup notes in the README, so you can't say I didn't ease your way. 😊
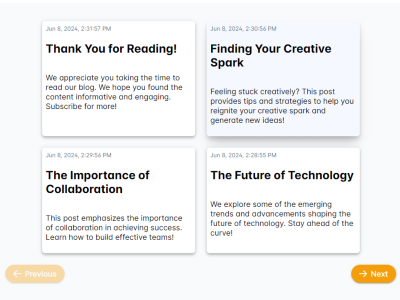
If everything is set up correctly, you'll see this:
Putting It Together 🧑💻
The aim here isn't a line-by-line tutorial, which would drag on. Instead, I'll highlight the essential pieces and the choices that brought the most value. For deeper detail, the repository is always open.
The Post and PostsListConfig Interfaces 📝
Let's examine the Post and PostsListConfig interfaces:
export interface Post {
  id: string;
  title: string;
  description: string;
  date: number;
}

export interface PostsListConfig {
  limit: number;
  page: number;
  pageLastElements: Map<number, Post>;
}
The Post interface is a basic object with a handful of fields, nothing complex.
The PostsListConfig interface is more intriguing since it deals with pagination configuration. Here's what each property means:
limit: The number of posts to show per page.page: The current page number being viewed.pageLastElements: A map that keeps the last post for each page, which aids in efficient paging. We'll return to this topic shortly.
The PostsService Class 🔧
Now, let's inspect the PostsService class.
  @Injectable({
    providedIn: 'root',
  })
  export class PostsService {
    private readonly PATH = 'posts';
    private readonly firestore = inject(Firestore);
    private readonly collection = collection(this.firestore, this.PATH).withConverter(assignTypes<Post>());

    getPosts$(config: PostsListConfig): Observable<Post[]> {
      const { limit: qLimit, page, pageLastElements } = config;
      const conditions: QueryConstraint[] = [orderBy('date', 'desc'), limit(qLimit)];

      let postCollection;
      if (page === 1) {
       const { date } = pageLastElements.get(page - 1)!;
      conditions.push(startAfter(date));
        postCollection = query(this.collection, orderBy('date', 'desc'), limit(qLimit));
      } else {
        const { date } = pageLastElements.get(page - 1)!;
        postCollection = query(this.collection, orderBy('date', 'desc'), limit(qLimit), startAfter(date));
      }
      return collectionData(postCollection, { idField: 'id' });
    }
  }
This service retrieves data from Firestore; I'm using AngularFire to streamline the Firebase interactions.
There are two possible scenarios:
Scenario 1: Loading the first page
query(this.collection, orderBy('date', 'desc'), limit(qLimit))
For the first page, no special handling is needed. The query sorts posts by date, newest first, and limits the results to the defined qLimit. This is the most straightforward case.
Scenario 2: Loading a subsequent page
query(this.collection, orderBy('date', 'desc'), limit(qLimit), startAfter(date))
Here's where it gets more complex. Firestore lacks numerical offsets, so pagination relies on query cursors. This means using startAt and startAfter, both needing a reference to a document. The distinction is:
startAt: Fetches results greater than or equal to the reference point.startAfter: Fetches results greater than the reference point.
Likewise, endAt and endBefore can establish the boundary for the query results.
To allow moving both forward and backward through pages, we rely on the pageLastElements map to retain the final document of each page. With that reference, we can traverse in either direction. One key detail: in this example, orderBy is fixed, but if sorting changes dynamically, you'd pass the sort field into the startAfter method as well.
The PostsStore 📦
Let's dive into the most compelling part: the PostsStore, which handles our app's state. As noted, we'll rely on SignalStore from the ngrx/store library. First, let's understand its data model.
  export type StatusType = 'loaded' | 'loading' | 'success' | 'error';

  export interface Posts {
    entities: Post[];
    entitiesCount: number;
  }

  export interface PostListState {
    listConfig: PostsListConfig;
    posts: Posts
    status: StatusType;
  }

  export const postListInitialState: PostListState = {
    listConfig: {
      page: 1,
      limit: 4,
      pageLastElements: new Map<number, Post>(),
    },
    posts: {
      entities: [],
      entitiesCount: 0,
    },
    status: 'loading',
  };
As shown above, the PostListState interface outlines our store's shape. It includes the listConfig (which we know), the posts, and a status. The posts field contains both the list of posts and their total count, while status reflects the current state—useful for toggling loaders or error and success indicators.
The initial state, postListInitialState, provides a sensible starting point for the list configuration.
With the state defined, let's look at the PostsStore itself:
  export const PostsListStore = signalStore(
    { providedIn: 'root' },
    withState<PostListState>(postListInitialState),
    withComputed(store => ({
      paginator: computed(() => ({
        show: store.listConfig.page() > 1 || store.posts.entitiesCount() === store.listConfig.limit(),
        hasPreviousPage: store.listConfig.page() > 1,
        hasNextPage: store.posts.entitiesCount() === store.listConfig.limit(),
      })),
    })),
    withMethods((store, service = inject(PostsService)) => ({
      loadPosts: rxMethod<PostsListConfig>(
        pipe(
          tap(() => patchState(store, { status: 'loading' })),
          switchMap(listConfig =>
            service.getPosts$(listConfig).pipe(
              tapResponse({
                next: (entities: Post[]) => {
                  const newListConfig = listConfig.pageLastElements.set(listConfig.page, entities[entities.length - 1]);
                  patchState(store, {
                    posts: { entitiesCount: entities.length, entities },
                    listConfig: {
                      ...listConfig,
                      pageLastElements: newListConfig,
                    },
                    status: 'success',
                  });
                },
                error: () => {
                  patchState(store, { ...postListInitialState }, { status: 'error' });
                },
              })
            )
          )
        )
      ),
    }))
  );
It might seem complex, but it breaks down neatly.
- The
withStatefeature injects state properties into theSignalStore, taking the initial state as its argument. withComputedallows the addition of derived, computed properties.withMethodsis for adding store methods.
Our withState usage is straightforward, so we'll skip the details. Let's focus on withComputed:
We employ withComputed to decide whether the paginator should be visible, depending on the current page and entity count. This way, the navigation controls only render when there's actually something to page through, as we'll see shortly.
For withMethods, we use rxMethod to define a function called loadPosts. It takes a PostsListConfig and returns an Observable that fetches items based on that configuration.
Look closely at the tapResponse to spot the key logic. We update the pageLastElements map and then commit changes via patchState. Meanwhile, the status is toggled: first to loading, then to success or error, matching the request's outcome.
The PostsComponent 💻
Time for the fun part: connecting the store to the view. A big plus of SignalStore is its ease of use—just inject it and you're set. You can access state signals like posts or trigger actions like loadPosts. Additionally, the computed function lets you build derived values that react to store changes; here, we have $isLoading.
  export class PostsListComponent {
    readonly listStore = inject(PostsListStore);

    $posts = this.listStore.posts.entities;
    $isLoading = computed(() => this.listStore.status() === 'loading');
    $listConfig = this.listStore.listConfig;

    constructor() {
      this.listStore.loadPosts(this.$listConfig());
    }

    goToNextPage() {
      this.listStore.loadPosts({ ...this.$listConfig(), page: this.$listConfig.page() + 1 });
      window.scroll({ top: 0, left: 0, behavior: 'smooth' });
    }

    goToPrevPage() {
      this.listStore.loadPosts({ ...this.$listConfig(), page: this.$listConfig.page() - 1 });
      window.scroll({ top: 0, left: 0, behavior: 'smooth' });
    }
  }
  <div class="w-full pt-6">
    <div class="flex justify-content-center grid grid-cols-4 gap-4 mb-4">
      @if (!$isLoading()) {
        @for (post of $posts().values(); track post.id) {
          <post-card
            class="w-full max-w-20rem"
            [$post]="post" />
        }
        <paginator
          class="w-full"
          (onNextClicked)="goToNextPage()"
          (onPrevClicked)="goToPrevPage()"
          [$paginator]="listStore.paginator()" />
      } @else {
        <post-card-skeleton [$quantity]="listStore.listConfig.limit()" />
      }
    </div>
  </div>
The PaginatorComponent 💻
To close out, let's examine the PaginatorComponent, as promised. It relies on signal inputs and outputs to show or hide the paginator and to wire up the previous and next page controls. The component's logic is refreshingly clear and minimal.
  @if ($paginator().show) {
    <div class="flex justify-content-between">
      <p-button
        icon="pi pi-arrow-left"
        label="Previous"
        [disabled]="!$paginator().hasPreviousPage"
        [rounded]="true"
        (onClick)="onPrevClicked.emit()"
        [raised]="true"></p-button>

      <p-button
        icon="pi pi-arrow-right"
        label="Next"
        [disabled]="!$paginator().hasNextPage"
        [rounded]="true"
        [raised]="true"
        (onClick)="onNextClicked.emit()"></p-button>
    </div>
  }
  export class PaginatorComponent {
    $paginator = input.required<PaginatorConfig>();
    onNextClicked = output<void>();
    onPrevClicked = output<void>();
  }
The Demo 🎨
If you haven't cloned the repository, you can check the demo below.
Notice that because of the rxMethod, the loaded posts stay synced with Firebase, so updates appear instantly.
In case you haven't pulled the repo, here's the demo:
Keep in mind that due to the rxMethod, the displayed posts are continuously linked to the Firebase database, so you can observe changes live.
Final demo
Thanks for reading! I hope this guide assists you with Firebase pagination down the road and, equally important, deepens your comfort with Signals.
And please remember, you can always check the repository to see the code and try the demo for yourself.