
Selecting an i18n library – is the Angular team's solution the right pick?
When you start researching internationalization libraries, the first option you'll encounter is @angular/localize, developed by the Angular team itself. A natural question arises: why consider third-party alternatives when there's an official solution backed by the framework's creators?
However, @angular/localize wasn't always available. In the early days of Angular, the community had to build their own i18n tools. Looking at the current landscape, the official library takes a fundamentally different approach from the rest of the ecosystem. Today, internationalization libraries fall into two distinct categories: those that operate at compile time and those that work at runtime.
Compile-time libraries
As of this writing, @angular/localize is the only compile-time option. It processes translations during the build phase, producing a separate bundle for each supported language. Each language version gets hosted at its own URL, such as domain.com/en for English and domain.com/es for Spanish.
Benefits:
- Faster application rendering since translations are already embedded
- No additional weight added to the bundle
- Angular CLI provides text extraction from the application
- Multiple translation file formats are supported
- Long-term support is practically guaranteed since it's maintained by the Angular team
- No need to master key naming conventions or grouping strategies — translations are handled directly
Drawbacks:
- Switching languages requires a full application reload. This is the most significant limitation, particularly if keeping users engaged matters to you.
- Integrating with Ionic or Electron environments is challenging, and you'll find very limited documentation or community examples for these setups.
- Once the application is built, translations cannot be altered. Correcting a typo or updating content means rebuilding the entire application.
- Initial configuration is more involved compared to runtime libraries
Runtime libraries
Runtime libraries perform translation while the application is executing. Translation files are retrieved on demand through HTTP requests.
Benefits:
- Language switching happens without refreshing the page, preserving the user's focus even on slow connections
- Plenty of tutorials available for using runtime libraries with Electron and Ionic
- You can connect an external service to manage translations, which reduces the development team's overhead. Updates and fixes can be applied after deployment (we'll dig into this later)
- The developer experience is generally excellent
Drawbacks:
- Translating at runtime adds a performance penalty. While memoization helps mitigate this, it's still something to keep in mind.
- Additional HTTP requests are needed to fetch translation files. You can offset this with caching after the initial load, or by code-splitting translations per module.
- The bundle size grows larger
- There's no built-in mechanism to change the
LOCALE_IDinjection token once the application is running - A single failure in loading translation files can halt the entire application process
- Building a solid, scalable runtime implementation demands more expertise than working with
@angular/localize
Three runtime libraries are currently prominent in the Angular ecosystem:
- Angular-i18next (~10k downloads) — an Angular wrapper around the i18next library. It hasn't reached the same level of adoption as in React or Vue communities.
- @ngx-translate/core (~720k downloads) — the most widely used runtime translation library. For a while, its future was uncertain due to the author stepping away, but it recently received its first update in over a year.
- @ngneat/transloco (~90k downloads) — positioned as the successor to ngx-translate. In my view, it's the strongest runtime option available for Angular right now, offering excellent DX, thorough documentation, and a rich plugin ecosystem.
Is @angular/localize always the right choice?
As you can see, no solution comes without compromises. The download numbers reflect this balance: @angular/localize sees roughly 740,000 weekly downloads, while the three runtime libraries combined account for around 820,000.
So, should you go with the Angular team's offering? It's certainly worth serious consideration. @angular/localize is a solid, performance-oriented solution that handles not just translation but full internationalization. We'll clarify the distinction between translation and internationalization later in this piece.
That said, your choice should ultimately be guided by your application's requirements and business goals. It's also wise to consider the long-term complications that runtime libraries can introduce — issues that surface only after extended use. Problems like inconsistent data formats, slower load times, and limitations with the LOCALE_ID token are just a few examples. We'll explore these in more depth shortly.
Building a basic app with Transloco
In my experience, working with runtime translations demands a deeper understanding of general i18n practices. To showcase those patterns, I'll use @ngneat/transloco — the worthy successor to ngx-translate — rather than the well-established @angular/localize. Let's jump straight into the code.
Start by creating a new project and adding Transloco with this command:
ng add @ngneat/transloco
During setup, you'll be prompted to pick language codes for the configuration and translation files. You can reference the ISO 639-1 codes list.
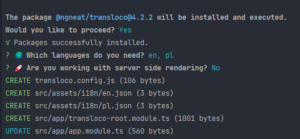
Let's examine what changed in our project. A new file, transloco-root.module.ts, was created in the app folder. It contains two key pieces:
- HttpLoader — the service responsible for loading translation files into the app. If you need to change where translations are stored or integrate an external translation management service, this is where you'd make those adjustments.
@Injectable({ providedIn: 'root' })
export class TranslocoHttpLoader implements TranslocoLoader {
  constructor(private http: HttpClient) {}

  getTranslation(lang: string) {
    return this.http.get<Translation>(`/assets/i18n/${lang}.json`);
  }
}
- TranslocoRootModule — holds the library's configuration. Here you define supported languages, the default language, and whether dynamic language switching is enabled. This module gets imported automatically into your main module.
@NgModule({
  exports: [TranslocoModule],
  providers: [
    {
      provide: TRANSLOCO_CONFIG,
      useValue: translocoConfig({
        availableLangs: ['en', 'pl'],
        defaultLang: 'en',
        // Remove this option if your application doesn't support changing language in runtime.
        reRenderOnLangChange: true,
        prodMode: !isDevMode(),
      }),
    },
    { provide: TRANSLOCO_LOADER, useClass: TranslocoHttpLoader },
  ],
})
export class TranslocoRootModule {}
Additionally, a
transloco.config.jsfile was added. This is where you specify the path to translation files, the list of supported languages, and any scoped libraries.
module.exports = {
  rootTranslationsPath: 'src/assets/i18n/',
  langs: ['en', 'pl'],
  keysManager: {}
};
The last addition is the assets/i18n folder, containing newly generated .json files for your translations.
Adding translations
Let's populate the files with some sample translations.
en.json
{
  "common": {
    "languages": {
      "en": "English",
      "pl": "Polish"
    }
  },
  "foodStorage": "Food Storage",
  "itemSelect": {
    "grapes": "? Grapes",
    "carrot": "? Carrots",
    "cookie": "? Cookies"
  },
  "item": {
    "code": "Code: {{code}}",
    "type": "Type: {code, select, grapes {Fruit} carrot {Veggie} other {Unknown}}",
    "amountInStock": "Amount in stock: {amount, plural, =0 {No items} one {One item} other {Many items (#)}}",
    "price": "Price: {{price}}"
  }
}
pl.json
{
  "common": {
    "languages": {
      "en": "Angielski",
      "pl": "Polski"
    }
  },
  "foodStorage": "Magazyn Jedzenia",
  "itemSelect": {
    "grapes": "? Winogrona",
    "carrot": "? Marchewki",
    "cookie": "? Ciasteczka"
  },
  "item": {
    "code": "Kod: {{code}}",
    "type": "Typ: {code, select, grapes {Owoc} carrot {Warzywo} other {Nieznany}}",
    "amountInStock": "Ilość w magazynie: {amount, plural, =0 {Brak przedmiotów} one {Jeden przedmiot} other {Wiele przedmiotów (#)}}",
    "price": "Cena: {{price}}"
  }
}
You might have noticed several types of translations in these files:
- Text Translations — simple key-value pairs where the value is displayed as-is. In the example,
foodStoragefits this category. - Interpolable Translations — values that get inserted dynamically into the text, like in
item.code. - Pluralized Translations (select) — content that changes based on a string parameter, as seen in
item.type. - Pluralized Translations (amount) — similar to the above, but driven by a numeric parameter. Check out
item.amountInStock.
Translations can be nested in objects, and you reference them with dot notation, for instance: itemSelect.grapes.
Using translations in templates
Once your translations are ready, Transloco offers several ways to use them in templates:
- Attribute directive — the key goes into the
translocoattribute, with optional parameters passed via thetranslocoParamsinput.
<h1 transloco="itemCode" [translocoParams]="{code: 'grape'}"></h1>
<p transloco="languageName"></p>- Transloco Pipe — familiar to those who've used ngx-translate. Apply the pipe to a key and pass parameters as the first argument.
<h1>{{ "itemCode" | transloco: {code: 'grape'} }} </h1>
<p>{{ "languageName" | transloco }} </p>- Structural directive — my preferred approach and one I don't see in other runtime libraries. The
*translocodirective provides at-function for translating keys directly in the template. The library developers endorse this method for three reasons: it adheres to the DRY principle, it's highly efficient thanks to memoization, and it limits template subscriptions to just one.
<ng-container *transloco="let t">
  <h1>{{ t("itemCode", {code: 'grape'}) }}</h1>
  <p>{{ t("languageName") }}</p>
</ng-container>
Now that we're familiar with the various translation methods, let's build out a minimal application.
Creating a simple application
app.component.ts
@Component({
  selector: 'app-root',
  templateUrl: './app.component.html',
  styleUrls: ['./app.component.scss']
})
export class AppComponent {
  private readonly translocoService = inject(TranslocoService)


  getAvailableLangs() {
    return this.translocoService.getAvailableLangs()
      .map(lang => typeof lang === "string" ? lang : lang.id)
  }


  onLanguageChange(event: Event) {
    const newLanguage = (event.target as HTMLSelectElement).value;
    this.translocoService.setActiveLang(newLanguage)
  }
}
In app.component.ts, we inject TranslocoService and define a getAvailableLanguages method that returns the codes of all supported languages. We also set up an onLanguageChange handler to manage language switching.
App.component.html
<ng-container *transloco="let t">
  <select (change)="onLanguageChange($event)">
    <option *ngFor="let language of getAvailableLangs()" [value]="language">
      {{ t('common.languages.' + language) }}
    </option>
  </select>

  <h1>{{ t('foodStorage') }}</h1>
</ng-container>
For the language switcher, we add a select element populated with the app's languages. Changing its value triggers the onLanguageChange method.
After implementing these steps, language switching should work seamlessly, updating the text inside the h1 tag accordingly.
Let's pause and look at some handy methods from TranslocoService. For more, check the official documentation.
- getAvailableLangs() — returns the list of supported language codes
- getActiveLang() — gives you the currently active language
- setActiveLang() — switches to a new language
- translate(key, params) — synchronously translates the given key
- selectTranslate(key, params) — provides an observable that emits the translation whenever the active language changes, suitable for reactive templates.
To give you more context, let's use TranslocoService again — this time to update the page title based on the selected language, leveraging the takeUntilDestroyed() operator introduced in Angular 16.
@Component({
  // …
})
export class AppComponent {
  private readonly translocoService = inject(TranslocoService);

  constructor() {
    this.translocoService
      .selectTranslate('foodStorage')
      .pipe(takeUntilDestroyed())
      .subscribe((title) => this.titleService.setTitle(title));
  }
  // …
}
Choosing meaningful identifiers for translations
Over time, countless strategies and conventions have emerged for naming translation keys. In this segment, I will walk you through several of these approaches and discuss their strengths and weaknesses.
The "literal" approach
This strategy assigns keys that mirror the original text itself. Its primary appeal lies in its clarity and straightforwardness, which significantly lowers the chance of creating redundant keys later on.
For example:
"selectLanguage": "Select Language"When crafting keys for longer content like descriptions or paragraphs, it's wise to look at the overall context. The chosen key ought to be concise yet sufficiently descriptive to encapsulate the entire text. Appending a suffix such as "description" can also prove beneficial.
For instance:
internationalizationBenefitsDescription: "Internationalizing your application results in improved market reach, cultural inclusivity, user satisfaction, and increased opportunities for your brand."
The main drawback of this method surfaces when dealing with terms that have multiple interpretations. Take the word "lie," for example, which could denote either "fabricating a story" or "reclining flat." In such scenarios, opting for a key that leaves no room for ambiguity is advisable.
For example:
“lieAsLay”: “lie”
“lieAsTellUntruth”: “lie”
Incorporating punctuation or special characters in keys can often introduce errors. To sidestep potential complications down the line, it's best to leave them out entirely.
Can’t -> cant
Shouldn’t -> shouldnt
It’s -> its
The grouping strategy
A different tactic involves organizing keys according to their corresponding views or screens. This method shines particularly when dealing with distinct modules of your application. A key benefit here is its isolated nature — because keys are tied to specific views, you can tweak their translations without affecting other parts of the app, a guarantee that the literal method doesn't offer.
For example:
“paymentDialog”: {
  “rulesAgreement”: “I agree to the rules…”,
  “proceed”: “Proceed”
},
“cookieDialog”: {
  “rulesAgreement”: “I agree to the rules…”,
  “accept”: “Accept”
}
(Note: dot notation, such as paymentDialog.proceed, is used to access these nested keys)
This setup also offers the added perk of enabling on-demand loading of translation files alongside their respective modules. By isolating a translation set into its own file and doing a bit of setup, you can shave off significant initial load time for the application.
Let's now turn our attention to typical errors and recurring issues that come with using grouped translations.
A frequent pitfall is giving subkeys overly generic labels like description, paragraph, or button. Using such names presumes that your view will consistently feature only one of each element. As the UI grows and additional elements with their own translations are introduced, figuring out which key corresponds to which component becomes a real headache. Fortunately, adopting the literal naming style can easily bypass this issue.
For example:
confirmDialog: {
  button -> saveButton
  secondButton -> discardButton
}
Over-nesting is another trap often encountered with this methodology. A sound guideline is to avoid going deeper than three levels of nesting — beyond that point, your keys start to lose readability.
Over time, you may observe that certain translations are repeated across different groups. To address this, you can establish a dedicated common or generic section within your primary translation file to house all those shared, recurring terms.
Additional recommendations
- Never attempt to piece together translations by concatenation — doing so is a recipe for trouble sooner or later. Instead of joining separate pieces like
t("save") + t("changes"), you should simply define a fresh key:t("saveChanges"). - Be cautious when injecting translations via
innerHTML, as this pattern can open the door to XSS security vulnerabilities.