Why Your IDE File Tree Is a Mess
Developers spend a large portion of their workday inside an IDE. A clean, organized interface can make a huge difference in how quickly you can navigate your codebase. Yet, tools like Nx generate a pile of configuration and boilerplate files that end up cluttering the file explorer, making it harder—especially for newcomers—to locate the files that actually matter.
If you're not familiar with Nx yet, I recommend checking out Luca's article that covers this powerful tool in detail.
By the end of this guide, you'll know how to hide those generated files and free up roughly 30% of your explorer's vertical space. The before-and-after effect is visible in the screenshot below. Both VS Code and WebStorm users will find the steps relevant.

Cleaning Up the Explorer with File Nesting
The trick is to use a feature called File Nesting, which collapses secondary files underneath a main file. We'll apply it to group Nx's boilerplate files under project.json, the central configuration file for every Nx library. As a result, the file tree will look far less intimidating and much simpler to scan.
Setting Up File Nesting in VS Code
To get started with VS Code, follow these steps:
1. Open User Settings (JSON):
- Hit
Ctrl + Shift + P(orCmd + Shift + Pon macOS) to open the Command Palette. - Search for
Preferences: Open Settings (JSON)and select it.
2. Add File-Nesting Configuration: Append the snippet below to your settings.json file:
{
  "explorer.fileNesting.enabled": true,
  "explorer.fileNesting.expand": false,
  "explorer.fileNesting.patterns": {
    "*.ts": "${capture}.js",
    "*.js": "${capture}.js.map, ${capture}.min.js, ${capture}.d.ts",
    "*.jsx": "${capture}.js",
    "*.tsx": "${capture}.ts",
    "tsconfig.json": "tsconfig.*.json",
    "package.json": "package-lock.json, yarn.lock, pnpm-lock.yaml, bun.lockb",
    "project.json": "*.md, *.ts, *.json, *.js"
  }
}
This setup activates file nesting for common file types—.ts, .js, .jsx, and .tsx. The important part is the project.json section, which groups all .md, .ts, .json, and .js files under it.
Once the configuration is in place, refresh the explorer view, and all those generated files should be neatly tucked under project.json, as shown in the screenshot at the top of the article.
Setting Up File Nesting in WebStorm
WebStorm users are not left out—the IDE offers a similar feature, though it requires a bit more manual configuration compared to VS Code.
Here's how to set it up in WebStorm:
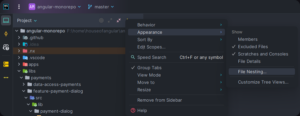
1. Open the File Nesting Rules Dialog
- Go to the
Projecttool window (the file explorer). - Click the kebab menu (three vertical dots).
- Select
Appearance > File Nesting.
2. Add a New File Nesting Rule
- Click the plus icon to create a new rule.
- For
Parent File Suffix, enterproject.json. - For
Child File Suffix, use the value provided below. You may want to extend it with any additional files you'd like to hide.
.eslintrc.json; .stylelintrc.json; README.md; eslint.config.js; jest.config.ts; package.json; tsconfig.json; tsconfig.lib.json; tsconfig.spec.json
3. Save Your Changes by Clicking OK
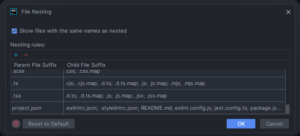
After applying the rule and refreshing the explorer, the boilerplate files should be collapsed under project.json, just like in the VS Code setup. If the changes don't take effect immediately, restarting WebStorm might help.
Keep in mind that WebStorm only applies nesting rules to files that share the same base name. That means you'll need to list each boilerplate file explicitly—unlike VS Code, there's no support for regex patterns here.
For a deeper dive into WebStorm's file nesting, check out the official JetBrains documentation: https://www.jetbrains.com/help/idea/file-nesting-dialog.html
Wrapping Up
This small tweak can make a noticeable difference in your day-to-day workflow by cutting down on visual noise and reducing the time spent scrolling through the explorer. It's a simple customization that has worked well for me, and I hope it brings you the same clarity. Since this post is a bit outside the usual Angular-focused topics here at angular.love, I'd be curious to hear your take—share your thoughts in the comments and let me know if there are other IDE tips you'd like to see covered next.