Lately, I've been experimenting with a handful of Angular features that don't get as much attention as they probably should: effect, afterRenderEffect, afterNextRender, afterEveryRender, and Renderer2. While effect() is relatively well-known, the others remain somewhat obscure in typical Angular codebases.
I decided to write this down because I kept confusing these APIs with each other; this post is as much a personal reference as it is a guide for anyone else. I'll walk through each one, provide examples, highlight the differences, and also check how they fare in server-side rendering (SSR) scenarios.
The effect function
The effect() schedules a callback that runs once initially, then re-runs whenever any of its tracked signal dependencies change. A quick aside — I covered the diamond problem in RxJS and why it doesn’t occur with signals in my Senior Angular Interview Questions list. In short, if an effect depends on multiple signals and you update them sequentially, the effect will still run only once. This is because signals are synchronous, unlike Observables which are asynchronous and can trigger multiple re-executions with side effects.
effect is perfect for bridging a reactive signal state with non-reactive, imperative code. The most common examples are updating the DOM manually, logging, or firing off a fetch() request. Less frequent scenarios include writing to local storage, sending analytics events, refreshing chart data, or toggling a loading indicator.
// state of the used theme
readonly theme = signal<'light' | 'dark'>('light');

// track what page we are on
readonly currentPage = signal('home');

// data to render a chart
readonly chartData = signal([1, 2, 3]);

// loading state of the app
readonly loading = signal(false);

constructor() {
  effect(() => {
	// change theme & save it
    document.body.dataset.theme = this.theme();
    localStorage.setItem('theme', this.theme());
  });

  effect(() => {
	// sends data to a 3rd party
    analytics.trackPage(this.currentPage());
  });

  effect(() => {
	// updates values in the chart
    updateChart(this.chartData());
  });

  effect(() => {
    // dependency to listen to
    const chartData = this.chartData();

    untracked(() => {
	    this.loading.set(true);
    })
  })
}
When working with SSR, effect() requires caution. It also runs on the server at least once (even if dependencies are undefined), and subsequently, every time a dependency changes. Even an effect with no dependencies executes: effect(() => console.log('Empty effect'));
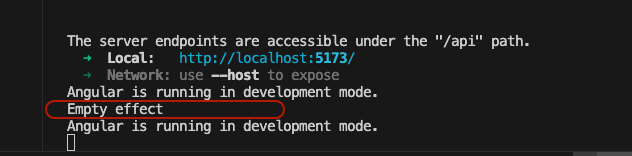
On the server, there's no browser environment—no window, document, or localStorage. Adding any DOM access or browser-specific calls directly into an effect will cause an error during server rendering. The solution is to restrict server-side effects to Node-safe operations. Anything tied to the DOM should be guarded with something like isPlatformBrowser or moved into afterRenderEffect, which only executes in the browser after Angular has completed the initial paint.
Another key point is the cleanup mechanism—EffectCleanupRegisterFn. Just as you unsubscribe from RxJS streams, effect() provides a way to clean up resources when the effect is destroyed. This proves invaluable for wiring up event listeners, timers, or external libraries that demand explicit teardown.
This cleanup function is the first argument provided to the effect() callback. While there's no strict naming convention—any variable name works—it's commonly called onCleanup(). Invoking it within your effect ensures you don't accidentally leak memory or leave orphaned listeners when a component is destroyed. It's easy to overlook, but it can prevent serious performance problems in larger applications.
@Component({
  selector: 'app-resize-listener',
  template: `
    <p>Window width: {{ width() }}</p>
  `
})
export class ResizeListenerComponent {
  // reactive signal that stores the current width
  readonly width = signal(window.innerWidth);

  constructor() {
    effect((onCleanup) => {
      const updateWidth = () => this.width.set(window.innerWidth);
      window.addEventListener('resize', updateWidth);

      // cleanup when effect is destroyed
      onCleanup(() => {
        window.removeEventListener('resize', updateWidth);
      });
    });
  }
}
The afterRenderEffect function
For operations like changing the DOM, using browser APIs, or integrating with libraries that are meaningless on the server (e.g., drawing on canvas, rendering charts, or querying element dimensions), afterRenderEffect is the more suitable choice. It runs after the browser has finished rendering the current view. Looking back at earlier examples, updating a chart's data is better aligned with afterRenderEffect since it constitutes a direct DOM update.
The official documentation strongly advises defining an explicit phase for this function, warning that neglecting to do so can lead to "significant performance degradation."
Consider a practical scenario: displaying a PDF to a user and tracking how far they scroll, expressed as a percentage. One solution among many is to follow this pattern:
@Component({
  selector: 'app-root',
  template: `
    <div #divTop style="height: 20px; position: sticky; top: 0"></div>

    <div #divRef style="height: 400px; overflow: scroll">
      <!-- this is the PDF -->
      <div style="height: 3000px; background: red"></div>
    </div>
  `,
})
export class App {
  readonly divRef = viewChild<ElementRef<HTMLDivElement>>('divRef');
  readonly divTop = viewChild<ElementRef<HTMLDivElement>>('divTop');

  readonly scrollPercentage = toSignal(
    toObservable(this.divRef).pipe(
      filter((el) => !!el),
      switchMap((el) =>
        fromEvent(el.nativeElement, 'scroll').pipe(
          map(() => {
            const scrollHeight = divRef.nativeElement.scrollHeight ?? 1;
		    const clientHeight = divRef.nativeElement.clientHeight ?? 1;
		    const scrollTop = divRef.nativeElement.scrollTop ?? 0;

		    const scrolled = Math.round(
		        (scrollTop / (scrollHeight - clientHeight)) * 100
		    );

		    return scrolled;
          })
        )
      )
    ),
    { initialValue: 0 }
  );

  constructor() {
    afterRenderEffect({
      // creating dependency on the scroll signal
      earlyRead: () => this.scrollPercentage(),
      // write to DOM every time scrollPercentage emits
      write: (val, cleanUp) => {
        const divTop = this.divTop();
        if (!divTop) {
          return;
        }

        divTop.nativeElement.innerText = `Scroll: ${val()}%`;
      },
    });
  }
}
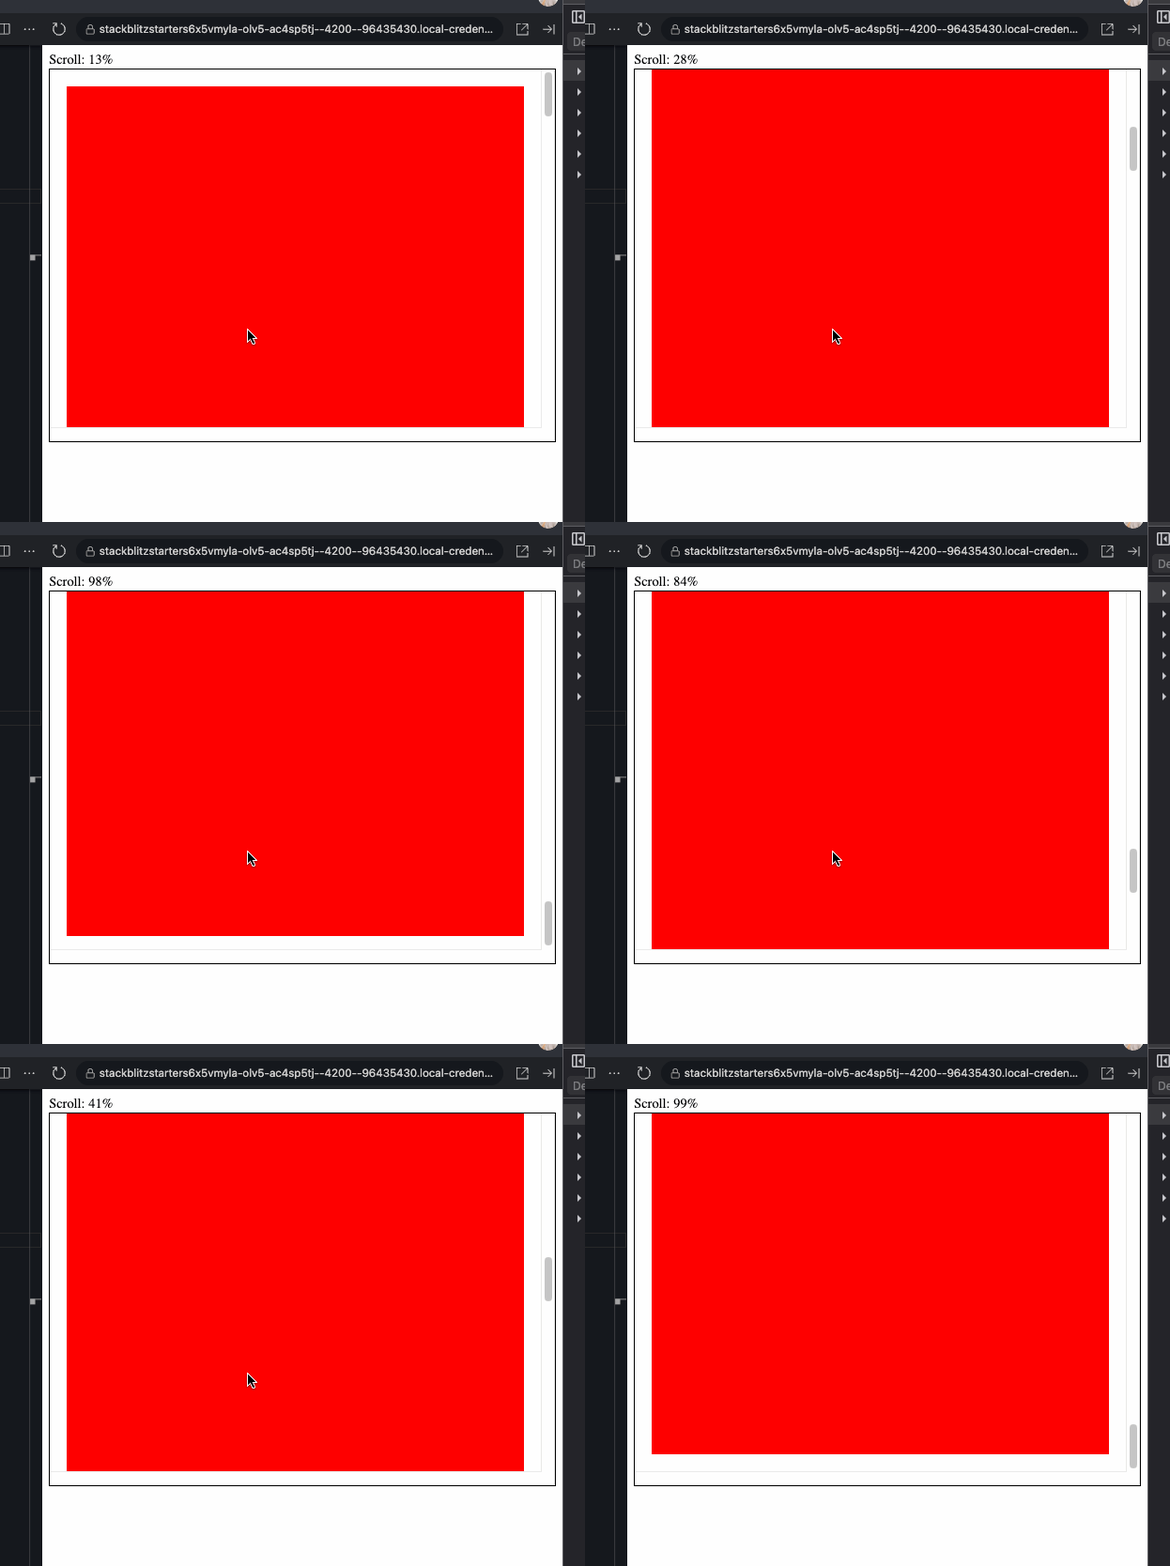
In this example, afterRenderEffect fires after the browser paints the DOM. It uses the earlyRead callback to declare a dependency on the scrollPercentage signal. Whenever scrollPercentage updates—as you scroll—the write phase is invoked to alter the DOM.
This exact behavior can be replicated without afterRenderEffect by simply interpolating the scrollPercentage signal in the HTML template ({{ scrollPercentage() }}).
The afterRenderEffect API also discusses the read phase and its variability, so what distinguishes them?
- Opt for
earlyReadif you need to inspect the DOM before anywriteoperations happen. Angular executes theearlyReadphase first, allowing you to capture measurements (like width and height) before the DOM is changed, and pass this data to the subsequentwritephase. - Use
readafter all style and layout changes from thewritephase have been applied. This is ideal for reading accurate measurements following UI updates, however, you cannot pass values fromreadback into thewritephase. OnlyearlyReadpermits data transfer to thewriteoperation.
There is also the mixedReadWrite phase. This one allows both reading and writing to the DOM within the same callback. Angular, however, advises against using it, preferring the separate phases. The execution order is:
earlyReadwritemixedReadWriteread.
I also came across a valuable resource: a YouTube video by Code Shots With Profanis titled Get to Know the AfterRenderEffect hook in Angular. His explanation is worth a look.
From what I understand, in a client-only rendering setup, if you ignore the phases in afterRenderEffect, it behaves like a regular effect. My previous scroll example could be simplified to the following:
  constructor() {
    // example 1
	afterRenderEffect(() => {
	  const val = this.scrollPercentage();
	  const divTop = this.divTop();

	  divTop.nativeElement.innerText = `Scroll: ${val}%`;
	});

	// example 2
    effect(() => {
      const val = this.scrollPercentage();
      const divTop = this.divTop();

      divTop.nativeElement.innerText = `Scroll: ${val}%`;
    });
  }
NOTE: But bypassing the rendering phases means you're risking layout thrashing. This occurs when the browser is repeatedly forced to recalculate the layout because your code reads and writes to the DOM in an uncoordinated sequence, creating a feedback loop. By grouping all reads in the
earlyReadphase and all writes in thewritephase, Angular ensures that DOM reads happen before any writes. This coordination prevents these problematic loops.
Using afterNextRender and afterEveryRender
The documentation explains that these functions allow you to "register a render callback to be invoked after Angular has finished rendering all components on the page into the DOM." Here's the core concept:
afterNextRenderexecutes just once, following the initial render of the view.afterEveryRenderexecutes after every render cycle, acting like a subscription to the rendering process.
If you're looking for analogies among the traditional lifecycle hooks, afterNextRender mirrors ngAfterViewInit most closely, while afterEveryRender resembles ngAfterViewChecked because it runs anytime a tick() detects something dirty. A key difference is that afterNextRender and afterEveryRender run exclusively on the client; lifecycle hooks, conversely, are also triggered during server-side rendering.
Another distinction lies in their scope. The lifecycle hooks are per-component, whereas the render callbacks apply to the entire application as rendered on the page. The Angular team provides a helpful diagram illustrating the execution sequence.
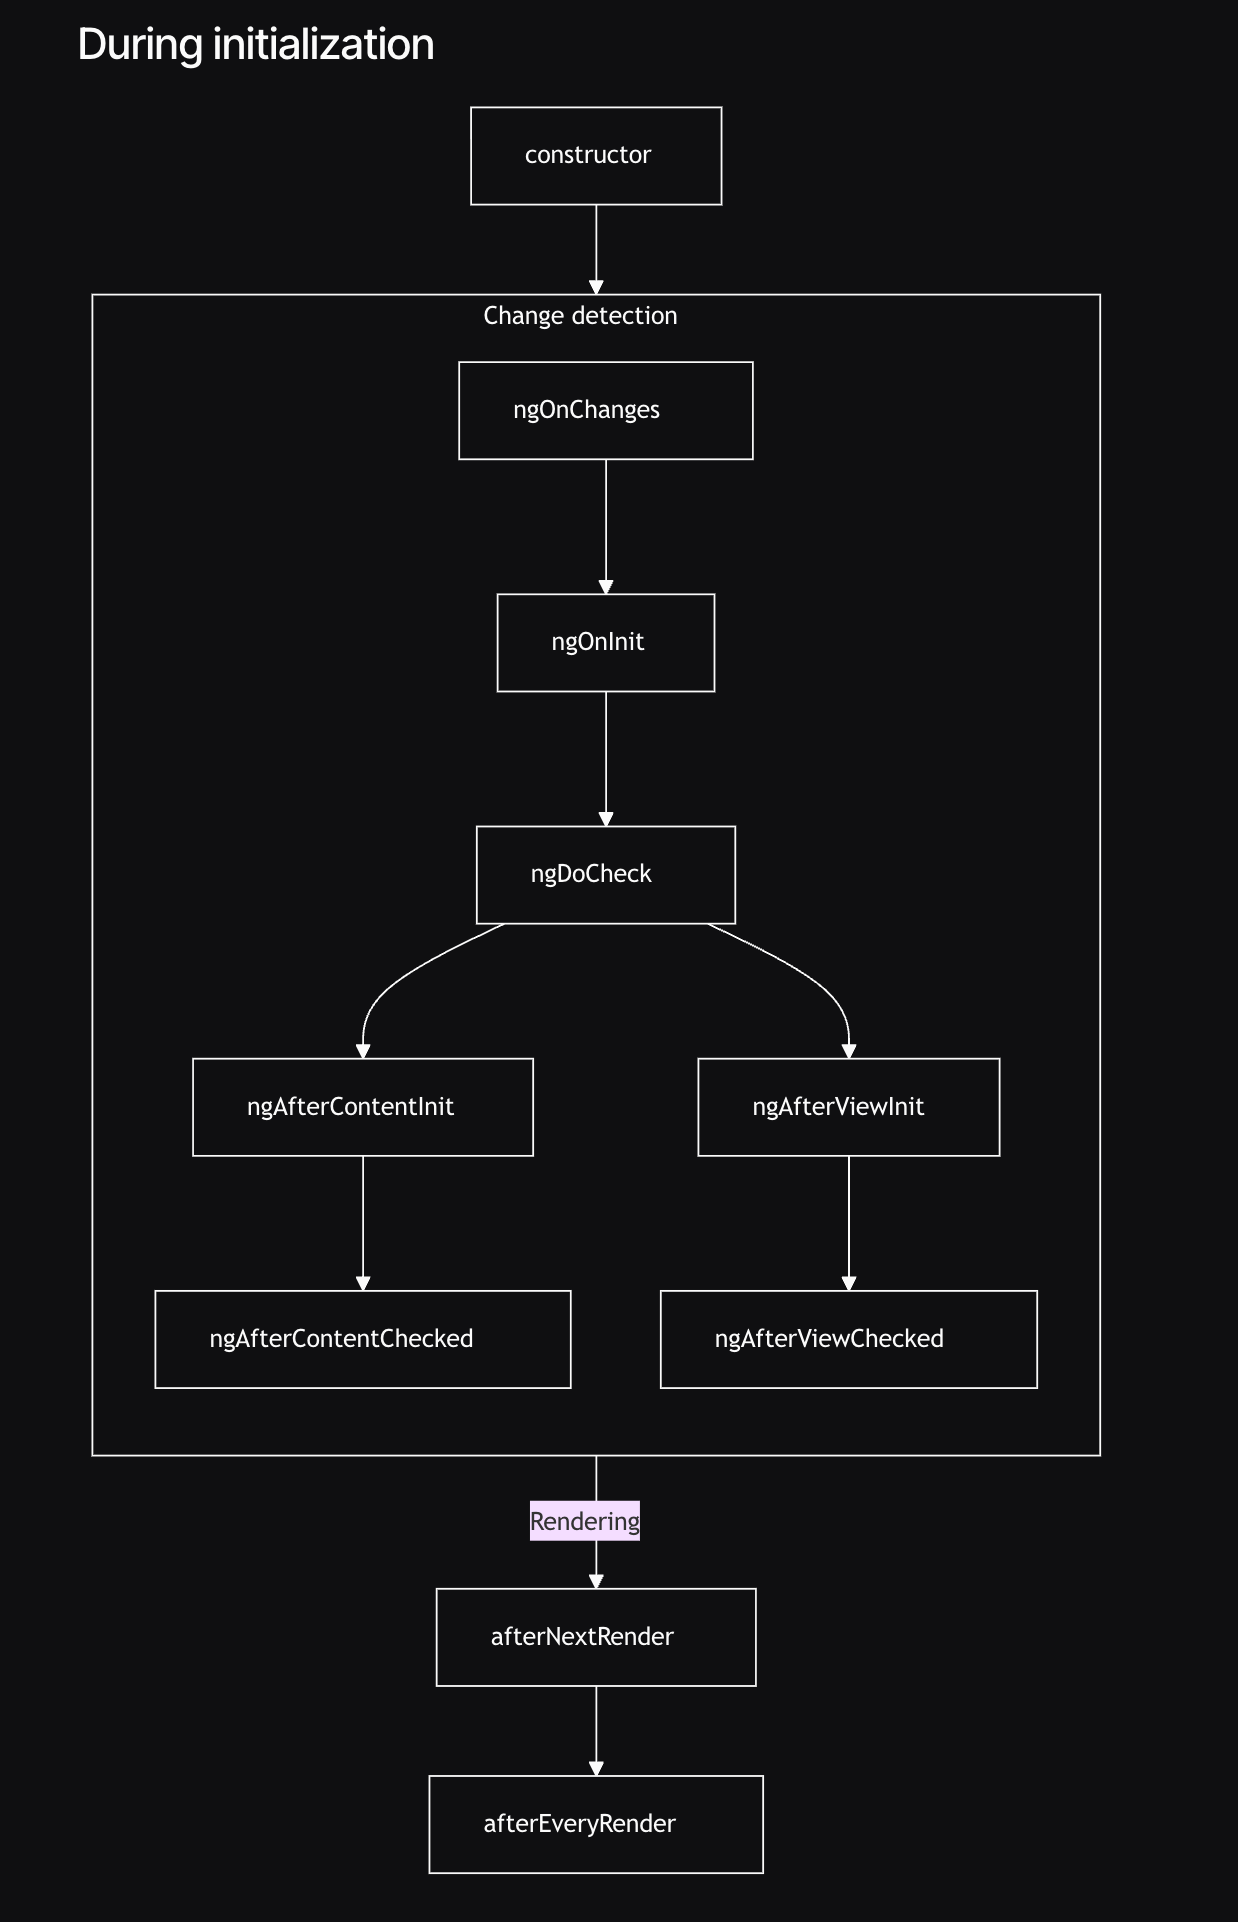
Grasping afterNextRender is straightforward—it fires only once after the DOM is painted. You could relocate logic from ngOnInit, as afterNextRender is invoked from within the constructor. Use it to set up charts, which require the DOM to be ready, or to move focus to an empty input field:
@Component({
  selector: 'app-root',
  template: `
     <input #input placeholder="first" value="Test1" />
     <input #input placeholder="second" />
     <input #input placeholder="third" />
  `,
})
export class App {
  readonly inputs = viewChildren<ElementRef<HTMLInputElement>>('input');

  constructor() {
    afterNextRender(() => {
      const inputs = this.inputs();
      const firstEmpty = inputs.find((d) => d.nativeElement.value == '');

	  // this will focus on the 'second' input
      firstEmpty?.nativeElement?.focus();
    });
  }
}

As for afterEveryRender, at least to me, it's suited for less frequent situations. A pertinent question is: when do you need to run code after every rendering cycle? One example is the onStable method of ZoneJS, which fires after each change detection pass. As our apps move toward being zoneless, you could replicate onStable's behavior by placing its logic inside an afterEveryRender callback; the result would be the same. The code and GIF below demonstrate this.
@Component({
  selector: 'app-resize-listener',
  standalone: true,
  template: `
    <button (click)="onClick1()">Empty Button</button>
    <button (click)="onClick2()">Text Button</button>

    <p>Text: {{ text() }}</p>
  `,
})
export class ResizeListenerComponent {
  private readonly ngZone = inject(NgZone);

  readonly text = signal('');

  constructor() {
    this.ngZone.onStable
      .asObservable()
      .subscribe((e) => console.log('ZoneJs - triggered'));

    afterEveryRender(() => {
      console.log('afterEveryRender - triggered');
    });
  }

  onClick1() {}

  onClick2() {
    this.text.update((prev) => `${prev}K`);
  }
}
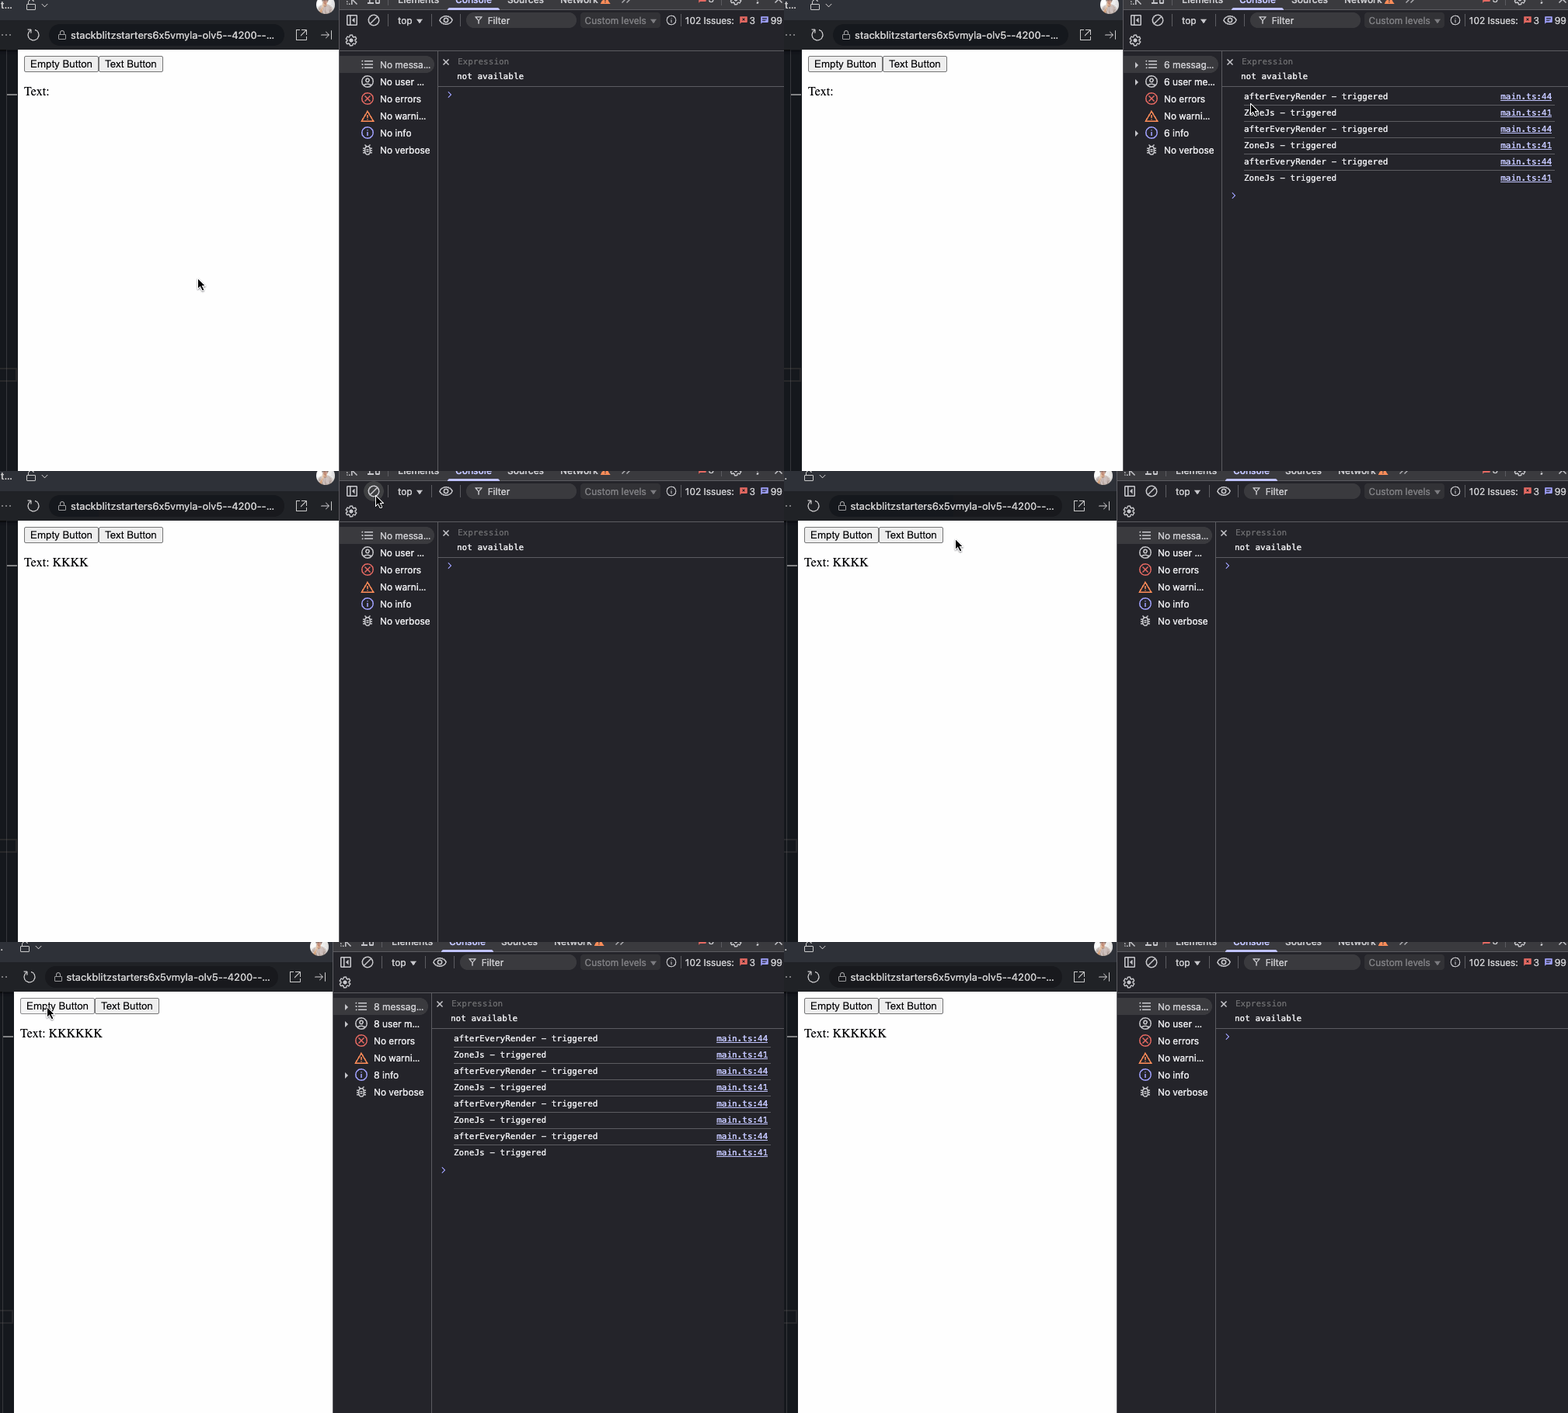
In fact, I could rewrite my earlier scroll example, which relied on Observables, to use afterEveryRender instead, and it would function the same:
@Component({
  selector: 'app-root',
  template: `
    <div #divTop style="height: 20px; position: sticky; top: 0"></div>

    <div #divRef style="height: 400px; overflow: scroll;">
      <div style="height: 3000px; background: red"></div>
    </div>
  `,
})
export class App {
  readonly divTop = viewChild<ElementRef<HTMLDivElement>>('divTop');
  readonly divRef = viewChild<ElementRef<HTMLDivElement>>('divRef');

  constructor() {
    afterEveryRender({
      earlyRead: () => ({
        divRef: this.divRef(),
        divTop: this.divTop(),
      }),
      write: (elements) => {
        const { divRef, divTop } = elements;
        if (!divTop || !divRef) {
          return;
        }

		const scrollHeight = divRef.nativeElement.scrollHeight ?? 1;
        const clientHeight = divRef.nativeElement.clientHeight ?? 1;
        const scrollTop = divRef.nativeElement.scrollTop ?? 0;

        const scrolled = Math.round(
          (scrollTop / (scrollHeight - clientHeight)) * 100
        );

        divTop.nativeElement.innerText = `Scroll: ${scrolled}%`;
      },
    });
  }
}
A question I was pondering is whether to prefer afterEveryRender or reach for Renderer2 to set up event listeners. The scroll percentage example could be modified to use Renderer2 like this:
@Component({
  selector: 'app-scroll-tracker',
  standalone: true,
  template: `
    <p>Scroll: {{ scrollPercent() }}%</p>

    <div #divRef style="height: 200px; overflow-y: scroll;">
      <div style="height: 1000px; background: lightblue"></div>
    </div>
  `,
})
export class ScrollTrackerComponent {
  private readonly renderer = inject(Renderer2);
  private readonly destroyRef = inject(DestroyRef);

  readonly divRef = viewChild<ElementRef<HTMLDivElement>>('divRef');
  readonly scrollPercent = signal(0);

  // reference to the listener to destroy it with the component
  private removeListener?: () => void;

  constructor() {
    afterNextRender({
      earlyRead: () => this.divRef()?.nativeElement,
      write: (box) => {
        if (!box) {
          return;
        }

        this.removeListener = this.renderer.listen(box, 'scroll', () => {
          const percent = Math.round(
            (box.scrollTop / (box.scrollHeight - box.clientHeight)) * 100
          );
          this.scrollPercent.set(percent);
        });
      },
    });

    // destroy listener with the component
    this.destroyRef.onDestroy(() => {
      this.removeListener?.();
    });
  }
}
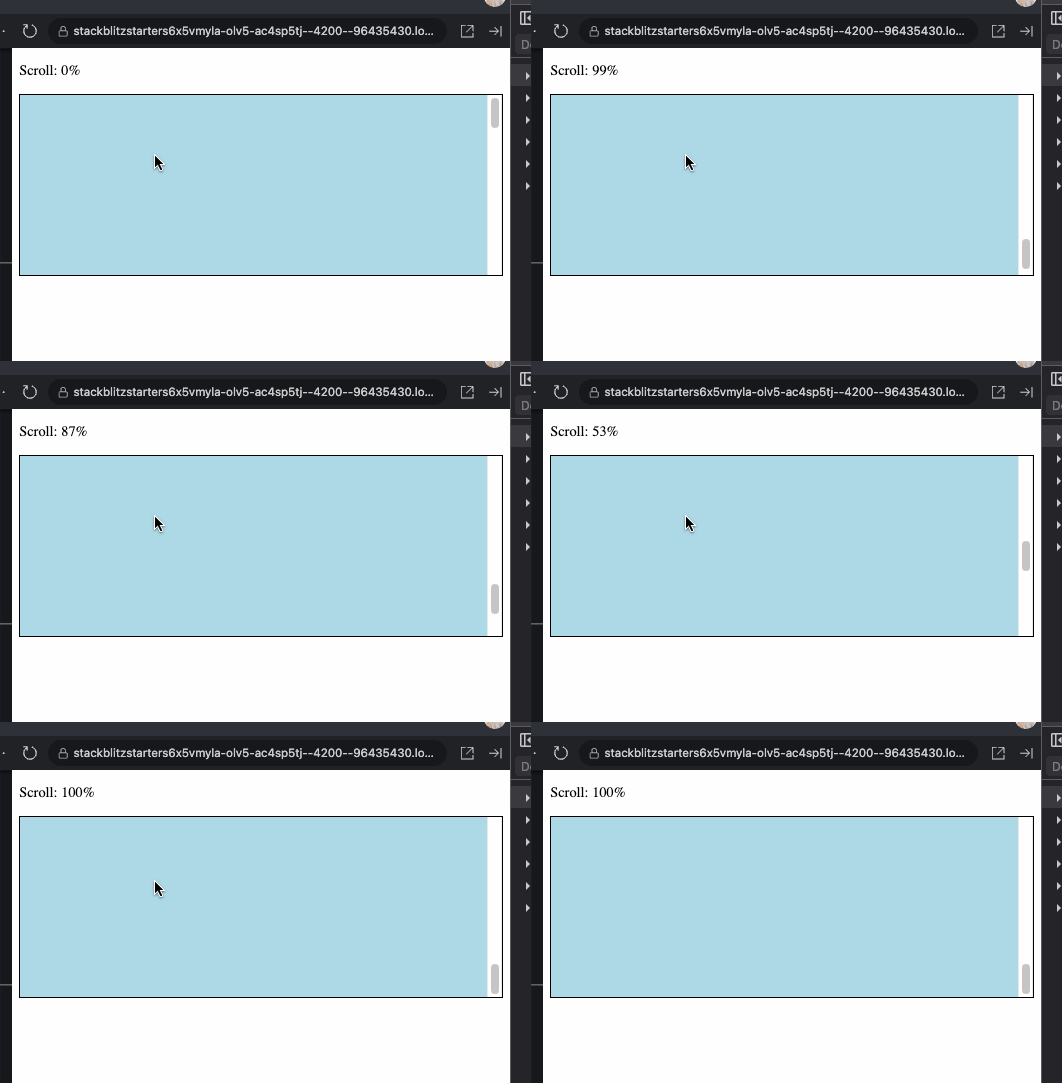
It appears there's usually more than one solution to a problem. As far as I can tell, the core distinction is:
Renderer2is meant for attaching listeners or executing direct DOM manipulations.afterEveryRenderis for running a callback once the DOM painting finishes.
For the scroll tracker, the Renderer2 approach is more fitting since we're dealing with an event-driven behavior (listening to scroll events). However, if the goal were to scroll to the bottom whenever new content appears on screen, afterEveryRender would be the better tool to call upon.
Wrap-up
In summary, these tools aren't competitors; they address different use cases. If your logic is purely reactive, stick with effect. If it's dependent on the DOM, reach for afterRenderEffect. For that single moment after the first render, use afterNextRender. For recurring operations tied to every render cycle, afterEveryRender is your friend. And Renderer2 stands as a versatile option for attaching listeners and manipulating the DOM without crashing the app during SSR.
I hope this piece clarifies these often-confused APIs, at least a little. They certainly created some confusion for me, which is why I decided to study them and share my understanding. Feel free to leave your thoughts. Check out more of my content on dev.to, or connect with me on LinkedIn, or visit my Personal Website.