Schematics: What Are They?
Schematics function as code generators that operate on descriptive instructions. Essentially, you provide a set of blueprints detailing your requirements, and the system produces the necessary artifacts—be it source code, configuration files, or templates.
When Should You Use Schematics?
By leveraging Schematics, you can streamline numerous repetitive tasks across your projects or within an organization. This approach empowers you to standardize structures and embed coding standards directly into your workflow.
The payoff is increased efficiency and a significant reduction in manual configuration work, particularly during initial setup phases.
Comprehensive documentation becomes less critical, as the processes are encoded and repeatable.
For library authors, this means automating the integration process for users. This convenience makes your library more appealing, sparing developers from time-consuming installation and configuration steps.
To summarize, Schematics facilitate:
- consistent project scaffolding
- enforcement of architectural patterns
- standardized code quality practices
- consistent naming conventions
- reusable component logic
- workflow automation
Key Benefits of Schematics
As code and artifact generators, Schematics enable you to scaffold and configure new projects—or individual components—in a predictable, automated fashion. The primary benefits are:
- they are modular and composable
- they are reliable and sequentially executed
- they are inherently run in a verification mode
Modular and Composable
Schematics are packaged into collections and can be linked together or run in sequence. Each transformation is applied as an indivisible unit of work.
Reliable and Sequentially Executed
Because of their atomic nature and synchronous execution, Schematics are dependable. They run in a strict order, making error identification straightforward.
Inherent Verification Mode
When launched via the Schematics CLI, they operate in a dry-run mode. This means that, unless you explicitly specify otherwise, no actual file system changes are made.
Essential Terminology
Understanding Schematics requires familiarity with its core concepts and API. Before we move to hands-on examples, let's clarify the key terms you'll encounter regularly.
The Source Tree (the /files Directory)
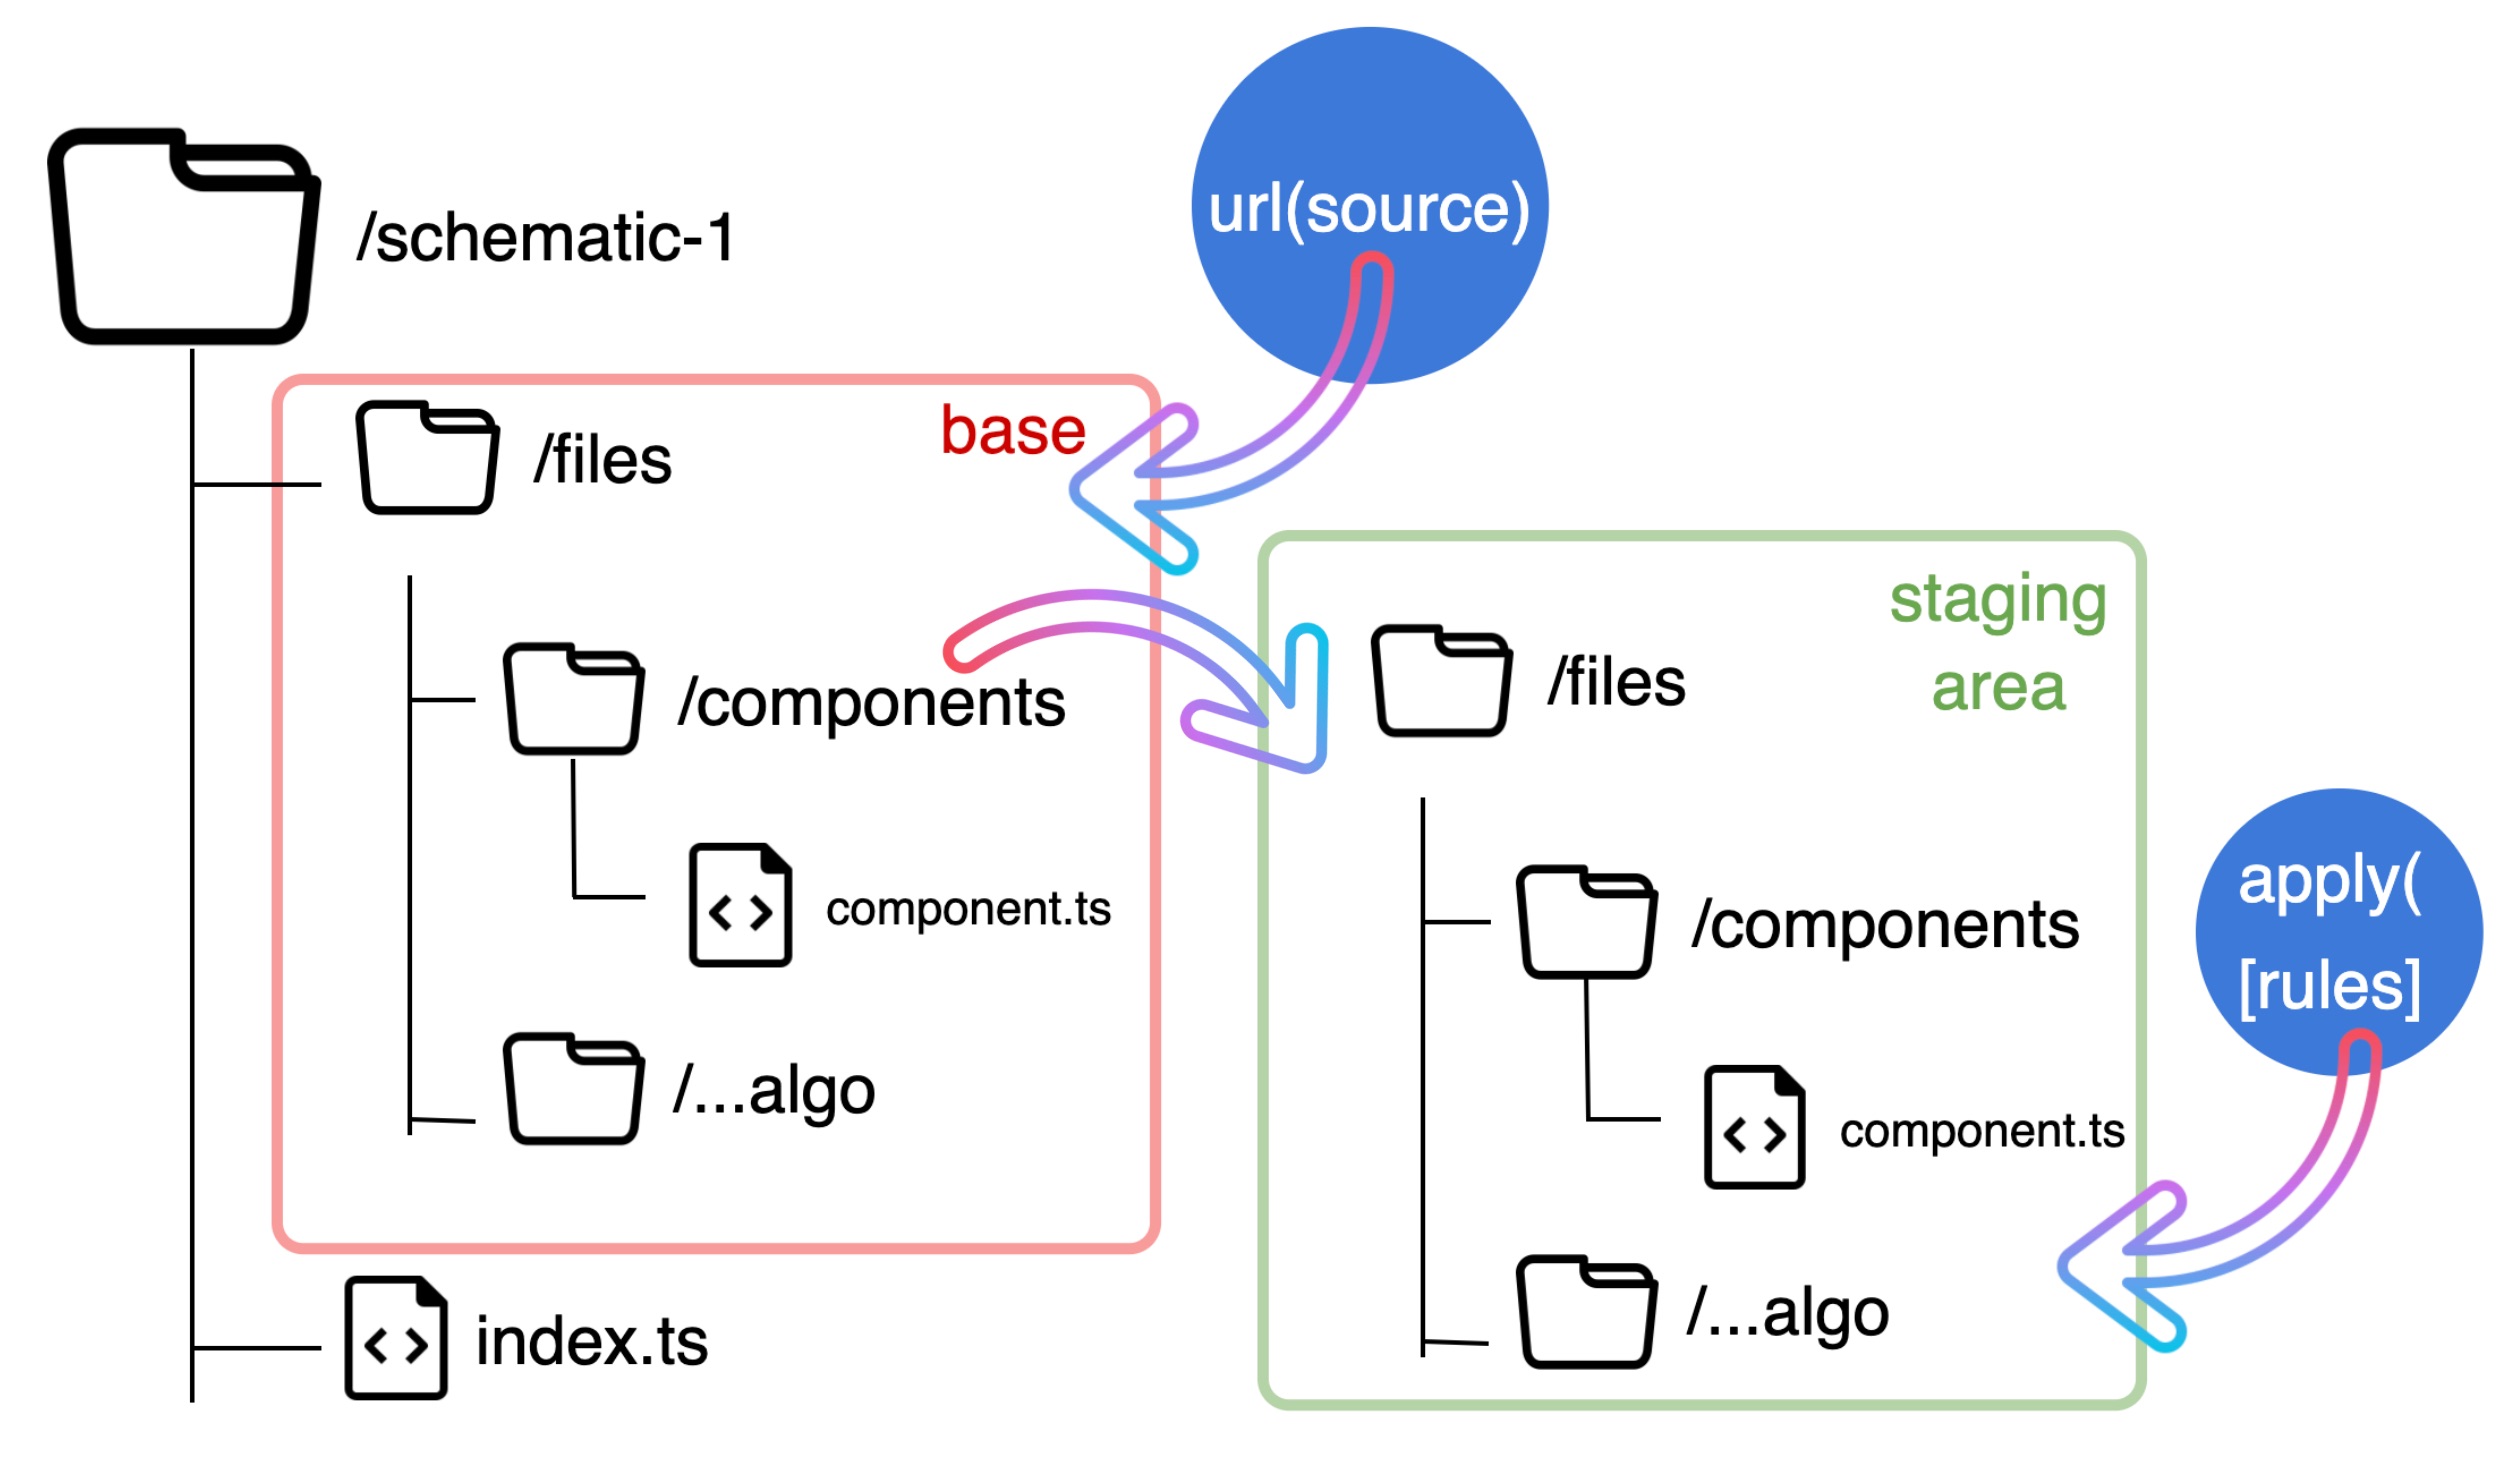
The tree, or source, represents a VIRTUAL snapshot of your project. It consists of a base layer (the actual files present at the start) and a staging area where your intended modifications are collected, along with necessary metadata.
To have your schematic generate new files, you place a /files directory at the schematic's root. The contents here should perfectly mirror what you want to be created on the target system.
We refer to this directory as files because the typescript compiler ignores it by default, so its contents are never transpiled. If you choose a different name, you'd have to configure your tsconfig.json to exclude it manually.
Rule
A Rule is a function that receives a tree, applies a series of transformations, and then returns the modified tree. Alternatively, you can use Observables, returning an Observable of a Tree.
index.ts
This file acts as the schematic's entry point and serves as a Rule factory. Located at the root of your schematic, it always returns a Rule.
It executes within a specific context, which supplies essential metadata and tools, like logging capabilities.
SchematicContext
This object encapsulates the environment in which your schematic is being run, as mentioned above.
Action
An Action is the smallest possible unit of change that can be applied to the tree.
collection.json
This file holds definitions for one or multiple schematics. It contains declarations for each schematic, including its description, the path to its factory (the entry point), and the path to its validation schema if one exists. It also lists any aliases for the schematic.
Aliases
Aliases provide an alternative name that can be used to invoke a schematic from the CLI.
A schematic can have none, one, or multiple aliases.
The configuration format looks like this: "aliases": ["alias"]
schema.json
This is the validation schema for a schematic, defining its properties and expected inputs. It's technically optional but strongly recommended!
Options
These are parameters you can pass to a schematic during execution, such as --name.
Prompts
Prompts enable interaction between your schematic and the user through the CLI and are defined within schema.json.
Understanding the Virtual Tree
The virtual tree provides an abstract representation of the target project's file system. It comprises the base (existing files), a staging area for applied modifications, and context-derived metadata.
A Crucial Concept
A fundamental point to grasp is that transformations don't act directly on the base files. Instead, they are staged and applied to the staging area first.
Think of it like git. Changes you make are not permanent until you commit them. Furthermore, they don't impact the remote repository until you push and merge.
In schematics, the process is analogous:
Understanding Actions
Every transformation you apply to a tree is, at its core, a series of atomic actions.
There are four primary types of actions: CreateFileAction, DeleteFileAction, OverwriteFileAction, and RenameFileAction.
To see exactly how these are implemented, you can examine the source code in your local environment by looking at node_modules/@angular-devkit/schematics/src/tree/action.js.
That concludes the theoretical overview. We'll explore the API in more detail in the next segment!