ng new MatTypeaheadLibrary -p mat-ta
This will generate a fresh Angular v6 workspace. One notable difference in this release is the CLI configuration file: you'll now find angular.json rather than the old .angular-cli.json. The new file describes the workspace and supports multiple apps and projects. By default, the workspace contains two projects: MatTypeaheadLibrary and MatTypeaheadLibrary-e2e.
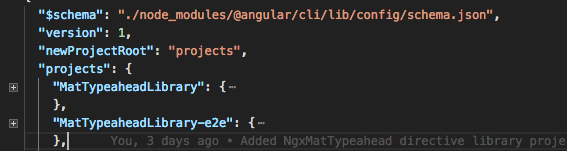
The screenshot of angular.json shows both generated project configurations collapsed.
Step 2: Add a library to the workspace
The library will be named NgxMatTypehead, following the usual naming pattern for Angular npm packages, with prefix NgxMat. If not specified, the prefix defaults to lib.
ng g library NgxMatTypeahead -p NgxMat
Further details on the command can be found here and here.
The ng g library command modified the workspace in several ways:
- It introduced a
projectsfolder at the root, containing angx-mat-typeaheadsubdirectory. This is the home for the library source code. - The
projectsobject inangular.jsonwas updated to include the newly created library.
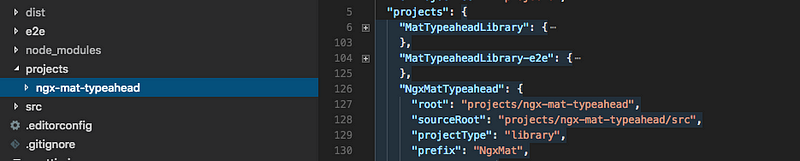
The angular.json file with NgxMatTypeahead listed under projects.
package.jsongained build-related dependencies such asng-packagr.- Under
projects/ngx-mat-typeahead, all necessary files for building, writing, and testing were created. TheREADME.md,CHANGELOG.mdandLICENSEfiles were added manually.
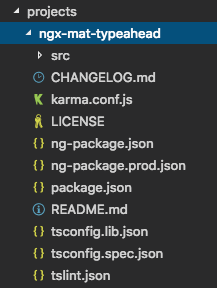
The file layout of the ngx-mat-typeahead directory.
- Last, the
tsconfig.jsonwas updated with apathsarray. This lets the library be imported using an absolute path, mimicking how one would import fromnode_modules.
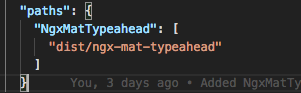
tsconfig.json showing the added paths.
Step 3: Implement the library
I'll skip the implementation details of the directive itself (it's straightforward) and focus on the files that were created or modified.
- The library's
srcfiles can be found underprojects/ngx-mat-typeahead/src/lib.
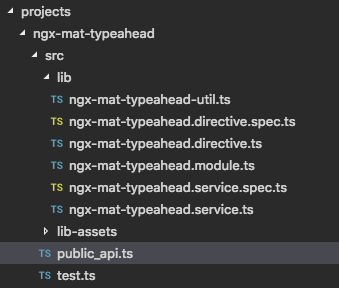
Files inside the lib directory.
- The core code resides in
ngx-mat-typeahead.directive.tsandngx-mat-typeahead.service.ts. Thengx-mat-typeahead.module.tsdefines the module. Their contents are available on GitHub. public_api.tsre-exports everything from thelibfolder.
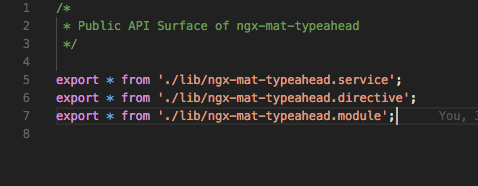
Contents of public_api.ts.
- Unit tests for the public methods were written in the corresponding
.specfiles using Karma and Jasmine, both preconfigured. Run the test suite withng test NgxMatTypeahead. - Those are all the changes needed to create the directive. Its selector is
NgxMatTypeahead.
Step 4: Build the library
Once the development is complete, the library must be built. With the recent Angular tooling, this is just one command. For a production-ready build, include the --prod flag:
ng build <library-name>
- I executed
ng build NgxMatTypeahead. This compiles the code and dependencies, and produces bundles that adhere to the Angular Package Format. The output is written to thedistfolder.
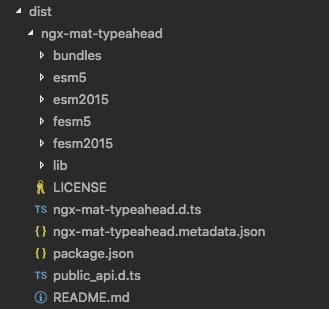
The dist directory containing all build artifacts.
- With the bundled code ready in
dist, the library was almost ready to go live on npm.
Step 5: Consume the library locally
You don't need to upload the library to npm to test it. After building with ng build NgxMatTypeahead, it can be imported into the app just like any external package—by adding it to the `NgModule` imports. A few important observations:
- Although it's imported the usual way,
NgxMatTypeaheadisn't actually published or installed innode_modulesat this point.

The app.module file.
- Let's reflect on what happened during library generation with
ng g library NgxMatTypeahead -p NgxMat. Among other modifications, thetsconfig.jsongained apathsentry: - That
pathsmapping tells the build system where to locate the library. See the docs for more information.
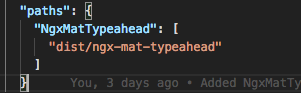
tsconfig.json with the paths configuration.
- As a result, the import of
NgxMatTypeaheadModuleactually resolves todist/ngx-mat-typeahead.
Step 6: Iterating (watch mode)
When you test the library and need to modify it (which will happen), you'll want the library and the app to run in --watch mode. This is straightforward:
- First, link the library to the app using
npm linkin two steps. Details can be found here. - Change to the
dist/ngx-mat-typeaheadfolder and runnpm link. - Then, from the project root, run
npm linkagain. - After that, start the library build in watch mode:
ng build NgxMatTypeahead—`watch, and runng servefor the app.
You can now develop both the library and the app together, and every change to the library's source will trigger a recompilation of the app.
With the library bundled, tested, and consumed locally, we can proceed to the final step—publishing it to npm.
2. Publishing the Library to npm
Once the compiled library is in place under the dist directory and looks ready to go, a few remaining adjustments are necessary before the actual publication. The full details are covered here, but the key points are summarized below.
- Enhance the
package.jsonfile by filling in metadata such as the author's name, the repository URL on GitHub, and other relevant details.
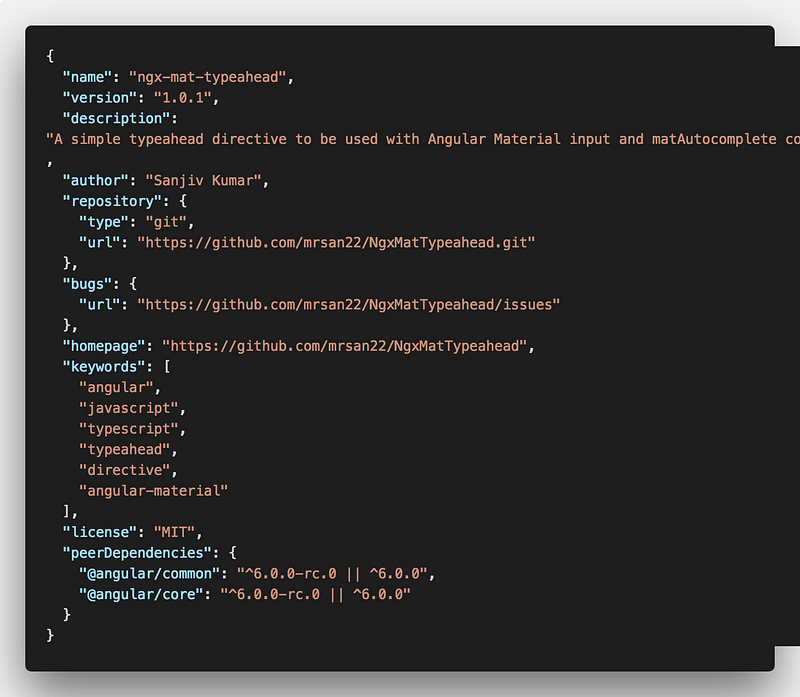
the package.json file after adding the additional metadata
- Create both
README.mdandLICENSEfiles. The README file serves as the primary documentation displayed on the npm package page, so it should thoroughly describe the API and any other important usage instructions. Adding a license is also recommended for clarity and legal purposes. - You may choose to rebuild the library after these changes so that the new files and metadata are included in the
distoutput. - Ensure the final compilation is done with the
--prodflag to guarantee a production-ready bundle. - At this stage, the
distfolder is set for publishing. However, since an npm account was not yet available, one had to be created. The process for this is straightforward and clearly outlined on the npm website.
To publish, you must be a user on the npm registry. If you aren’t a user, create an account by using
**npm adduser**. If you created a user account on the site, use**npm login**to access your account from your terminal.
- Verification: Running
**npm whoami**in the terminal will indicate whether you are already authenticated. - Once everything is confirmed to be in order, the next step was to navigate into the
dist/ngx-mat-typeaheadfolder and executenpm publish
Pro Tip: Verify that your package functions correctly before publishing, as releasing a broken package provides no benefit to anyone.
npm publish
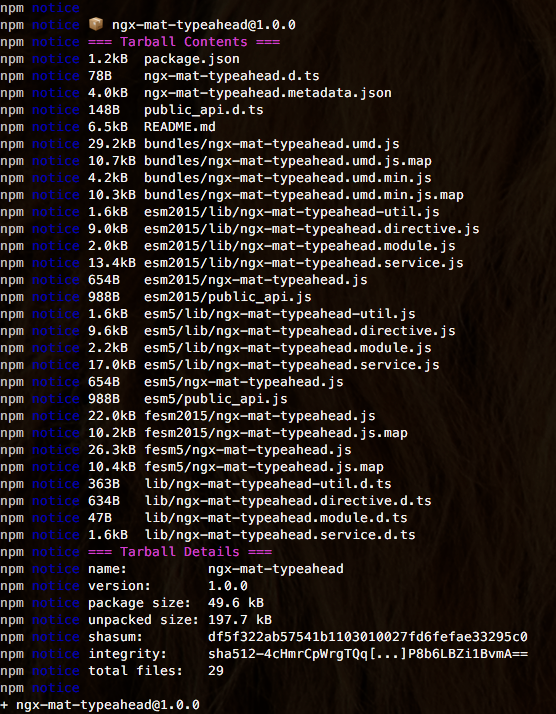
the output from running npm publish
- With that, the first Angular module was successfully published to the npm registry.
- To confirm the package is live, visit
https://npmjs.com/package/<package>. - The published package can be viewed here → ngx-mat-typeahead.
- The complete source code is also available for reference on GitHub.
Feel free to share any feedback, suggestions, or encountered issues in the comments. You can also reach out on Twitter (@esanjiv).
Keep learning and happy coding!