
@Component({
  selector: 'app-writing-assistant',
  template: `
    <div>
      <h2>Writing Assistant</h2>
      <textarea [(ngModel)]="paragraph1" placeholder="Enter first paragraph"></textarea>
      <textarea [(ngModel)]="paragraph2" placeholder="Enter second paragraph"></textarea>
      <button (click)="overview.reload()">Compare</button>
      @if (overview.hasValue()) {
          <div>
            <h3>Comparison Result:</h3>
            <p>{{ overview.value() }}</p>
          </div>
      }
    </div>
  `,
  imports: [FormsModule],
})
export class WritingAssistantComponent {
  readonly #genAI = inject(GenAIService);
  paragraph1 = signal('');
  paragraph2 = signal('');
  overview = rxResource({
    stream: () => {
      if (!this.paragraph1() || !this.paragraph2()) {
        return of('');
      }
      return this.#genAI.writingOverview(this.paragraph1(), this.paragraph2());
    },
  });
}
writingOverview(paragraph1: string, paragraph2: string) {
    const prompt = `Provide a brief overview comparing the following two paragraphs:\n\nParagraph 1: ${paragraph1}\n\nParagraph 2: ${paragraph2}. Decide which version is better\n\nOverview:`;
    return this.generateContent(prompt);
}
**Overview:** Paragraph 1 is a standard, grammatically correct greeting. Paragraph 2 is a heavily abbreviated and misspelled version of the same greeting. **Decision:** Paragraph 1 is significantly better due to its clarity, proper grammar, and readability. Paragraph 2 is difficult to understand and would be considered unprofessional in most contexts.
Structured outputs
The classic approach of relying on free-form text responses quickly hits a wall when we need the AI's output to drive programmatic decisions in our application. We could attempt to parse the prose response to guess which paragraph the model prefers, but this is fragile and frankly misguided.
Imagine receiving a JSON object from Gemini that not only contains the textual analysis but also a typed field indicating the preferred paragraph. This is precisely what structured outputs enable. By declaring a response schema, we tell the API exactly what shape the response must take, eliminating the guesswork entirely.
Let's put this into practice with our writing assistant. We define a new backend endpoint that specifies a response MIME type of "application/json" and provides a JSON schema. The schema declares an object with two required properties: overview (a string) and bestChoice (a string restricted to the enum values "1" or "2").
{
  "betterParagraph": 1,
  "reason": "Paragraph 1 is significantly better due to its clarity, proper grammar, and readability. Paragraph 2 is difficult to understand and would be considered unprofessional in most contexts."
}
The advantages are immediate. The model will not return flowery preambles or malformed JSON. It will adhere strictly to the schema, ensuring that our Angular service can reliably parse the response without defensive coding.
In our Angular service, we call this new endpoint and parse the response body as JSON before returning it. The component then subscribes to this data and uses the bestChoice field to conditionally apply CSS classes, highlighting the selected paragraph in green and the other in red.
app.post('/writing-assistant', async (req, res) => {
  const { paragraph1, paragraph2 } = req.body;
  const schema = {
    "type": "object",
    "properties": {
      "overview": { "type": "string" },
      "bestChoice": {
        "type": "string",
        "enum": ["1", "2"]
      }
    },
    "required": ["overview", "bestChoice"]
  };
  const prompt = `Provide a brief overview comparing the following two paragraphs:\n\nParagraph 1: ${paragraph1}\n\nParagraph 2: ${paragraph2}. Decide which version is better\n\nOverview:`;
  try {
    const response = await genAI.models.generateContent({
      model: 'gemini-2.0-flash-lite',
      contents: prompt,
      config: {
        responseMimeType: 'application/json',
        temperature: 0.1,
        responseSchema: schema,
      },
    });
    res.json(response.candidates[0]?.content.parts[0].text || {});
  } catch (error) {
    console.error('Error generating writing overview:', error);
    res.status(500).json({ error: 'Failed to generate writing overview' });
  }
});
This simple demonstration shows the power of merging LLM capabilities with dynamic UI decisions. The same principle scales to far more complex scenarios, as we are about to discover.
Building a dynamic form generator
Let's move to a richer use case: a tool that generates a custom form based on a user's description. This could be useful for creating feedback forms, event registration forms, or any other kind of survey.
The user will provide a text description, and Gemini will produce a structured array of form field descriptors. Each descriptor defines the field's name, its type (input, textarea, or dropdown), an optional label, and for dropdowns, a list of options.
Rather than hand-writing the JSON schema for this, we can leverage Google AI Studio's visual editor. We toggle on "Structured Output" and use the point-and-click interface to define all the fields and their types. The tool conveniently provides us with the code representation of the schema, which we copy directly into our Express backend.
writingOverview(paragraph1: string, paragraph2: string) {
    return this.#http.post<
    GeminiResponse
    >('http://localhost:3000/writing-assistant', {paragraph1, paragraph2});
}
Our new backend endpoint, generate-form, follows the same boilerplate as before; the only differences are the schema variable and the prompt. This consistency makes extending our backend trivial.
With this endpoint in place, we turn to the Angular frontend. This is where we get to leverage modern Angular features. First, we define an interface for the form field descriptor in TypeScript:
@Component({
  selector: 'app-writing-assistant',
  template: `
    <div>
      <h2>Writing Assistant</h2>
       @let value = overview.value();
      <textarea
        [(ngModel)]="paragraph1" placeholder="Enter first paragraph"
        [class.better]="value?.bestChoice === '1'"
        [class.worse]="value?.bestChoice === '2'"></textarea>
      <textarea
        [(ngModel)]="paragraph2" placeholder="Enter second paragraph"
        [class.better]="value?.bestChoice === '2'"
        [class.worse]="value?.bestChoice === '1'"></textarea>
      <button (click)="overview.reload()">Compare</button>
      @if (value.overview) {
          <div>
            <h3>Comparison Result:</h3>
            <p>{{ value.overview }}</p>
          </div>
      }
    </div>
  `,
  styles: `
    .better {
      border: 2px solid green;
    }
    .worse {
      border: 2px solid red;
    }
  `,
  imports: [FormsModule],
})
export class WritingAssistantComponent {
  /* rest of the component code remains unchanged */
}
Next, we create an Angular resource that calls the backend and stores the returned array of field descriptors. We then use a linked signal to derive the form's value object from these descriptors. This linked signal constructs an object where each key is a field name and each value is an empty string, giving us a basic skeleton for the form's state.
export interface FormField {
  name: string;
  type: 'input' | 'textarea' | 'dropdown';
  options?: {value: string, label: string}[]; // only for dropdown
}
The form itself is created using the form() helper from Angular's signal forms. Iterating over the descriptors, we use Angular's @switch/@case control flow in the template to render the appropriate form control for each field type, binding with the [control] directive. Because the form structure is unknown at compile time, we rely on the $any() type-cast to appease the type checker.

This approach gives us a fully interactive, live-updating form preview. The user's input drives the generative model, which produces a structured output that seamlessly becomes the backbone of an Angular reactive, signal-driven form. The pattern is incredibly powerful, and we have barely scratched the surface.
Function calling and tool use
Now, we arrive at the second major concept of this article: function calling, or as it's better known, tool use. While structured outputs shape the format of a response, function calling enables the model to influence the state of our application by directly invoking code.
app.post('/generate-form', async (req, res) => {
  const { prompt: query } = req.body;
  if (!query) {
    return res.status(400).json({ error: 'Prompt is required' });
  }
  const prompt = `User will provide a description of a generic form, and you will generate the blueprint. Include only the fields required to add data, do not include buttons. ${query}`;
  const schema = {
  "type": "object",
  "properties": {
    "form": {
      "type": "array",
      "items": {
        "type": "object",
        "properties": {
          "name": {
            "type": "string"
          },
          "type": {
            "type": "string",
            "enum": [
              "input",
              "textarea",
              "dropdown"
            ]
          },
          "options": {
            "type": "array",
            "items": {
              "type": "object",
              "properties": {
                "value": {
                  "type": "string"
                },
                "label": {
                  "type": "string"
                }
              },
              "propertyOrdering": [
                "value",
                "label"
              ],
              "required": [
                "value",
                "label"
              ]
            }
          }
        },
        "propertyOrdering": [
          "name",
          "type",
          "options"
        ],
        "required": [
          "name",
          "type"
        ]
      }
    }
  },
  "propertyOrdering": [
    "form"
  ],
  "required": [
    "form"
  ]
};
  try {
    const response = await genAI.models.generateContent({
      model: 'gemini-2.0-flash-lite',
      contents: [
        { role: 'user', parts: [{ text: prompt }] }
      ],
      config: {
        responseMimeType: 'application/json',
        temperature: 0.1,
        responseSchema: schema,
      }
    });
    res.json(response.text);
  } catch (error) {
    console.error('Error generating form blueprint:', error);
    res.status(500).json({ error: 'Failed to generate form blueprint' });
  }
});
In this final example, we'll explore how to provide our Gemini model with a set of tools, let it decide when and how to use them, and ultimately, have it create a detailed travel itinerary, complete with browsing functionality for example. The model will act as an orchestrator, a very tiny orchestrator that ties application functionality to the power of an LLM.
@Component({
    selector: 'app-generative-form',
    template: `
        <h2>Generative Form Component</h2>
        <textarea
            #promptArea (keypress.enter)="prompt.set(promptArea.value)">
        </textarea>
        <button (click)="prompt.set(promptArea.value)">Generate</button>
        @if (formBlueprint.hasValue()) {
            <h3>Generated Form Blueprint:</h3>
            @for (field of formBlueprint.value(); track field.name) {
                <div>
                    <label [for]="field.name">{{field.name | titlecase }}</label>
                    @switch (field.type) {
                        @case ('input') {
                            <input [id]="field.name" [control]="$any(form)[field.name]" />
                        }
                        @case ('textarea') {
                            <textarea [id]="field.name" [control]="$any(form)[field.name]"></textarea>
                        }
                        @case('dropdown') {
                            <select [id]="field.name" [control]="$any(form)[field.name]">
                                @for(option of field.options; track option.value) {
                                    <option [value]="option.value">{{ option.label }}</option>
                                }
                            </select>
                        }
                        @default {
                            <div>Unknown field type: {{field.type}}</div>
                        }
                    }
                </div>
                {{formValue() | json}}
            }
        }
    `,
    imports: [Control, TitleCasePipe, JsonPipe],
})
export class GenerativeFormComponent {
    readonly #genAI = inject(GenAIService);
    prompt = signal('');
    formBlueprint = rxResource({
        params: () => ({prompt: this.prompt()}),
        stream: ({params}) => {
            if (!params.prompt) {
                return of(null);
            }
            return this.#genAI.generateForm(params.prompt);
        },
    });

    formValue = linkedSignal(() => {
        const blueprint = this.formBlueprint.value();
        if (!blueprint) {
            return null;
        }
        const value = {} as Record<string, any>;
        for (const field of blueprint) {
            value[field.name] = '';
        }
        return value;
    });

    form = form(this.formValue);
}
A natural evolution would be to implement a multi-step conversational loop where the model requests tool calls, waits for their results, and iterates to produce a final response. This opens the door to agents that can complete tasks on the user's behalf, the cornerstone of modern AI-adjacent frontend design.
Tool invocation
Interestingly enough, the concept of tool or function invocation—despite being a cornerstone of AI-driven applications and agentic patterns—can effectively be viewed as a special case of structured outputs. Let's clarify what it entails and how it distinguishes itself from a plain structured output.
- Structured outputs enable us to define a schema for the model's response, and the model then produces content that conforms to that schema
- Tool invocation provides the LLM with a list of available functions (similar to methods in a frontend or backend codebase), and the model picks which one—be it an API, a database query, or a search utility—it needs to utilize
- While one could achieve a similar outcome purely with structured outputs, tool invocation offers the dual benefit of returning both structured results (or unstructured ones) and the invoked function calls, allowing us not only to execute functions but also to present explanatory text and prompts from the model
With that in mind, let's construct a command-line interface for our application where users can type prompts to trigger actions—such as navigating to a specific page or modifying settings. Our first order of business will be implementing a navigation command.
To accomplish this, we must define a schema that outlines our function along with its parameters. A potential example is shown below:
[
  {
    "name": "navigate",
    "description": "Navigates the user to the page defined by the URL",
    "parameters": {
      "type": "object",
      "properties": {
        "url": {
          "type": "string",
          "enum": [
            "/some-url",
            "/another-url",
            "/yet-another-url"
          ]
        }
      },
      "required": [
        "url"
      ],
      "propertyOrdering": [
        "url"
      ]
    }
  }
]
Notice that this structure closely mirrors what we used for structured outputs, with the key distinction being the top-level name and description fields that characterize the function we're exposing. These attributes carry significant weight, as the LLM relies on them to determine which of the provided functions, if any, should be selected.
Nevertheless, this current setup falls short of practical use, given that we've supplied placeholder URLs. The actual routes in our Angular application differ considerably and are inherently dynamic—future routes may be added, while others could be deprecated.
To address this limitation, the optimal approach is to generate the schema on the fly, drawing from the live routes registered in our Angular app. By leveraging the Router service, we can pull the routing configuration directly. Here's a demonstration:
getRoutesSchema() {
    const routes = this.#router.config
      .filter(route => route.path) // filter out routes without a path
      .map(route => `/${route.path}`); // prepend '/' to each path
    return {
      name: 'navigate',
      description: 'Navigates the user the page defined by the URL',
      parameters: {
        type: 'object',
        properties: {
          url: {
            type: 'string',
            enum: routes,
          },
        },
        required: ['url'],
        propertyOrdering: ['url'],
      },
    };
}
Before we proceed, it's worth revisiting what's unfolding here. We're constructing an object that represents a function the LLM might—though not necessarily—opt to call. When we mention "call," it's important to note that in this context, the model doesn't execute anything directly; instead, it signals our application to do so (we retain the discretion to decline). The function in question is navigate, accepting a single argument url—a string that aligns with one of the routes we've retrieved from the Angular Router. In essence, the LLM instructs the caller to execute navigate(url) in order to redirect to a specific page.
Next, we'll introduce a minimal endpoint that captures the user's input along with our dynamically generated schema, passing both to Gemini:
app.post('/command-line', async (req, res) => {
  const { commands, prompt } = req.body;

  if (!commands) {
    return res.status(400).json({ error: 'Commands are required' });
  }

  const finalPrompt = `
    You are an assistants who helps users execute commands in a web app defined in natural language. Take a look at the tools available and the user's prompt and decide which ones to call with what arguments.

    User prompt: ${prompt}
  `;

  const response = await genAI.models.generateContent({
    model: 'gemini-2.0-flash-lite',
    contents: prompt,
    config: {
      temperature: 0.1,
      tools: [{functionDeclarations: commands}],
    },
  });

  res.json(response);
});
As observed, this implementation is even more streamlined, since the heavy lifting happens client-side and is offered to Gemini as a set of callable tools. She also furnishes a slight augmentation of the user's prompt, steering Gemini toward selecting the appropriate tool, given this is intended to be a command utility rather than a conversational bot.
Finally, let's put together the component that delivers the command-line interface for our users:
@Component({
    selector: 'app-command-line',
    template: `
        <input (keyup.enter)="onEnter($event)" />
    `,
})
export class CommandLineComponent {
    readonly #router = inject(Router);
    readonly #genAI = inject(GenAIService);

    onEnter(event: Event) {
        const input = (event.target as HTMLInputElement).value;
        const commands = [this.getRoutesSchema()];
        // callCommandLine simply takes the user's input and the commands schema and calls the /command-line endpoint we defined above
        this.#genAI.callCommandLine(commands, input).subscribe(response => {
            const command = response.candidates[0]?.content.parts[0].functionCall;
            this.handleCommand(command);
        });
    }

    handleCommand(command?: {name: string; args: Record<string, any>}) {
        switch (command.name) {
            case 'navigate':
                const url = command.args['url'];
                // we might want to validate the URL here before navigating
                // since LLMs can sometimes hallucinate, in a production setting
                // it would be a good idea to check if the URL actually exists
                // within our app routes
                this.#router.navigateByUrl(url);
                break;
            default:
                console.warn(`Unknown command: ${command.name}`);
        }
    }

    getRoutesSchema() {
        // omitted for the sake of brevity, see above
    }
}
You'll see that the response.candidates[0]?.content.parts[0] object now includes a functionCall property, representing the function Gemini has chosen to request. We manage this result neatly within a switch/case structure, routing to the relevant Angular function—in this instance, Router.navigateByUrl.
When you launch the component in the browser and input something like "navigate to writing assistant," the app seamlessly redirects to the writing assistant component we created earlier—truly impressive! Naturally, we've only got a single command so far, but here's another one you might try implementing solo: a directive to toggle the application theme between light and dark modes. You could build a lightweight service to manage the current theme, define a schema for the theme-changing function, and wire up the command within the handleCommand method.
Wrapping up
We've significantly expanded upon the foundations set in the prior instalment. Along the way, we covered:
- structured outputs, which allow us to compel the model to respond in a specific format, and their application in crafting generative user interfaces
- function calling, which empowers us to expose custom functions (or tools) for the model to leverage
- a preliminary foray into prompt engineering, enriching the user's input to better suit our specific requirements
- our initial steps into agentic workflows, where the model autonomously makes decisions and invokes functions based on user input, producing far more sophisticated outcomes than mere text generation
In our upcoming discussion, we'll plunge into the intricacies of embeddings—unique vector representations of text that unlock extraordinary capabilities such as semantic search and text categorization. Keep an eye out!
A quick plug
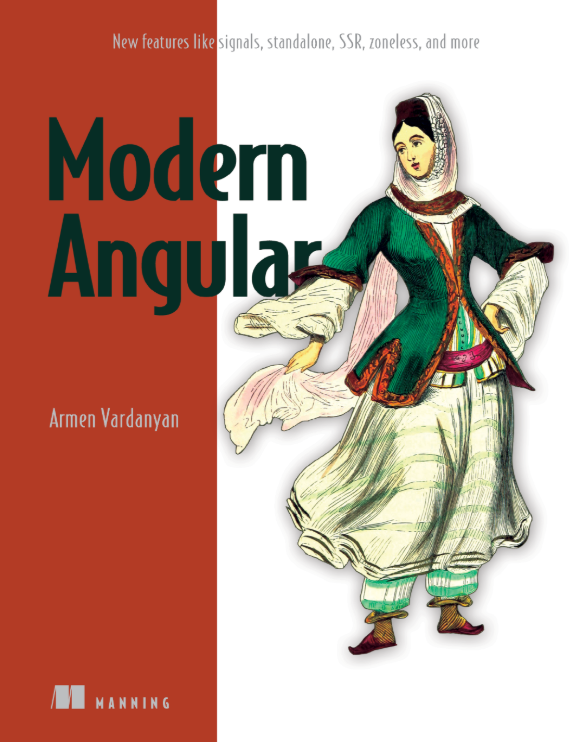
My latest book, Modern Angular, has hit the shelves! I devoted considerable effort to documenting every novel Angular feature spanning versions v12 to v18, from enhanced dependency injection and RxJS interop to Signals, SSR, Zoneless, and so much more.
If you're maintaining a legacy project, I'm confident this book will help you get up to speed with all the fresh and thrilling additions our beloved framework offers. Grab a copy here: https://www.manning.com/books/modern-angular
One small aside—there's a chapter on integrating LLMs with Angular apps that's somewhat dated already, despite the book being published earlier this year (a testament to the astonishing pace of AI progression!). Hoping you'll forgive me ;)