Will Signals Replace RxJS?
This is arguably the most frequently asked question across the Angular community at the moment. Given that both tools address similar concerns—state management and reactivity—and both play a role in Angular applications, the confusion is entirely justified.
Let’s start with the official stance from the Angular team: RxJS will become optional. That word choice matters. Optional means it will not be mandatory, but it will certainly remain supported. What does that look like in practice?
For starters, support for RxJS has actually gotten better with the latest release. A good example is the takeUntilDestroyed operator, which simplifies unsubscribing from Observables. Additionally, the @angular/core/rxjs-interop package was introduced, allowing you to bridge signals with RxJS smoothly. So the short answer is no—RxJS is not going anywhere.
What’s more, this year saw a significant milestone for Observable adoption in browsers: Chromium-based browsers now support an experimental native version of Observables. This suggests reactive extensions—if not RxJS itself—are likely to become even more widespread, not less.
So, to wrap up the first point: RxJS is alive and well, and it won’t be fading out any time soon. In Angular, its integration has improved; it just becomes optional, with many tasks now doable via signals instead. That naturally leads us to the next consideration.
Should You Migrate to Signals?
This one is a bit more nuanced. Signals are considerably simpler than RxJS, but they still come with their own learning curve, so it’s fair to ask whether moving away from RxJS (in certain scenarios) is worth it. Here’s a quick rundown of what signals offer.
- Synchronous execution: Observables can be asynchronous, which often adds complexity. Signals are guaranteed to be synchronous, eliminating race conditions and other unexpected behaviors. (Of course, this also means they’re not ideal for handling async operations directly, but we’re focusing on the positives here.)
- Immediate value access: With Observables, you must subscribe to read the latest value. With signals, you can just call them (e.g.,
mySignal()) and instantly get the current value. - Minimal API: RxJS is packed with operators, Schedulers, hot/cold Observables, Subjects, and more. Signals keep the API surface tiny, offering just enough primitives to cover your reactivity needs.
- Angular-native: While Angular now has improved RxJS interop, signals are built specifically for the framework. Updating a signal’s value automatically triggers change detection, making them a cornerstone for Zoneless Angular apps.
If that’s enough to convince you that migrating to signals is the right call, let’s tackle the practical part: how do you actually do it?
What's the best strategy for adopting signals?
To answer this properly, it helps to accept upfront that shifting an entire codebase to signals won't be a quick, one-off task—unless the application is quite small. On the other hand, converting a single component property from an Observable (or even a plain string or boolean) to a signal is a fairly contained change that, more often than not, leaves the rest of the component's behavior untouched.
That realization opens the door to a gradual, piece-by-piece migration. Below is a high-level roadmap we'll then break down in detail.
- Low-hanging fruit: converting input/output properties and view/content queries
- Simple properties: primitives can be switched over without much ceremony
- Object properties: a bit more involved, but still very doable
BehaviorSubjects: typically easy to swap, though some care is warranted- Other Observables: highly case-dependent, often more about replacing
asyncpipes withtoSignalthan rewriting the Observable itself
Let's walk through each of these.
Handling inputs, outputs, and queries
As you're likely aware, recent Angular versions shipped the input and output functions as the modern replacements for the @Input and @Output decorators. The key point here is that input produces a signal, which then works seamlessly with computed, effect, and the newer linkedSignal.
Take a component written with decorators:
@Component({
  selector: 'my-dialog',
  template: `...`,
})
export class MyDialogComponent {
  @Input() open: boolean;
  @Output() close = new EventEmitter<void>();
}
The same component, migrated to signals, looks like this:
@Component({
  selector: 'my-dialog',
  template: `...`,
})
export class MyDialogComponent {
  open = input.required<boolean>();
  close = output<void>();
}
We won't go deep into every nuance of signal-based inputs and outputs here—the official docs cover that thoroughly, which you can find here and here.
The real concern, though, is scale. In a substantial enterprise app, you could be looking at hundreds of components and thousands of inputs—far too many to update by hand.
Luckily, the Angular team has provided a migration schematic to handle the bulk of this work. Running it will automatically transform most (if not all) of your inputs and outputs, and it will also update any references—whether in TypeScript, templates, or host bindings—so they properly invoke the signal to read its value.
ng generate @angular/core:signal-input-migration
So what does "safe to convert" mean in practice? The schematic will skip inputs that are reassigned inside the component itself, since signal inputs are immutable—once set by a parent, the child can't change them. That's actually a nice safeguard against bugs, but it also means you'll need to handle such cases manually:
@Component({
  selector: 'my-dialog',
  template: `...`,
})
export class MyDialogComponent {
  @Input() open: boolean;
  @Output() close = new EventEmitter<void>();

  closeDialog() {
    this.open = false; // this will not work if input is a signal
    this.close.emit();
  }
}
If you're willing to accept a bit more risk, there's a flag that pushes the schematic to convert some of those less-straightforward inputs:
ng generate @angular/core:signal-input-migration --best-effort-mode
Use this with caution, as it might introduce build errors—always verify the output.
For inputs that remain unconverted, you can plan a follow-up pass. By adding an --insert-todos flag, the schematic will drop TODO comments exactly where manual work is needed, making those spots easy to locate later:
@Component({
  selector: 'my-dialog',
  template: `...`,
})
export class MyDialogComponent {
  // TODO: Skipped for migration because:
  //  Your application code writes to the input. This prevents migration.
  @Input() open: boolean;
  close = output<void>();

  closeDialog() {
    this.open = false; // this prevented it
    this.close.emit();
  }
}
One more scenario to watch for: getters that read an input and then perform some transformation or side effect. These will need to be reworked by hand, likely into an effect or a computed down the line.
If your application is genuinely massive, you can also run the schematic on just a slice of the app by passing a path. That way you can migrate one module, test it, deploy it, and loop back for the next portion:
ng generate @angular/core:signal-input-migration --path=src/app/some/feature
Even the manual part doesn't have to be a slog. There's a handy VSCode refactoring action that can flip an @Input or @Output to its signal equivalent, leaving you to polish any edge cases by hand.
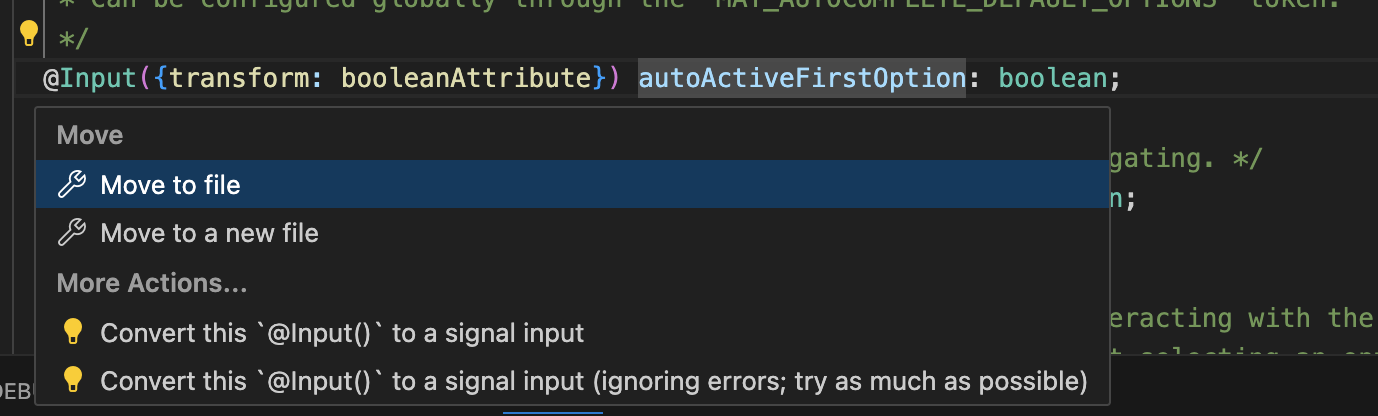
What we've covered so far is the more demanding path. Migrating outputs on their own is significantly safer and can be done in a separate pass:
ng generate @angular/core:signal-output-migration
Because this migration is guaranteed to be safe, there's no --best-effort-mode flag, and no TODO comments are inserted. It also cleans up after itself—removing any direct calls to EventEmitter.next and dropping the now-redundant EventEmitter.complete calls.
Finally, you can also run a schematic to convert view and content queries into signals. This one isn't always safe either, so the --best-effort-mode flag is available if you need it:
ng generate @angular/core:signal-queries-migration
That covers the first major step. Once your inputs, outputs, and queries are migrated, it's time to move on.
Converting simple properties
With the signal-friendly building blocks out of the way, we now have to switch to manual work—though the effort is still modest. If a component has a primitive property, like a string or boolean, turning it into a signal is straightforward:
@Component({
  selector: 'some-component',
  template: `
    <app-dialog [open]="open"/>
    <button (click)="toggleDialog()">Toggle Dialog</button>
  `,
})
export class MyComponent {
  open = false;

  toggleDialog() {
    this.open = !this.open;
  }
}
The signal can then be used directly in the template as well:
@Component({
  selector: 'some-component',
  template: `
    <app-dialog [open]="open()"/>
    <button (click)="toggleDialog()">Toggle Dialog</button>
  `,
})
export class MyComponent {
  open = signal(false);

  toggleDialog() {
    this.open.update((value) => !value);
  }
}
This is pretty easy. The main things to remember are:
- Declare the property as a signal of its value type, e.g.,
'true'becomessignal(true). - Replace simple assignment with the signal's
updateorsetmethods:- Instead of
this.open = !this.open, writethis.open.update((value) => !value).
- Instead of
- Remember to invoke the signal in templates:
openturns intoopen(). - For two-way bindings like
[(ngModel)], skip the parentheses: use[(ngModel)]="open"without calling it.
That's the simple stuff. Handling more complex shapes, like nested objects or arrays, brings a few extra considerations.
Working with complex properties
For complex properties, the process is largely the same, but you'll find yourself leaning on .update more than .set. That's especially true when you're modifying a collection, like adding an item to an array:
arraySignal.update((array) => [...array, newItem]);
The real pain point emerges when the state is deeply nested. Imagine a state signal holding a product object, which contains an orderHistory array of order objects, each with its own quantity. Updating that quantity for the third order requires a lot of spread operators and careful typing:
state.update((state) => {
  return ({
    ...state,
    product: {
      ...state.product,
      orderHistory: state.product.orderHistory.map((order, index) => {
        if (index === 2) { // third order
          return {
            ...order,
            quantity: order.quantity + 1 // increment quantity
          };
        }
        return order; // return other orders unchanged
      }),
    }
  })
});
That's messy. Angular alone won't simplify this, but a library like immer can. Immer lets you write mutation-like code, but produces a new immutable object under the hood, sparing you from all the manual copying. The result is much cleaner:
import { produce } from 'immer';

state.update((state) => {
  return produce(state, (draft) => {
    draft.product.orderHistory[2].quantity += 1; // increment quantity
  });
});
That reads much better. Another issue with complex state is hidden coupling between properties. Take this pattern, for instance:
@Component({
  selector: 'some-component',
  template: `
    <select [(ngModel)]="selectedOption>
      @for (option of options; track option.id) {
        <option [value]="option.id">{{ option.name }}</option>
      }
    </select>
  `,
})
export class SomeComponent implements OnChanges {
  @Input({required: true}) options: {id: number, name: string}[];
  selectedOption = this.options[0]; // default selection

  ngOnChanges(changes: SimpleChanges) {
    if (changes['options']) {
      this.selectedOption = this.options[0]; // reset selection if options change
    }
  }
}
Here, selectedOption depends implicitly on the options input. When options change, the selection should reset. The old approach leans on ngOnChanges as a clumsy intermediary.
If options is an input signal, linkedSignal solves this reactively and cleanly:
@Component({
  selector: 'some-component',
  template: `
    <select [(ngModel)]="selectedOption">
      @for (option of options(); track option.id) {
        <option [value]="option.id">{{ option.name }}</option>
      }
    </select>
  `,
})
export class SomeComponent {
  options = input.required<{id: number, name: string}[]>();
  selectedOption = linkedSignal({
    source: this.options,
    computation: (options) => options[0]
  }); // reset to first option

  // no need for ngOnChanges anymore
}
The component code is arguably simpler now, but this unlocks a broader point: migrating complex state often means rethinking component logic. The changes are for the better, but they take time and can occasionally be mentally taxing.
To sum up, here's the checklist for migrating complex properties:
- Turn the property into a signal of its value, e.g.,
'true'becomessignal(true). - Pay attention to template calls: invoke the signal as
open()when needed. - Too, don't forget the exceptions, like
[(ngModel)], where the signal should stay uncalled. - Prefer
.updateover.setfor anything more advanced that references the prior value. - Reach for a library like Immer when updates get particularly deep.
- Scan state for implicit relationships and use
linkedSignalorcomputedto wire them up correctly. - Take it piece by piece—migrate, verify, and test incrementally.
With inputs and state properties handled, it's time to tackle a heavyweight: RxJS and its interplay with signals.
Migrating BehaviorSubjects
Let's begin with the simplest and most common conversions—BehaviorSubjects. While they may not be the most ubiquitous Observables, they are unquestionably the easiest to turn into signals.
The reasons become clear when you recall what a BehaviorSubject offers:
- it always has a value available,
- you can read that value synchronously,
- you can subscribe and react to changes.
That description sounds remarkably close to a signal. Indeed, the conversion is quite direct:
@Component({
  selector: 'some-component',
  template: `
    <p>Current value: {{ value$ | async }}</p>
    <button (click)="increment()">Increment</button>
  `,
})
export class SomeComponent {
  private value$ = new BehaviorSubject<number>(0);

  constructor() {
    this.value$.subscribe(value => {
      console.log('Value changed:', value);
    });
  }

  increment() {
    this.value$.next(this.value$.getValue() + 1);
  }
}
So a BehaviorSubject like this:
@Component({
  selector: 'some-component',
  template: `
    <p>Current value: {{ value() }}</p>
    <button (click)="increment()">Increment</button>
  `,
})
export class SomeComponent {
  private value = signal(0);

  constructor() {
    effect(() => {
      console.log('Value changed:', this.value());
    });
  }

  increment() {
    this.value.update(v => v + 1);
  }
}
Can be replaced with a signal, and the migration steps are easy to summarize:
- Swap the
BehaviorSubjectfor a signal of the same type:new BehaviorSubject<number>(0)for instance becomessignal(0). - In templates, change
value$ | asyncto simplyvalue(). - Instead of
this.value$.next(this.value() + 1), usethis.value.update(v => v + 1). - For subscriptions, replace
this.value$.subscribe(...)with aneffect(() => {...}).
For 95% of situations, that's all there is to it. Challenges arise when operators, particularly asynchronous ones, enter the picture. For instance, you might want to debounce increments when a button is clicked rapidly:
@Component({
  selector: 'some-component',
  template: `
    <p>Current value: {{ value$ | async }}</p>
    <button (click)="increment()">Increment</button>
  `,
})
export class SomeComponent {
  private value$ = new BehaviorSubject<number>(0);

  constructor() {
    this.value$.pipe(
      debounceTime(300) // wait for 300ms before emitting
      takeUntilDestroyed(),
    ).subscribe(value => {
      console.log('Value changed:', value);
    });
  }

  increment() {
    this.value$.next(this.value$.getValue() + 1);
  }
}
That leads us to the broader topic of moving Observables to signals, and how to handle operators along the way.
Migrating other observables
Building on the previous example, there are two viable routes, and it helps to weigh them before picking one:
- Keep the
BehaviorSubjectintact and calltoSignalto get a signal where needed. - Or, convert to a signal up front and use
toObservablewhenever RxJS operators are necessary.
Both are workable, but the second approach has a slight edge: it keeps signals at the center of your reactive state, and reading them is easier in templates or elsewhere—someSignal() beats juggling someBehaviorSubject$ | async and someBehaviorSubject$.getValue().
So, reworking an earlier example to lean on toObservable for using operators like debounceTime looks like this:
@Component({
  selector: 'some-component',
  template: `
    <p>Current value: {{ value() }}</p>
    <button (click)="increment()">Increment</button>
  `,
})
export class SomeComponent {
  private value = signal(0);

  constructor() {
    toObservable(this.value).pipe(
      debounceTime(300),
      takeUntilDestroyed(),
    ).subscribe(value => {
      console.log('Value changed:', value);
    });
  }

  increment() {
    this.value.update(v => v + 1);
  }
}
Now that we've covered BehaviorSubject, let's talk Observables in general.
The most immediate tool might be the toSignal, but it's not always necessary. Two standout examples come to mind: using NgRx (or similar state-management libraries) and handling HTTP request Observables.
For NgRx, the library itself offers a signal-based API. Instead of converting manually, you can leverage selectSignal to retrieve state directly as a signal from a selector:
@Component({
  selector: 'some-component',
  template: `
    <p>Current value: {{ value() }}</p>
    <button (click)="increment()">Increment</button>
  `,
})
export class SomeComponent {
  readonly #store = inject(Store);
  value = this.store.selectSignal(selectValue); // selectSignal returns a signal

  constructor(private store: Store<State>) {
    effect(() => {
      console.log('Value changed:', this.value());
    });
  }

  increment() {
    this.store.dispatch(incrementValue());
  }
}
That's handy—no need for toSignal at all, just a signal ready to use.
For HTTP calls, Angular brings in a new reactive primitive, httpResource, which wraps a request's entire lifecycle—loading, error, and data—into signals:
@Component({
  selector: 'some-component',
  template: `
    @if (resource.isLoading()) {
      <p>Loading...</p>
    } @else if (resource.hasError()) {
      <p>Error: {{ resource.error() }}</p>
    } @else {
      <p>Data: {{ resource.data() | json }}</p>
    }
  `,
})
export class SomeComponent {
  readonly resource = httpResource(this.#http.get('/api/data'));
}
That's quite simple; there are no subscriptions or async pipes, just signals. For more details, you can check out my earlier piece on httpResource.
A note of caution:
httpResourceis currently intended forGETrequests. While you could coerce it to send aPOST, that approach is strongly discouraged. For other verbs, you'll still need alternatives liketoSignal.
So, where does toSignal fit in? That brings us to the final question this article aims to answer.
Signals or RxJS: How to choose
Looking back at the examples in this article, a clear pattern emerges: signals served as synchronous, reactive containers for values, while RxJS was reserved for managing asynchronous event streams.
This mental model is key. Think of signals as state and RxJS as events. Keeping this distinction in mind will make it much easier to decide which tool fits a given scenario.
Take this example:
fromEvent(document, 'click').pipe(
  map((event: MouseEvent) => event.clientX),
  takeUntilDestroyed(),
).subscribe((x) => {
  console.log('Mouse clicked at X:', x);
});
Here, the focus is on user-generated events, which are inherently asynchronous. There is no notion of state or stored data; the goal is purely to react. This is a textbook case for RxJS. You could technically wrap things in toSignal, but what would the resulting signal represent? It would simply hold the latest click event object, which is not a meaningful semantic. It’s better to leave this as RxJS and move on.
On the other hand, suppose the API you are using already exposes state as an Observable (think of NgRx without the selectSignal helper). Here, the value genuinely represents state that evolves over time. Converting it with toSignal makes perfect sense:
this.state$ = toSignal(
  this.store.select(selectState),
  {defaultValue: someDefaultValue}
);
This simple reasoning—state vs. events—can guide most of your choices between signals and RxJS.
One remaining question is the case we touched on earlier: what if you have a reactive value (not an event stream) but want to apply async RxJS operators like debounceTime?
As mentioned before, the recommended approach is to keep the source value as a signal for simplicity, then convert it to an Observable wherever needed, apply the desired operators, and subscribe. This gives you the best of both worlds: a clean, synchronous source of truth plus the power of the RxJS operator toolbox.
Wrapping Up
Migrating a large-scale Angular application to signals is not a trivial undertaking. It requires careful planning and can feel overwhelming at first. However, as demonstrated in this guide, it is entirely feasible and can be approached incrementally without major disruptions. You will inevitably run into tricky edge cases along the way, but the strategies outlined here should help you stay on course toward a fully reactive codebase.
Shameless Plug
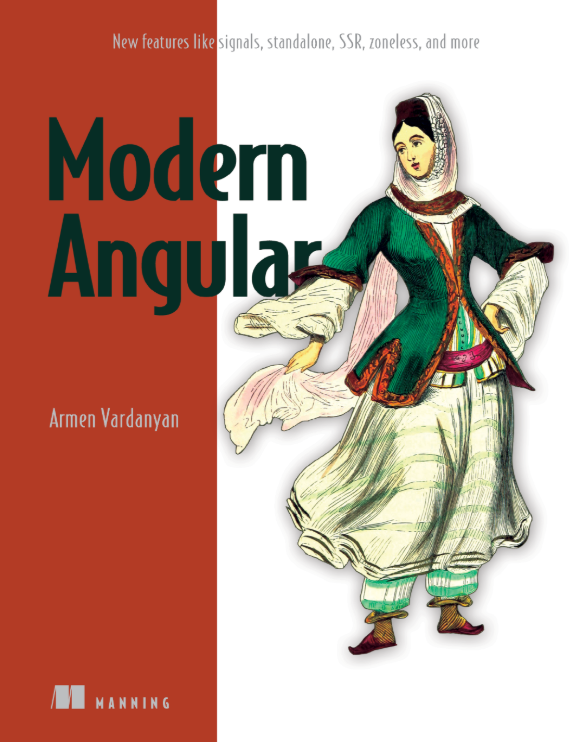
My book, Modern Angular, is now available in print! It covers every major feature introduced between Angular v12 and v18, including advanced dependency injection, RXJS interop, Signals, SSR, Zoneless, and much more.
If you are maintaining a legacy project, this book will help you get up to speed with all the latest improvements our favorite framework has to offer. You can find it at: https://www.manning.com/books/modern-angular
P.S. If you want to go deeper into RxJS interoperability or signals specifically, chapters 5, 6, and 7 are for you ;)