Injecting Components Dynamically in Angular
This guide covers the core concepts of injecting components dynamically as part of a component's logic. Before diving in, a working replica of the code described here is available on StackBlitz via this link.
The Concept of Component Injection
A powerful feature in Angular is the ability to inject a component of your choice into another component's template. This technique, known as component injection, is particularly useful for modern sites that need flexible content composition.
How to Get Started
Recommended path for Angular 17 and newer
- If you're working with Standalone Components, they must be listed in the imports array of the host component:
// If I were to use this component to be dynamically imported along other compoents
@Component({
  standalone: true,
  selector: 'profile-photo',
})
export class ProfilePhoto { }

@Component({
  standalone: true,
  imports: [ProfilePhoto], //then this is the place where it should be declared
  templateUrl: 'userProfile.component.html'
})
export class UserProfile { }
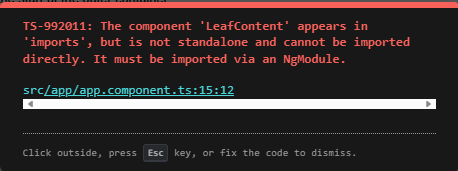
An important caveat: when using standalone components, all components in the process must be standalone. Importing a non-standalone component requires you to also import the module that declares that component.
Building a Demo
With the fundamentals established, let's build a small project that dynamically injects two components into a host template. The requirements are:
- Two buttons in the UI, each responsible for adding its respective component to the DOM.
- The injected components should flow naturally in the DOM, without overlapping or removing previously injected ones.
- Each injected component must be able to remove itself when clicked.
Setting Up the Host Component
While injecting a component is straightforward, it's usually placed at the end of the host component's body by default. To control placement, it's recommended to use an ng-container as the designated insertion point. For the actual injection logic, ViewContainerRef is the simplest and most direct method.
Here’s the initial host component with two buttons:
import {Component, ViewContainerRef, inject} from "@angular/core";

@Component({
  standalone: true,
  selector:'app-root',
  template: `
  <button type="button" (click)="injectC1()" >Inject Component 1</button>
  <button type="button" (click)="injectC2()" >Inject Component 2</button>
  `
})
export class AppComponent {
  private viewContainerRef = inject(ViewContainerRef);

  public injectC1(){
    //inject component1
  }

  public injectC2() {
    // inject component2
  }
}
This sets up a private viewContainerRef, allowing components to be injected into this host. Next, we'll create the two child components and wire up the button click handlers.
import {Component, ViewContainerRef, inject} from "@angular/core";

@Component({
  standalone: true,
  selector:'app-component1',
  styleUrl :'c1.css',
  template: `
  <div class="c1">This is Component 1</div>
  `
})
export class Component1 {}

@Component({
  standalone: true,
  selector:'app-component2',
  styleUrl :'c2.css',
  template: `
  <div class="c2">This is Component 2</div>
  `
})
export class Component2 {}
The corresponding injection logic is then added to the button functions:
@Component({
...
})
export class AppComponent {
  private viewContainerRef = inject(ViewContainerRef);

  public injectC1(){
+    this.viewContainerRef.createComponent(Component1)
  }

  public injectC2() {
+    this.viewContainerRef.createComponent(Component2)
  }
}
Finally, we add the styles for each component:
| main.css |
|---|
.grid {
  margin-top:5px;
  display:grid;
  grid-template-columns: repeat(2, minmax(0, 1fr));
  gap:5px;
}
.container {
  border: 1px solid green;
}
| c1.css |
|---|
.c1{
  background-color:#FF0000;
  color:#FFF;
}
| c2.css |
|---|
.c2{
  background-color:#0000FF;
  color:#FFF;
}
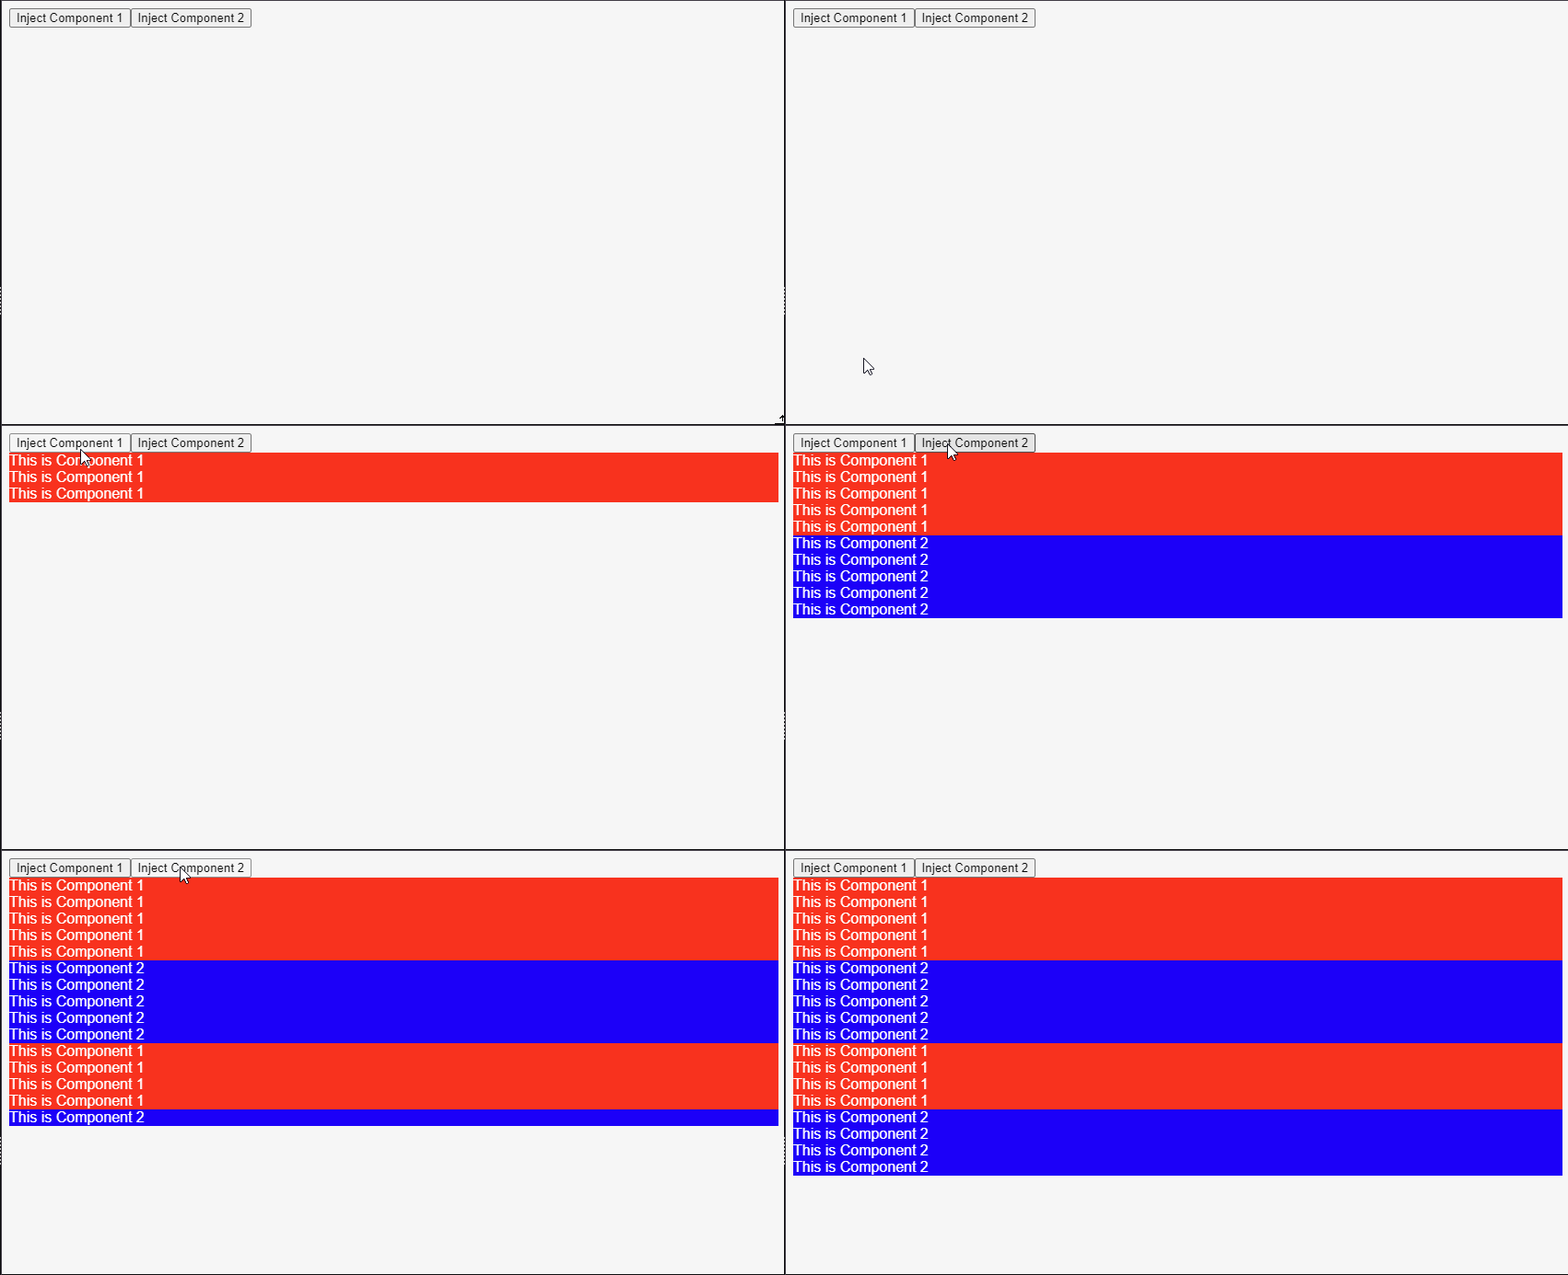
When you run this, you'll see the injected components appear at the end of the AppComponent template.
While this works for a demo, what if you need to inject components into a specific area of the page? Let's modify AppComponent to have a grid layout with one static column and one target column for our injections:
@Component({
 ...
  template: `
  <button type="button" (click)="injectC1()" >Inject Component 1</button>
  <button type="button" (click)="injectC2()" >Inject Component 2</button>
+ <div class="grid">
+   <div class="container">this is static</div>
+    <div class="container">this is dynamic</div>
+ </div>
  `
})
export class AppComponent {
...
}
Targeting a Specific Area with ng-container
To precisely define the injection target, an ng-container with a template reference variable is used. We can then use @ViewChild to access this exact DOM location.
@Component({
...
,
  template: `
  <button type="button" (click)="injectC1()" >Inject Component 1</button>
  <button type="button" (click)="injectC2()" >Inject Component 2</button>
  <div class="grid">
    <div class="container">this is static</div>
    <div class="container">
+    <ng-container #targetSpace />
    </div>
  </div>
  `
})
export class AppComponent {
- private viewContainerRef = inject(ViewContainerRef);
+  @ViewChild('targetSpace', {
+    read: ViewContainerRef
+  })
+  private targetSpace!:ViewContainerRef;

  public injectC1(){
+    this.targetSpace.createComponent(Component1)
-    this.viewContainerRef.createComponent(Component1)
  }

  public injectC2() {
+    this.targetSpace.createComponent(Component2)
-    this.viewContainerRef.createComponent(Component2)
  }
}
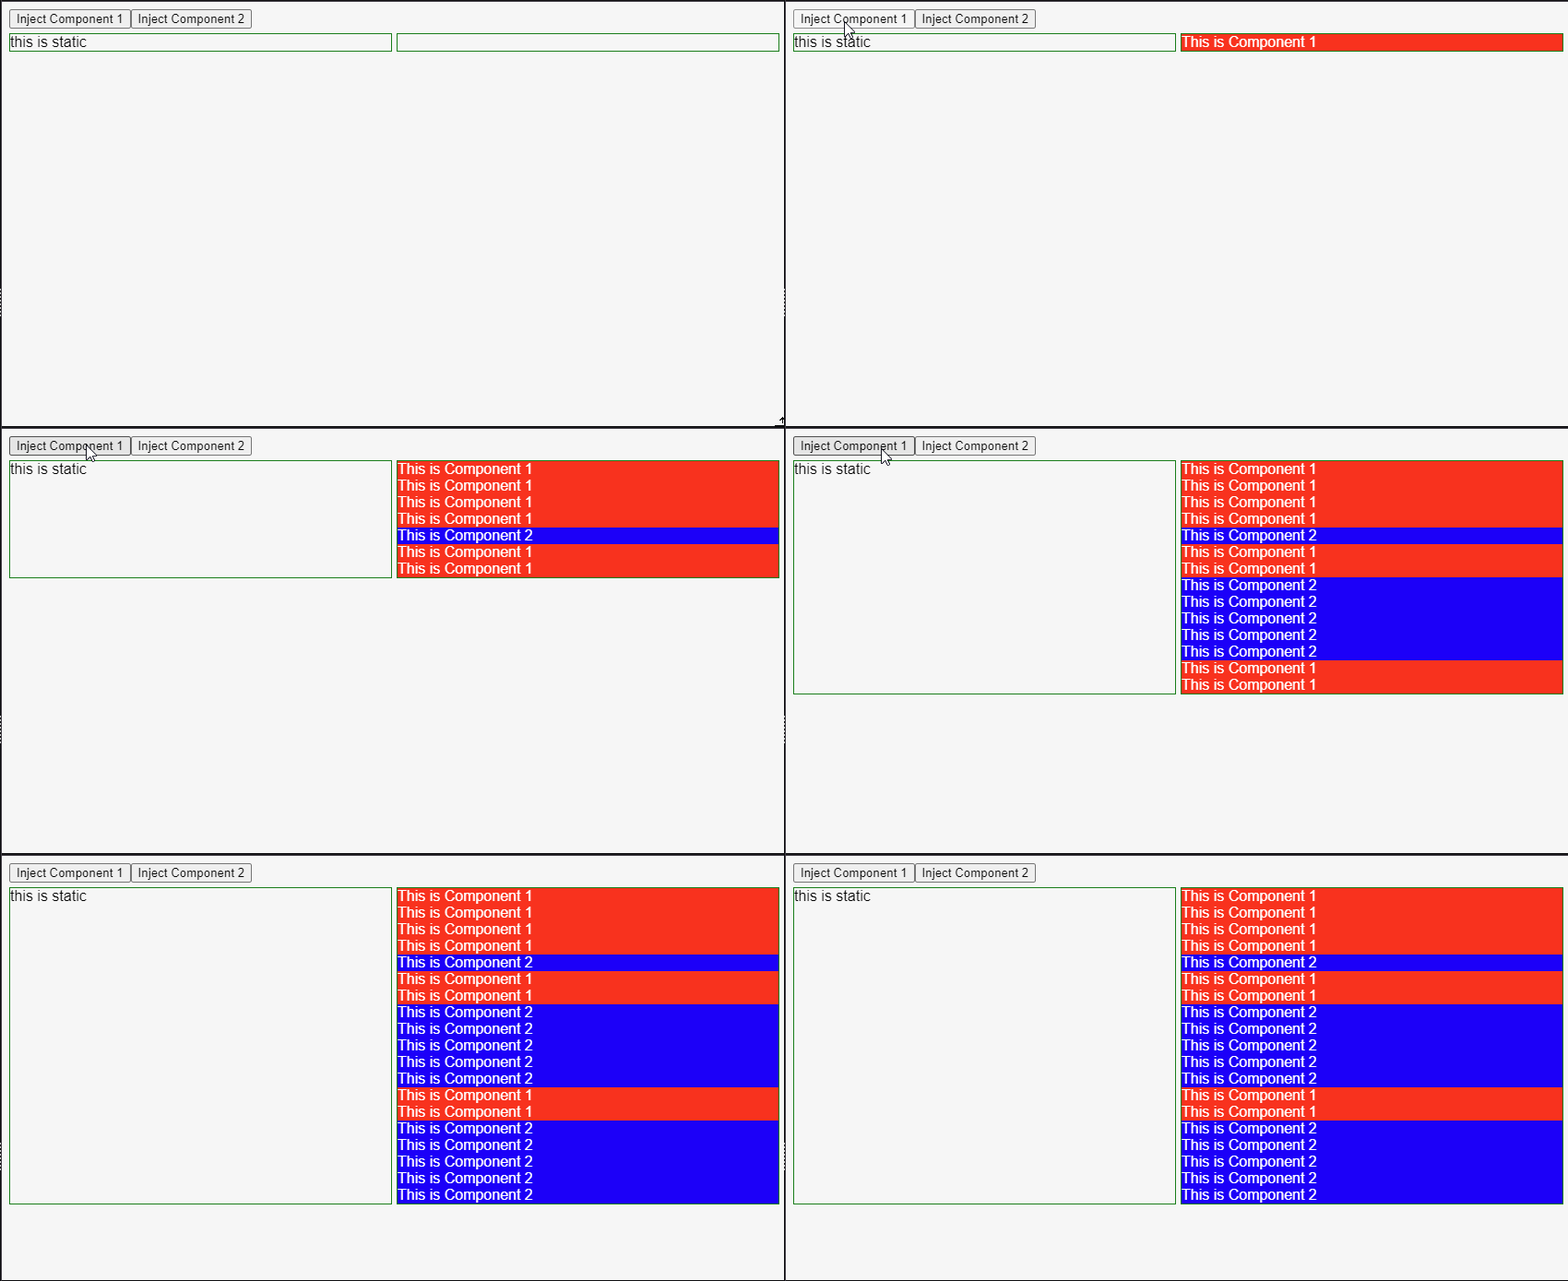
With this, the code now successfully injects components into the designated #targetSpace area.
Implementing Self-Removal
To allow components to destroy themselves, we'll use the output function. This is the modern equivalent of the @Output decorator. The child component emits an event on click, which the parent component subscribes to and handles the destruction.
For both Component1 and Component2, an output event named clicked is defined. In the template, this event is triggered using clicked.emit().
+ import {Component, ViewChild, ViewContainerRef, output} from "@angular/core";

@Component({
...
template: `
-  <div class="c1">This is Component 1</div>
+  <div class="c1" (click)="clicked.emit()">This is Component 1</div>
  `
})
export class Component1 {
+  public clicked = output<void>()
}

@Component({
...
template: `
- <div class="c2">This is Component 2</div>
+ <div class="c2" (click)="clicked.emit()">This is Component 2</div>
  `
})
export class Component2 {
+  public clicked = output<void>()
}
The removal logic rests with the parent component. It must hold a reference to each created component instance. Since output events are observables, the AppComponent can use the subscribe method to listen for the clicked event on each injected instance.
Each time `createComponent` is called, a reference is stored, pointing to that specific instance in memory. This ensures that clicking a component only removes itself, not any others. Understanding the difference between an object's reference and its instance in JavaScript is essential for managing dynamically created components effectively.
@Component({
 ...
})
export class AppComponent {
  ...

 public injectC1(){
-   this.targetSpace.createComponent(Component1)
+    const componentRef = this.targetSpace.createComponent(Component1)
+    componentRef.instance.clicked
+    .subscribe( () => {
+      componentRef.destroy();
+    })
  }

  public injectC2() {
-   this.targetSpace.createComponent(Component2)
+    const componentRef = this.targetSpace.createComponent(Component2)
+    componentRef.instance.clicked
+    .subscribe( () => {
+      componentRef.destroy();
+    })
  }
}
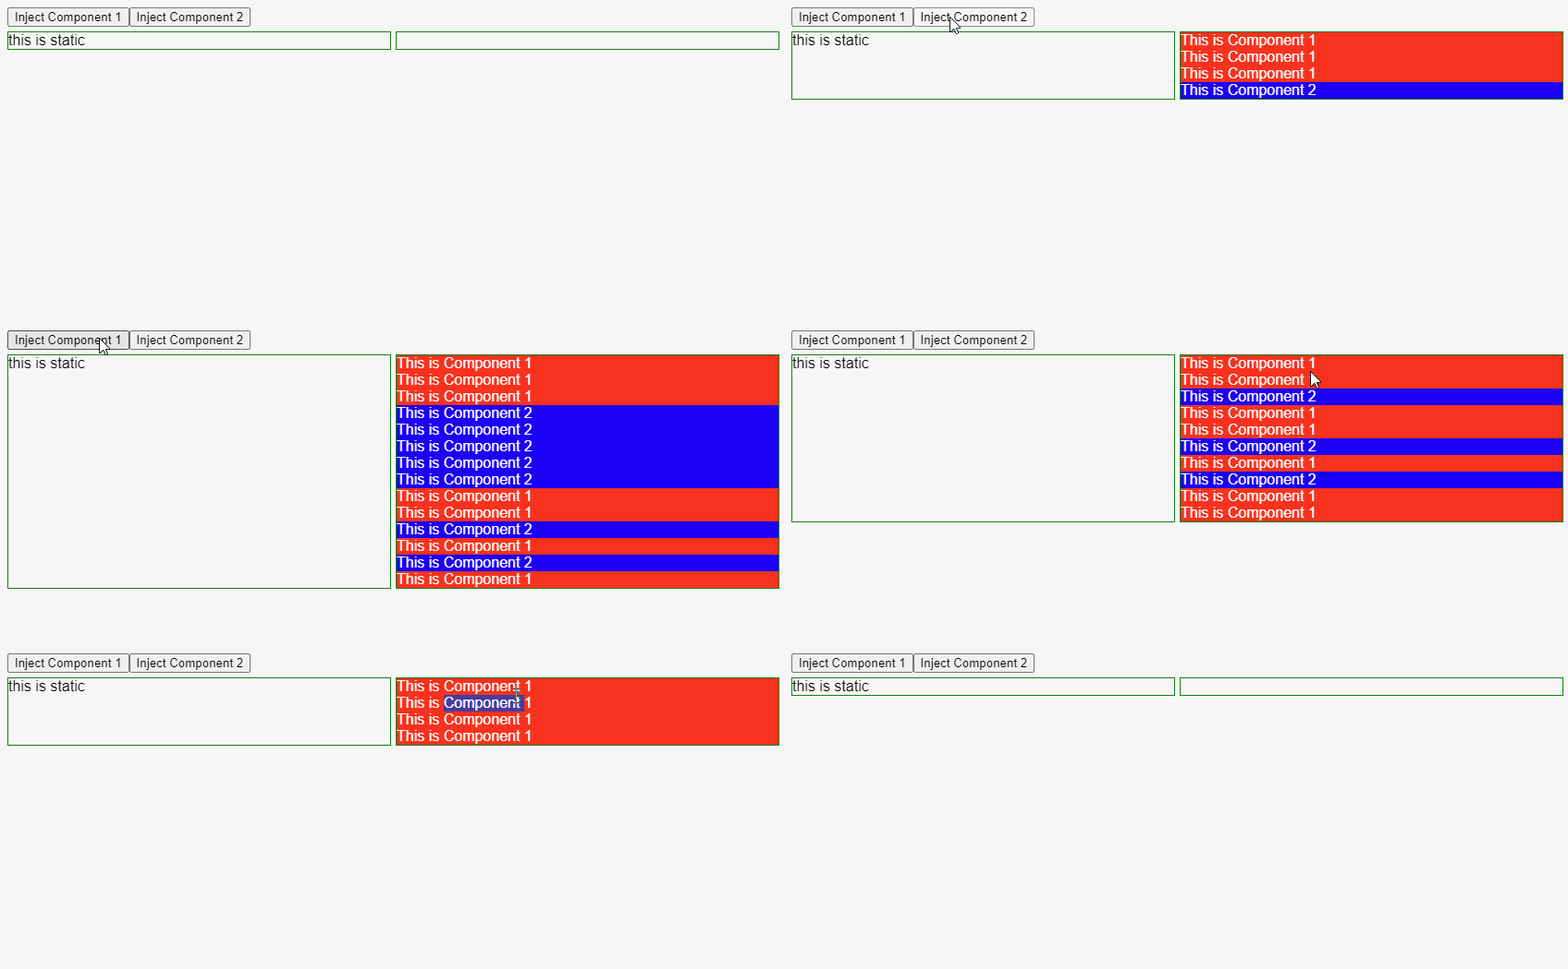
Now, each component will successfully remove itself from the DOM when clicked.
Managing Component Lifecycle on Destruction
When injecting and removing components dynamically, it's crucial to handle their destruction events. Angular 17 introduced features that streamline this process.
Using TakeUntilDestroyed, OutputToObservable, and DestroyRef
To manage subscriptions tied to a component's lifecycle, we can combine TakeUntilDestroy with OutputToObservable. First, a DestroyRef needs to be injected into each component. This allows us to define logic to run when the component is unmounted, often set up within the ngOnInit lifecycle hook.
Note that in Angular 16+, ngOnDestroy has become optional! This is because DestroyRef provides a more flexible way to clean up resources when a component is about to be destroyed.
@Component({
 ...
})
- export class Component1 {
+ export class Component1 implements OnInit {
+  public destroyRef = inject(DestroyRef);
  public clicked = output<void>();

+  ngOnInit() {
+    this.destroyRef.onDestroy(() => {
+      console.log('Component 1 was destroyed');
+    });
+  }
}

@Component({
 ...
})
- export class Component2 {
+ export class Component2 implements OnInit {
+  public destroyRef = inject(DestroyRef);
  public clicked = output<void>();

+  ngOnInit() {
+    this.destroyRef.onDestroy(() => {
+      console.log('Component 2 was destroyed');
+    });
+  }
}
The DestroyRef callback will execute when the component is destroyed. In this example, a message is logged to the console upon destruction. Now, let's update AppComponent to use OutputToObservable for its click handlers.
import {
  ViewContainerRef,
  Component,
  ViewChild,
  provideExperimentalZonelessChangeDetection,
  output,
  inject,
  DestroyRef,
  OnInit,
} from '@angular/core';

import { bootstrapApplication } from '@angular/platform-browser';

+ import {
+  outputToObservable,
+  takeUntilDestroyed,
+ } from '@angular/core/rxjs-interop';


...

@Component({
 ...
})
export class AppComponent {
  @ViewChild('targetSpace', {
    read: ViewContainerRef,
  })
  private targetSpace!: ViewContainerRef;

  public injectC1() {
    const componentRef = this.targetSpace.createComponent(Component1);
-    componentRef.instance.clicked.subscribe(() => {
+    outputToObservable(componentRef.instance.clicked)
+      .pipe(takeUntilDestroyed(componentRef.instance.destroyRef))
+      .subscribe(() => {
+        componentRef.destroy();
+      });
  }

  public injectC2() {
    const componentRef = this.targetSpace.createComponent(Component2);
-    componentRef.instance.clicked.subscribe(() => {
+    outputToObservable(componentRef.instance.clicked)
+      .pipe(takeUntilDestroyed(componentRef.instance.destroyRef))
+      .subscribe(() => {
+        componentRef.destroy();
+      });
  }
}
Once the click event is transformed into an observable, we can use the pipe operator with TakeUntilDestroy. This function takes the destroyRef of a given component instance and ensures the subscription is automatically cleaned up when that component is destroyed.
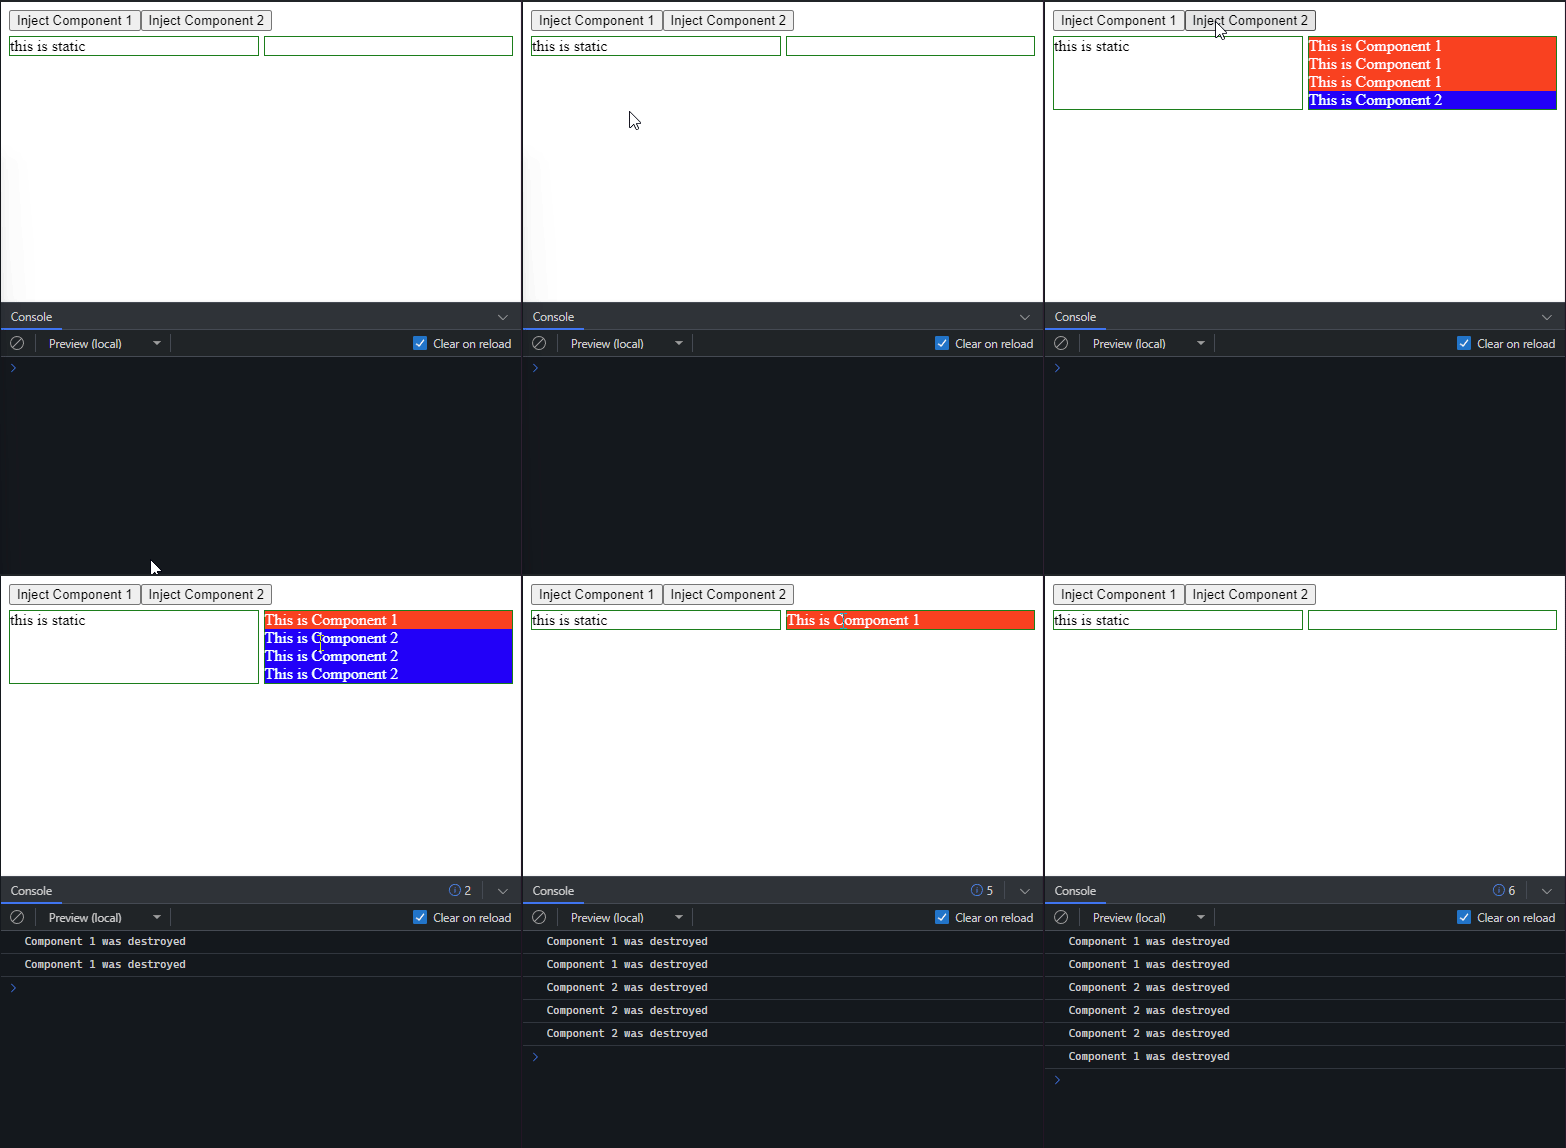
As a result, you'll see a console.log message in the browser's developer console each time a component is removed.
The Final Code
Below is the complete, working example.
| main.ts |
|---|
import {
  ViewContainerRef,
  Component,
  ViewChild,
  provideExperimentalZonelessChangeDetection,
  output,
  inject,
  DestroyRef,
  OnInit,
} from '@angular/core';
import {
  outputToObservable,
  takeUntilDestroyed,
} from '@angular/core/rxjs-interop';
import { bootstrapApplication } from '@angular/platform-browser';

@Component({
  standalone: true,
  selector: 'app-component1',
  styleUrl: 'c1.css',
  template: `
  <div class="c1" (click)="clicked.emit()">This is Component 1</div>
  `,
})
export class Component1 implements OnInit {
  public destroyRef = inject(DestroyRef);
  public clicked = output<void>();

  ngOnInit() {
    this.destroyRef.onDestroy(() => {
      console.log('Component 1 was destroyed');
    });
  }
}

@Component({
  standalone: true,
  selector: 'app-component2',
  styleUrl: 'c2.css',
  template: `
  <div class="c2" (click)="clicked.emit()">This is Component 2</div>
  `,
})
export class Component2 {
  public destroyRef = inject(DestroyRef);
  public clicked = output<void>();

  ngOnInit() {
    this.destroyRef.onDestroy(() => {
      console.log('Component 2 was destroyed');
    });
  }
}

@Component({
  standalone: true,
  imports: [Component1, Component2],
  selector: 'app-root',
  styleUrl: 'main.css',
  template: `
  <button type="button" (click)="injectC1()" >Inject Component 1</button>
  <button type="button" (click)="injectC2()" >Inject Component 2</button>
  <div class="grid">
    <div class="container">this is static</div>
    <div class="container">
    <ng-container #targetSpace />
    </div>
  </div>
  `,
})
export class AppComponent {
  @ViewChild('targetSpace', {
    read: ViewContainerRef,
  })
  private targetSpace!: ViewContainerRef;

  public injectC1() {
    const componentRef = this.targetSpace.createComponent(Component1);
    outputToObservable(componentRef.instance.clicked)
      .pipe(takeUntilDestroyed(componentRef.instance.destroyRef))
      .subscribe(() => {
        componentRef.destroy();
      });
  }

  public injectC2() {
    const componentRef = this.targetSpace.createComponent(Component2);
    outputToObservable(componentRef.instance.clicked)
      .pipe(takeUntilDestroyed(componentRef.instance.destroyRef))
      .subscribe(() => {
        componentRef.destroy();
      });
  }
}

bootstrapApplication(AppComponent, {
  providers: [provideExperimentalZonelessChangeDetection()],
});
| main.css |
|---|
.grid {
  margin-top:5px;
  display:grid;
  grid-template-columns: repeat(2, minmax(0, 1fr));
  gap:5px;
}
.container {
  border: 1px solid green;
}
| c1.css |
|---|
.c1{
  background-color:#FF0000;
  color:#FFF;
}
| c2.css |
|---|
.c2{
  background-color:#0000FF;
  color:#FFF;
}
Appendix: Working with NgModules
You might encounter projects that still use modules. Before Angular 16, modules were the standard way to organize code. They were often seen as cumbersome, taking time away from feature development. If a project relies on modules, the components to be injected must be listed in the module's declarations array:
@NgModule({
  /**
   * Declare your components to be injected in the declarations section
   */
  declarations: [
    AppComponent, // your main component
    ComponentToInject1, // component to be used on programatic injection
    ComponentToInject2, // component to be used on programatic injection
  ],
  imports: [BrowserModule],
  providers: [CurrentDateService],
  bootstrap: [AppComponent],
})
export class AppModule {}
Most of the standalone code examples will work here, but with a few key differences. Standalone and Modular components cannot be mixed in the same operation. Therefore, you must remove the standalone flag from the components:
@Component({
-  standalone: true,
  selector:'app-component2',
  styleUrl:'c2.css',
 template: `
  <div class="c2" (click)="clicked.emit()">This is Component 1</div>
  `
})
export class Component2 {
  public clicked = output<void>()
}
The main difference lies in the module definition and how it bootstraps the application.
Here is the final code adapted to use an NgModule:
| main.ts |
|---|
import {platformBrowser} from '@angular/platform-browser';
import { AppModule } from './app.module';

platformBrowser()
  .bootstrapModule(AppModule)
  .catch((err) => console.error(err));
| app,module.ts |
|---|
import { NgModule } from '@angular/core';
import { BrowserModule } from '@angular/platform-browser';

import { AppComponent } from './app.component';
import {Component1} from './c1.component';
import {Component2} from './c2.component';

@NgModule({
  declarations: [
    AppComponent,
    Component1,
    Component2,
  ],
  imports: [BrowserModule],
  providers: [],
  bootstrap: [AppComponent],
})
export class AppModule {}
| app.component.ts |
|---|
import {Component, ViewChild, ViewContainerRef} from "@angular/core";
import {Component1} from "./c1.component";
import {Component2} from "./c2.component";

@Component({
  selector:'app-root',
  styleUrl:'main.css',
  template: `
  <button type="button" (click)="injectC1()" >Inject Component 1</button>
  <button type="button" (click)="injectC2()" >Inject Component 2</button>
  <div class="grid">
    <div class="container">this is static</div>
    <div class="container">
    <ng-container #targetSpace />
    </div>
  </div>
  `
})
export class AppComponent {
  @ViewChild('targetSpace', {
    read: ViewContainerRef
  })
  private targetSpace!:ViewContainerRef;

  public injectC1(){
    const componentRef = this.targetSpace.createComponent(Component1)
    componentRef.instance.clicked
    .subscribe( () => {
      componentRef.destroy();
    })
  }

  public injectC2() {
    const componentRef = this.targetSpace.createComponent(Component2)
    componentRef.instance.clicked
    .subscribe( () => {
      componentRef.destroy();
    })
  }
}
| c1.component.ts |
|---|
import {Component, output} from "@angular/core";

@Component({
  selector:'app-component1',
  styleUrl :'c1.css',
  template: `
  <div class="c1" (click)="clicked.emit()">This is Component 1</div>
  `
})
export class Component1 {
  public clicked = output<void>()
}
| c2.component.ts |
|---|
import {Component, output} from "@angular/core";

@Component({
  selector:'app-component2',
  styleUrl :'c2.css',
  template: `
  <div class="c2" (click)="clicked.emit()">This is Component 2</div>
  `
})
export class Component2 {
  public clicked = output<void>()
}
| main.css |
|---|
.grid {
  margin-top:5px;
  display:grid;
  grid-template-columns: repeat(2, minmax(0, 1fr));
  gap:5px;
}
.container {
  border: 1px solid green;
}
| c1.css |
|---|
.c1{
  background-color:#FF0000;
  color:#FFF;
}
| c2.css |
|---|
.c2{
  background-color:#FF0000;
  color:#FFF;
}
Summary
Mastering programmatic injection can significantly simplify application architecture, making it more maintainable and easier to navigate, especially in complex, dynamic user interfaces.
Note: This article was updated on June 10, 2024, with a section on handling component destruction events. Special thanks to Jeff Getzin for suggesting this important topic.