
Intro
Welcome, Angular enthusiasts! This article takes a deep dive into component communication within your apps - covering everything from basic unidirectional data flow to intricate scenarios such as transmitting information through the router. A broad spectrum of communication techniques exists in Angular, but rather than exhaustively examining each one (which would turn this into an endless read), we'll offer a concise but comprehensive tour of the main strategies.
Be aware that certain methods discussed here will outperform others depending on the situation. Knowing the full range of options, their ideal use cases, and how they differ is crucial. Armed with this knowledge, you'll apply your own judgment to match the right solution to your specific problem, instead of using a one-size-fits-all approach.
Each technique is accompanied by executable code that you can run and experiment with on your own. The snippets in this article are kept intentionally minimal, so I highly suggest you explore the full implementations provided in that repository for a more complete picture.
Here's what we'll cover
- Input and Output
- Using the
@Inputand@Outputdecorators - Introducing the newer
input()andoutput()functions - Leveraging setters alongside the
@Inputdecorator - Inheritance patterns for
InputandOutput - Handling changes with the
OnChangeshook, or opting intocomputed()instead
- Using the
- Services with
@Injectable - Injection of components and directives
- Using template references (
#) - Projecting content
- Tapping into
@ContentChildand@ContentChildrenwith<ng-content> - Signal-powered queries via
contentChild()andcontentChildren()
- Tapping into
- Working with View and Query Lists
- Querying the DOM with
@ViewChildand@ViewChildrendecorators - Signal-based view queries using
viewChild()andviewChildren()
- Querying the DOM with
- Router-based communication
- Passing data through route segments and query strings (
/:idand?query=param) - Binding route inputs via the
withComponentInputBinding()helper - Sharing state through Routing State Objects
- Passing data through route segments and query strings (
Input, Output, Setter and ngOnChanges Lifecycle Hook
Input and Output in Angular
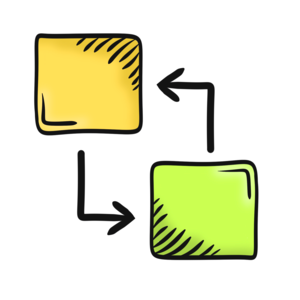
Now we turn to the classic mechanism for sibling component interaction in Angular — the duo that’s likely the most recognized: Input and Output. We’re going to cover both the older decorator syntax (marked by @) and the newer functional alternatives. Before diving into those, though, let’s consider a few real-world scenarios where Input and Output really come into play.
💡 Examples of Practical Uses of Input and Output
- Build more reactive components that alert their parents to user actions—think of a search field or a dropdown menu that signals state changes.
- Hand off data such as user profiles to a child component, while using
Outputto bubble up update requests back to the parent. - Move from a product listing to a detail screen, where
Inputcarries the chosen product’s identifier to the child component for rendering.
| Good/Bad | Description |
|---|---|
| ❌ | Providing Input and Output via metadata properties can be harder to understand and can be less concise. |
| ❌ | Component inheritance is rarely used in Angular, so you may never need this. |
| ⚠️ | With OnPush, changing object properties won't update the view - you must assign a new object reference. |
| ✅ | It's the standard way to communicate between components, well-tested and recommended. |
| ✅ | The newest Angular version lets you transform data through @Input() decorator's metadata transform function, similar to Setter. |
| ✅ | Always good to use and recommended with signals (with Signals from Angular 17+ as input() functions). |
| ✅ | input() and output() provide improved performance and change detection. |
| ✅ | Two-way binding simplifies code by reducing boilerplate for managing Input/Output pairs in common scenarios. |
| ✅ | Usage of model() function offers unification of Input and Output, which is typically useful in two-way data binding approaches. |
The Decorator-Based Classic Pattern
A well-established technique relies on @Input() and @Output() decorators, enabling child components to both accept incoming values and emit updates upward. Data flows into the child via bracket syntax [searchTerm]="myData", while return values travel back through an event binding (searchTermChange)="handle($event)", where the emitted payload is processed.
// Component with traditional `Input` and `Output`.
@Component({
  selector: 'app-search-box'
})
class SearchBoxComponent {
  // Receives data from parent.
  @Input()
  searchTerm = '';

  // Sends data to parent.
  @Output()
  searchTermChange = new EventEmitter<string>();
}

// Using in parent template with two-way binding approach.
<app-search-box [(searchTerm)]="searchTermInitial" />
Signals-Based Communication via input() and output()
Starting from Angular 17, a fresh pattern emerges—built on the input() signal and the output() function. It delivers gains in performance, refines change detection, and fits seamlessly into the signals ecosystem, positioning it as the preferred option for fresh projects.
// Modern approach with signal `input()` function and `output()` function.
@Component()
class SearchBoxComponent {
  initialValue = input<string>();
  searchTermChange = output<string>();
}
Inheriting Input and Output Properties
Although rarely seen in typical Angular codebases, the framework does allow child components to inherit Input and Output declarations from their base classes.
// Parent component with `Input`.
@Component({
  selector: 'app-base-card',
})
class BaseCardComponent {
  @Input()
  title = 'Header';
}

// Child component inheriting parent's `Input`.
@Component({
  selector: 'app-product-card',
})
class ProductCardComponent extends BaseCardComponent {
  // Child gets access to `title` property.
  constructor() {
    super();
    console.log(this.title);
  }
}
Setter Methods
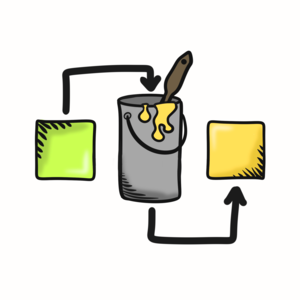
Looking to gain finer-grained command over your Input? With Angular, Setter methods give you the ability to catch and process incoming Input values ahead of assignment. Let's start by weighing the advantages and disadvantages:
| Good/Bad | Description |
|---|---|
| ❌ | Requires additional property for storing the value. |
| ❌ | More verbose than simple Input declarations. |
| ❌ | Input setters are executed individually, potentially leading to race conditions, if setters depend on the state of other inputs. |
| ❌ | Updating e.g. global updates from Setter or lifecycle hooks can cause NG0100 ExpressionChanged error. |
| ⚠️ | Improper use can cause side effects that you may not want (sometimes you might want them). |
| ✅ | Signals resolve these issues by ensuring a consistent state across all inputs and removing order dependencies entirely. |
| ✅ | Enables input validation on the fly. |
| ✅ | Allows data transformation as values come in. |
| ✅ | Can trigger side effects when new values change. |
// Example of `Setter` usage.
@Input()
set name(value: string) {
  console.log('New name:', value);
  // Store the value in component from setter.
  this._name = value.trim();
}
You can access the complete collection of examples for this topic by following this link.
How the ngOnChanges Lifecycle Hook Works
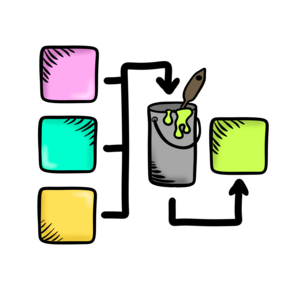
Let’s shift focus to ngOnChanges — an Angular lifecycle hook designed to watch your component’s Input properties. Whenever one of those Input values updates, the method triggers automatically and hands you a SimpleChanges object. From it, you can learn three facts: the exact Input that was altered, whether this update marks the initial change, and the prior value alongside the current one.
💡 Where ngOnChanges Shines in Real-World Scenarios
- Building undo/redo features by retaining snapshots of earlier values.
- Checking
Inputcombinations for correctness when several update in sync, such as applying cross-field validation rules.
| Good/Bad | Description |
|---|---|
| ❌ | Executes on every input change, which may affect performance if not used carefully. |
| ❌ | Runs for all input changes, even when you're interested in specific ones only. |
| ❌ | Requires setting up additional properties to track changes. |
| ❌ | It should be never used with signal Input. That's useless since we have computed signals. |
| ⚠️ | Runs first before ngOnInit Lifecycle Hook. |
| ⚠️ | Improper use can cause side effects that you may not want. |
| ⚠️ | With OnPush, changing object properties won't update the view - you must assign a new object reference. |
| ✅ | Efficiently handles multiple Input changes in a single lifecycle hook. |
| ✅ | Provides easy detection of first-time changes to Input properties. |
| ✅ | Enables comparison between previous and current Input values. |
// Component that tracks `Input` changes with `ngOnChanges`.
@Component()
class NameDisplay implements OnChanges {
  @Input() name = '';
  @Input() title = '';  // Adding a second input for title (Mr., Ms., Dr., etc).

  greeting = signal('Hello!')

  ngOnChanges(changes: SimpleChanges) {
    // Combine both inputs whenever either changes.
    if ('name' in changes || 'title' in changes) {
      const currentName = 'name' in changes ? changes['name'].currentValue : this.name;
      const currentTitle = 'title' in changes ? changes['title'].currentValue : this.title;

      // Create combined greeting.
      const fullGreeting = currentTitle
        ? `Hello, ${currentTitle} ${currentName}!`
        : `Hello, ${currentName}!`

      if ('name' in changes) {
        console.log('Name changed:', changes['name'].previousValue, '->', currentName);
      }

      if ('title' in changes) {
        console.log('Title changed:', changes['title'].previousValue, '->', currentTitle);
        this.greeting.set(fullGreeting);
      }
    }
  }
}
// Alternative solution that tracks `Input` with computed signals instead.
@Component()
class NameDisplay {
  name = input('');
  title = input('');

  // Create a computed signal that automatically updates when inputs change.
  greeting = computed(() => {
    const currentName = this.name();
    const currentTitle = this.title()

    console.log('Name or title updated:', { name: currentName, title: currentTitle })
    return currentTitle ? `Hello, ${currentTitle} ${currentName}!` : `Hello, ${currentName}!`;
  });
}
A comprehensive collection of code samples for this subject is available at this location.
Angular Services
In Angular, services are a versatile feature that go beyond simple dependency injection—they excel at facilitating data exchange between components. By registering a service at the root level, you establish a shared, centralized mechanism that enables seamless communication across your application.
Imagine a service as a communal repository: components can both contribute data to it and retrieve data from it, allowing for a bidirectional exchange that feels natural and cohesive.
💡 Real-World Scenarios Leveraging Services
- Maintain user authentication details like login status, personal preferences, and session identifiers to ensure a uniform experience throughout the app.
- Consolidate all HTTP requests in one service layer, streamlining how data is fetched, submitted, and processed by various components.
- Offer reusable helper functions (such as data formatting or validation routines) that are accessible to multiple components.
| Good/Bad | Description |
|---|---|
| ❌ | Requires understanding of Angular's dependency injection system. |
| ⚠️ | Simple class that can be injected, usually used with Signals or Observables. |
| ✅ | Enables component communication without creating direct dependencies. |
| ✅ | Works across multiple components throughout your application. |
| ✅ | Provides a centralized place for sharing data and logic. |
| ✅ | Makes testing easier by separating concerns. |
// Service that manages shared data.
@Injectable({
  providedIn: 'root'
})
class CartStore {
  cart = signal(['candy', 'chips', 'soda']);

  addItem(item: string) {
    this.cart.set([...this.cart(), item]);
  }
}

// Component using the shared service.
class CartComponent {
  cartStore = inject(CartStore);
  cart = this.cartStore.cart;

  addItem(item: string) {
    this.cartStore.addItem(item);
  }
}
All code samples tied to this section are located in this repository folder.
Template Variables in Angular
In Angular, template variables — denoted with the # symbol — offer a handy mechanism inside templates. They act as lightweight references, letting parent and child components easily communicate. Essentially, you assign aliases to components, enabling them to interact directly.
💡 Typical Scenarios Where Template Variables Shine
- Handling component state directly from the parent template (e.g., controlling expand/collapse panels or pagination).
- Working with forms (retrieving values, invoking validation, or clearing form inputs).
- Gaining immediate access to DOM elements from the template, bypassing the need for extra logic in the component class.
| Good/Bad | Description |
|---|---|
| ❌ | Limited scalability due to tight coupling between components. |
| ❌ | Variables are only accessible within the template unless passed through events. |
| ❌ | Timing issues can occur if accessing elements before they're rendered. |
| ✅ | Enables bi-directional communication between parent and child components within templates. |
| ✅ | Works smoothly with ViewChild and template functions for element access. |
| ✅ | Provides quick, direct access to component references. |
| ✅ | Reduces boilerplate code by eliminating need for Input, Output, or services. |
| ✅ | Gives parent components full access to child methods and properties. |
// Child component with todo management.
@Component()
class TodoListComponent {
  todos = ['Learn Angular', 'Build an app'];

  addTodo() {
    this.todos.push(`New Todo ${this.todos.length + 1}`);
  }
}

// Parent component using template variable.
@Component({
  template: `
    <todo-list #todoList/>
    <button (click)="addTodo(todoList)">Add Todo</button>
  `,
  imports: [TodoListComponent]
})
class ParentComponent {
  addTodo(todoList: TodoListComponent) {
    // Access child component through template variable.
    todoList.addTodo();
  }
}
A complete collection of code samples for this section is available at this link.
Angular Component Injection

A seldom-explored pattern worth examining is component injection. Through this mechanism, a child component can obtain a direct reference to its parent by having that parent injected into its own constructor. Although this isn't a typical practice for regular components, it proves valuable in specialized scenarios.
💡 Practical Scenarios for Component Injection
- In intricate form setups, child fields rely on the surrounding form's context.
- For nested menus, individual items require access to the parent menu's state.
- Within wizards or steppers, each step needs visibility into the central wizard's state.
| Good/Bad | Description |
|---|---|
| ❌ | Rare in real-world applications, which may make the code less maintainable for teams. |
| ❌ | Creates strong dependencies between components, reducing reusability. |
| ❌ | Limited to one-way communication from child to parent. |
| ❌ | Only works with direct parent components in the hierarchy. |
| ⚠️ | Rare usage with components but not with directives. |
| ✅ | Simplifies parent-child communication in specific cases without extra services. |
| ✅ | Provides direct access to parent methods and properties from the child component. |
// Parent component that child can access.
@Component()
class DialogManagerComponent {
  openDialog() {
    alert('Opening modal dialog!');
  }

  closeDialog() {
    alert('Closing modal dialog!');
  }
}

// Child component with injected parent.
class DialogButtonComponent {
  constructor(private dialogManager: DialogManagerComponent) {
    this.dialogManager.openDialog(); // Direct access to parent's methods.
  }

  handleClick() {
    this.dialogManager.closeDialog();
  }
}
The complete collection of code samples for this section is available at this repository location.
ViewChild and ViewChildren
How ViewChild Works in Angular
With ViewChild, a parent component gains direct access to a child component appearing in its own template. It automatically grabs the initial match it finds in the view, which suits scenarios requiring a single, clear-cut link between a parent and a child.
💡 Where ViewChild Shines in Real Projects
- Driving UI widgets like modals or accordions via code.
- Working with external libraries for maps, charts, or date pickers.
- Handling groups of similar elements, such as tabs, carousel pages, or list rows.
| Good/Bad | Description |
|---|---|
| ❌ | Creates tight coupling between parent and child components, which can limit reusability. |
| ❌ | Limited to direct parent-child relationships only. |
| ❌ | Extensive use of ViewChild can make applications harder to maintain and test. |
| ✅ | Provides direct access to child component's public methods and properties. |
| ✅ | Enables real-time access to child component's state and behavior. |
Traditional approach
Connecting a parent to its child has long been done through the @ViewChild() decorator. To set up that link, you supply the child component's class within the decorator itself.
// Child component with a method parent can call.
@Component({
  selector: 'app-search-input',
})
class SearchInputComponent {
  clearInput() {
    console.log('Clearing search input');
  }

  focus() {
    console.log('Focusing search input');
  }
}

// Parent component that controls the child.
@Component({
  selector: 'app-search-bar',
  template: `
    <app-search-input />
    <button (click)="resetSearch()">Reset Search</button>
  `,
  imports: [SearchInputComponent]
})
class SearchBarComponent {
  @ViewChild(SearchInputComponent)
  searchInput: SearchInputComponent;

  resetSearch() {
    this.searchInput.clearInput();
    this.searchInput.focus();
  }
}
Modern Signal-Based Approach
With Angular 17.2, the viewChild() signal function offers a more elegant alternative to using ViewChild directly—this API has been stable since Angular 19. The child component can be targeted by passing either a template reference variable or its component class as the argument.
// Parent component using signal-based ViewChild.
@Component({
  template: `
    <app-search-input />
    <button (click)="resetSearch()">Reset Search</button>
  `,
  imports: [SearchInputComponent]
})
class SearchBarComponent {
  searchInput = viewChild<SearchInputComponent>(SearchInputComponent);

  resetSearch() {
    this.searchInput().clearInput();
    this.searchInput().focus();
  }
}
You can find a comprehensive set of examples covering this topic here.
Understanding ViewChildren in Angular
After mastering ViewChild, its counterpart ViewChildren extends your toolkit. This powerful feature enables a parent component to interact with several child components or elements simultaneously within its template. Whereas ViewChild singles out one element, ViewChildren returns a QueryList that holds every matching element.
💡 Examples of Practical Uses of ViewChildren
- Handling dynamic component collections (todo items, form fields, list items).
- Working with form array controls in dynamic forms.
- Coordinating multiple tab panels or accordion sections.
Traditional Approach
The conventional technique relies on the @ViewChildren() decorator to gain access to multiple child components originating from the parent. The decorator points to the child component's class—mirroring ViewChild—yet it exposes every instance rather than only a single one.
// Parent component that manages multiple children.
@Component({
  selector: 'app-tab-group',
  template: `
    @for (tab of ['Dashboard', 'Profile', 'Settings']) {
      // Child components we want to access.
      <app-tab/>
    }
    <button (click)="closeAllTabs()">Close All Tabs</button>
  `,
  imports: [TabComponent]
})
class TamGroupComponent {
  @ViewChildren(TabComponent)
  tabs: QueryList<TabComponent>;

  closeAllTabs() {
    this.tabs.forEach(child => child.close());
  }
}

// Child component with method that parent can call.
@Component({
  selector: 'app-tab',
})
class TabComponent {
  close() {
    console.log('Closing tab');
  }
}
Modern Signal-Based Approach
With Angular 17 and beyond, a more streamlined method for utilizing ViewChildren emerges through the viewChildren() signal function. While the underlying mechanics remain unchanged, this new API takes advantage of Angular's reactive signals to boost efficiency and simplify the overall code structure.
// Parent component using signal-based ViewChildren.
@Component({
  selector: 'app-tab-group',
  template: `
    @for (tab of ['Dashboard', 'Profile', 'Settings']) {
      // Child components we want to access.
      <app-tab/>
    }
    <button (click)="closeAllTabs()">Close All Tabs</button>
  `,
  imports: [TabComponent]
})
class TabGroupComponent {
  tabs = viewChildren<TabComponent>(TabComponent);

  closeAllTabs() {
    this.tabs().forEach(child => child.close());
  }
}

// Child component with method that parent can call.
@Component({
  selector: 'app-tab',
})
class TabComponent {
  close() {
    console.log('Closing tab');
  }
}
All examples related to this topic are available in this repository.
Accessing Projected Content with ContentChild and ContentChildren
When building Angular components, you'll often need to work with content that gets projected into them. The ViewChild and ViewChildren decorators give you access to elements defined directly in your own template, but ContentChild and ContentChildren are the tools for reaching content that a parent passes between your component's opening and closing tags. This capability is particularly valuable for building flexible, reusable components that accept arbitrary markup from their consumers.
💡 Real-World Scenarios for Content Projection
- A card component can ship with a fixed visual structure—think designated header, body, and footer sections—while letting each parent component inject its own markup into those sections. This way, you can maintain a consistent card look across the entire app while tailoring the content for each specific use case, avoiding code duplication.
- Imagine a tab set component that handles all the UI for switching between tabs. The content for each individual tab can be provided entirely by a parent component, meaning you can create wildly different tab panels without touching the core tab navigation logic—the same dropdown or tab bar works everywhere, and the parent decides what each tab displays.
| Good/Bad | Description |
|---|---|
| ❌ | Content is only available after the ngAfterContentInit lifecycle hook, not during initialization. |
| ❌ | Component initialization cannot access or manipulate projected content. |
| ❌ | Lacks strong typing, making it harder to ensure type safety for projected content. |
| ⚠️ | Using multiple <ng-content> slots adds complexity, but enables powerful component compositions when used carefully. |
| ✅ | Creates flexible and reusable components through content projection features. |
| ✅ | Provides direct access to projected content, making it easy to interact with nested elements. |
How the Conventional Method Works
In the conventional method, developers rely on the @ContentChild() and@ContentChildren() decorators in conjunction with the <ng-content> element. Together, these tools offer a broad range of options for handling and projecting content dynamically.
// Parent component with content projection slots.
@Component({
  selector: 'app-panel',
  template: `
    <div class="parent">
      <ng-content select="[header]" />
      <ng-content />
    </div>
  `
})
class PanelComponent implements AfterContentInit {
  @ContentChild('title')
  title: ElementRef;

  @ContentChildren(PanelItemComponent)
  items: QueryList<PanelItemComponent>;

  ngAfterContentInit() {
    // Access projected content after initialization.
    this.items.forEach(item => console.log(item.title));
  }
}

// Child item component.
@Component({
  selector: 'app-panel-item',
  template: `<div class="item">{{ text() }}</div>`
})
class PanelItemComponent {
  text = signal('');
}

// Example usage in a parent component.
@Component({
  template: `
    <app-panel>
      <h2 title>Title Here</h2>
      <app-panel-item text="First item" />
      <app-panel-item text="Second item" />
    </app-panel>
  `
})
Signal-Driven Querying in Angular 17+
Starting with Angular 17, the contentChild() and contentChildren() APIs offer a signal-enabled alternative to the older query methods. These functions behave in a similar fashion yet expose reactive signal capabilities.
A comprehensive collection of code samples for this approach is available on the linked repository page.
Handling Route Parameters & Query Strings
Routing Parameters
Here, we look at how route parameters enable data sharing across Angular components. This approach proves valuable when components lack a direct connection in the component hierarchy.
Begin by defining your routes in the configuration and supplying them to provideRouter(routes)—or RouterModule for the legacy setup. After that, values can be transmitted via the routes during navigation, making them readily available to your components.
💡 Where Routing Params Shine
- The typical scenario involves jumping to a detail page for a particular item.
- In multi-step flows or workflows, they preserve the active step, such as
/checkout/step-2. - They enable focused data views, for instance
products/category/electronics.
| Good/Bad | Description |
|---|---|
| ❌ | Params are always strings, so you may need to parse or convert complex data types. |
| ❌ | Sensitive data passed through the URL can be visible and prone to tampering. |
| ✅ | Allows passing data between components without direct parent-child relationships, enabling more flexible component interaction. |
| ✅ | Data in URL params is preserved during navigation and can be shared easily through links. |
| ✅ | Components can easily access params via ActivatedRoute service. |
// Sets up the routing configuration.
const routes = [
  { path: 'details/:id', component: DetailsComponent },
];

const appConfig = {
  providers: [provideRouter(routes)]
};

// Parent component handles navigation to details.
@Component({
  selector: 'app-product',
  template: `
    <button (click)="showDetails()">Show details</button>
    <router-outlet />
  `,
  imports: [RouterOutlet]
})
class ProductComponent {
  router = inject(Router);

  showDetails() {
    this.router.navigate(['/details', '123']);
  }
}

// Child component uses the route parameter value.
@Component({
  selector: 'app-details',
})
class DetailsComponent implements OnInit {
  productId = signal('');
  activatedRoute = inject(ActivatedRoute);

  ngOnInit() {
    this.activatedRoute.params.subscribe(params => { // Remember to unsubscribe in real app or use `toSignal`.
      this.productId.set(params['id']); // Will use product id '123' from router params.
    });
  }
}
A comprehensive collection of examples for this topic is available here.
Routing Queries in Angular
When it comes to optional parameters, routing queries are the ideal fit. In contrast to route parameters, which reside directly in the URL path, query parameters appear after a question mark (?) in the address, such as localhost:4200/table?sort=asc. This makes them particularly useful for storing state like sort order, filters, or pagination info.
Adjusting or clearing these parameters doesn't necessitate a change to the core route path. The components can subsequently consume these values to control their rendering or logic.
How Are Query Parameters Different from Route Parameters?
- Examining the URL structures illustrates the distinction:
- Route parameters:
/details/123 - Query parameters:
/details?id=123&sort=name&order=asc
- Route parameters:
💡 Examples of Practical Uses of Routing Queries
- Filtering and Sorting, e.g. list view data are common uses for query parameters.
- Pagination - query parameters can be used to store the current page number.
- Search terms - useful for any application that has a search feature, enhancing user experience by allowing direct navigation to pre-searched results.
- Pre-populating forms through link, query parameters can carry the necessary data to populate form fields.
| Good/Bad | Description |
|---|---|
| ❌ | Can only handle string data, complex data types need parsing or conversion. |
| ❌ | Sensitive data is exposed in the URL, making it vulnerable to tampering. |
| ❌ | Handling large or nested data with query params can become messy. |
| ❌ | Browser URL length limits restrict passing large data sets via query params. |
| ❌ | Not suitable for real-time communication, only for passing state during navigation. |
| ✅ | Easy to share application state across users or sessions. |
| ✅ | Persist in the URL, allowing bookmarking and sharing links with current state. |
| ✅ | Ideal for optional, changeable data that doesn't define the route. |
| ✅ | Can pass multiple key-value pairs in a single URL, making it flexible for data sharing. |
// Parent component handles navigation to details page.
@Component({
  selector: 'app-product',
  template: `
    <button (click)="showDetails()">Show details</button>
  `,
})
class ProductComponent {
  router = inject(Router);

  showDetails() {
    this.router.navigate(['/details'], {
      queryParams: {
        id: '123',
        name: 'John',
        role: 'Developer'
      }
    });
  }
}

// Child component displays the query parameter values.
@Component({
  selector: 'app-details',
  template: `
    <p>ID: {{ id() }}</p>
    <p>Name: {{ name() }}</p>
    <p>Role: {{ role() }}</p>
  `,
})
class DetailsComponent implements OnInit {
  route = inject(ActivatedRoute);
  queryParams = toSignal(this.route.queryParams, {
    initialValue: {} as Params
  });

  id = computed(() => this.queryParams()['id'] || '');
  name = computed(() => this.queryParams()['name'] || '');
  role = computed(() => this.queryParams()['role'] || '');
}
All the working examples for this topic are available here.
Leveraging withComponentInputBinding() for Smoother Routing
This feature, introduced in Angular 16 and later, simplifies routing and data retrieval considerably. Here is how withComponentInputBinding() streamlines the process of linking your routes to your data.
With this method, the framework establishes a seamless link between the parameters encoded in your URL and the Input properties of your component. It functions as an automated conduit, removing the need for boilerplate in your setup.
All you need to do is import withComponentInputBinding() from the Angular router. After activation, the router takes care of mapping the URL segments to the component's Input fields every time a route is visited.
💡 Where Routing Input Binding Makes a Difference
- Using route data to display a detail view (for example,
/products/:productId) - Rendering article views with a category and slug (for example,
/blog/:category/:slug)
| Good/Bad | Description |
|---|---|
| ❌ | Can make routing more complex if used too much. |
| ❌ | Not great for complex data that changes often. |
| ❌ | Data only flows one way. |
| ❌ | Types aren't checked automatically. |
| ⚠️ | It can only be used with the routed components. |
| ✅ | Clean, organized route setup. |
| ✅ | Components can talk through routes. |
| ✅ | Less code needed to implement simple solution. |
// Parent component handles navigation.
@Component({
  template: `
    <button (click)="viewProductDetails('155')">View Product</button>
    <router-outlet />
  `,
  imports: [
    ProductDetailsComponent,
    RouterOutlet
  ],
})
class ProductListComponent {
  router = inject(Router);

  viewProductDetails(productId: string) {
    this.router.navigate(['/product', productId]);
  }
}

// Child component receives the productId.
@Component({
  template: `
    Product ID: {{ productId() }}
  `,
})
class ProductDetailsComponent {
  // Updates to '155' when you click the button in the parent.
  productId = input('');
}
A comprehensive collection of examples for this topic is available at this location.
Routing State Object
During Angular navigation, a transient state object can be included within the navigation extras. This object exists only for the duration of that specific navigation—it vanishes entirely upon a page refresh.
The navigate() method on the Router service or a bound [routerLink] directive both allow you to attach this state object to your navigation call.
Upon reaching the target component, the state is retrievable via the Router service. Access typically happens inside the ngOnInit hook or straight in the constructor—your choice depends on the exact moment the data is required.
💡 Practical Applications for State Objects
- Form pre-filling—when moving to a form component, state objects let you carry over relevant data from the previous screen to inject into the fields.
- Action confirmation—state objects are handy for forwarding results or confirmation notices to the next component after a user triggers an action.
- URL safety for sensitive info—any confidential data you'd rather keep out of the address bar can take a ride via the state object instead.
| Good/Bad | Description |
|---|---|
| ❌ | Does not work properly with SSR, because it loses the state. |
| ❌ | Impossible to share a link to a specific application state with another user. |
| ❌ | State object is not inherently type-safe by default. |
| ⚠️ | Data passed in the state object is not retained after a refresh or if the navigation history is modified. |
| ⚠️ | Actually, it's possible to pass data via URL and retrieve it even after a refresh (it depends how object is created), but in this example, we don't want to add anything more to the URL. We did it in previous topics about routing communication via queries or params. |
| ✅ | Ability to pass complex data objects between components during navigation. |
| ✅ | The router state object allows you to pass sensitive or personal data between components without exposing it in the URL |
// Parent component navigate to next component.
@Component({
  template: `
    <button (click)="navigateToDetails()">View Full Profile</button>
  `,
})
class ProfileSummaryComponent {
  router = inject(Router);

  changeRoute() {
    this.router.navigate(['profile-details'], { state: { userProfile: { name: 'JohnDoe', memberSince: 2020 }}});
  }
}

// Child component receives the state object.
@Component()
class ProfileDetailsComponent {
  router = inject(Router);

  constructor() {
    this.router.events.pipe(
      filter(e => e instanceof NavigationStart),
      map(() => this.router.getCurrentNavigation()?.extras.state),
    ).subscribe(profileData => { // Remember to unsubscribe in real app or use `toSignal`.
      if (profileData) {
        console.log('Received profile data:', profileData);
      }
    });
  }
}
A comprehensive set of examples for this topic is available in this repository.
Outro
Here we are, at the conclusion of this article. We've gone through every method of component communication in Angular, demonstrating both established patterns with the "old" syntax and newer approaches built on signals.
Keep in mind that all code samples live in the GitHub repository.
I trust this guide proved useful! Don't hesitate to post any questions in the comments below, or should you spot bugs in the code, feel free to submit an issue on GitHub.