The Role of E2E Testing in Angular Development
End-to-end testing has evolved from an optional extra into a core component of building dependable Angular applications. With projects expanding and delivery timelines tightening, relying solely on unit tests no longer provides sufficient coverage. E2E testing allows us to verify our applications from the perspective of the end user.
Contemporary tools such as Playwright streamline this process, offering a more intuitive and efficient approach that aligns well with modern development practices. For Angular teams, adopting Playwright translates to shipping features with greater assurance and fewer uncertainties.
Overview of Playwright
Playwright, created by Microsoft, is a cutting-edge E2E testing framework designed for web applications. It provides robust, fast, and cross-browser testing capabilities. The framework comes with built-in support for multiple browsers, accommodates testing across various device configurations, and includes advanced features like automatic waiting, network interception, and parallel test execution. These capabilities are engineered to help developers identify issues early in the development cycle and guarantee a seamless experience for users.
Key Advantages of Playwright

Playwright combines performance, dependability, and adaptability in a manner that seamlessly integrates into modern web testing workflows. Whether you're creating rapid smoke tests or comprehensive end-to-end scenarios, it offers a uniform API and toolset that address practical requirements. Below are its distinguishing features:
- browser coverage: execute tests across Chromium, WebKit, and Firefox,
- OS support: runs seamlessly on Windows, macOS, and Linux – whether on local machines or in CI environments, and supports both headless and headed execution,
- multi-language support: offers SDKs for TypeScript, JavaScript, Python, .NET, and Java,
- mobile simulation: emulates mobile browsing using Chrome for Android and Mobile Safari profiles,
- reduced flakiness: auto-waiting and web-first assertions help eliminate intermittent test failures and render manual wait times unnecessary,
- test isolation: each test runs in a lightweight browser context, ensuring complete separation without compromising performance,
- advanced scenarios: handles multi-tab operations, cross-origin requests, multiple user profiles, and access to Shadow DOM,
- developer utilities: comes equipped with a code generator, an interactive inspector, and a trace viewer for comprehensive debugging,
- efficient execution: offers quick startup times and the ability to run tests concurrently,
- session reuse: supports persistent authentication states that can be shared across tests while preserving independence between them.
What sets Playwright apart is its thoughtful design that leverages modern browser capabilities, delivering a development experience that feels both intuitive and powerful.
Comparing Playwright with Cypress
Both Playwright and Cypress are well-established E2E testing frameworks that now offer a range of similar features. However, their underlying architecture differs significantly, which can impact how they integrate into your specific workflow.
Cypress operates within the browser context, providing an exceptionally tight feedback loop and a polished developer experience. This in-browser execution, however, introduces constraints—such as challenges with multi-tab workflows and limitations when interacting with elements outside the browser's standard environment.
Playwright, by contrast, functions externally relative to the browser, granting direct access to browser internals. This gives testers the ability to manage scenarios involving multiple tabs and cross-origin navigations with ease. The trade-off arises in specific configurations, such as setting up persistent authentication or complex session handling, which may necessitate additional initial setup effort.
Ultimately, both tools are robust and feature-complete. Your choice will depend on the particular needs of your application, the development style of your team, and the degree of architectural flexibility you anticipate requiring.
Project Setup and Configuration
The Demonstration Application
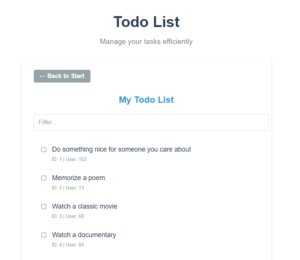
For the purposes of this guide, we'll utilize a straightforward Angular application. This example features two main routes: a Start page serving as the initial landing view, and a Todos page containing a basic task management component.
While the application is minimal, it's thoughtfully designed to illustrate a variety of E2E testing scenarios that reflect real-world usage patterns, all while keeping the codebase uncluttered.
The Start page:

The Todos page:
Adding Playwright to Your Project
To incorporate Playwright into your Angular application, use the following terminal command:
npm init playwright@latestRunning this command initiates the setup process, which will ask you to configure several options:
- language selection: choose between TypeScript (recommended) or JavaScript,
- directory structure: tests will be placed in a tests folder by default, or in an e2e folder if the tests directory is already taken,
- CI configuration: an option to automatically generate a GitHub Actions workflow for continuous integration,
- browser binaries: control whether to download Playwright's browser executables at this time (standard behavior is to install them).
Setting up Playwright with Nx
For teams using Nx for workspace management, Playwright can be installed with the following command tailored to your existing project:
nx g @nx/playwright:configuration --project=your-app-nameThis command installs the necessary plugin and configures the project within the Nx environment, ensuring compatible and streamlined integration.
Using the VS Code Extension Option
Alternatively, Playwright offers a dedicated Visual Studio Code extension. This extension provides a suite of features for authoring, executing, and debugging your tests directly from your IDE. Its specific capabilities will be covered in more detail in a subsequent section.
Configuring Playwright for Angular
The Playwright configuration file offers a high degree of flexibility, allowing you to tailor test execution to your needs. The primary configuration resides in a playwright.config.ts (or .js) file located in your project's root.
Here are the most frequently used configuration options you'll likely interact with:
- testDir: determines the folder where Playwright searches for test files, relative to the config file's location,
- workers: sets the maximum number of concurrent workers used for parallel test execution. This can be a fixed number (for example, 4) or a percentage based on available CPU cores (such as '75%'),
- projects: lets you define various execution environments, including different browsers or device profiles. You can configure separate projects for Chromium, Firefox, and WebKit, and include specific settings like device emulation. Projects can also share resources such as fixtures or storage state, enabling you to reuse an authenticated session across different test suites.
- webServer: specifies a local development server to start before the test suite runs. Here’s an example configuration:
webServer: {
    command: 'npm run start:dev',
    url: 'http://localhost:4200',
  }
These configuration choices are highly adaptable. You can combine them to enable a variety of testing strategies, such as running the suite across multiple browsers, distributing tests in parallel, or aligning with distinct CI environments.
For the examples in this article, we'll maintain the default Playwright configuration to concentrate on core testing concepts.
Designing an Organized Test Suite
Good test architecture is key to achieving reliability, clarity, and easy maintenance. This section discusses methods for structuring Playwright tests to keep your automation efficient and capable of growing with your application.
Directory Structure and File Organization
Our example application employs a modular E2E test structure, designed for maintainability and to mirror the app's own page architecture. The layout we use is as follows:
- shared/: houses common elements and components that multiple test suites use, such as universal buttons, dialogs, or search fields,
- <page>/: groups all testing logic for a specific page or feature area, including page objects, fixtures, and component definitions.
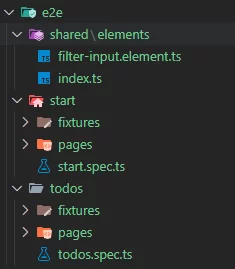 Each page directory is further organized into:
 - elements/: contains modular UI components that can be isolated and reused,
- pages/: implements the Page Object Model, where classes define the interaction methods for each page,
- fixtures/: holds setup procedures for creating consistent test preconditions, including state management and navigation logic specific to the page,
- <page>.spec.ts: contains the actual test cases, defining the expected behaviors for the page.
Adopting structure like this ensures your tests remain organized and easy to extend, simplifying maintenance as your application evolves.
Building Your Initial End-to-End Test
Playwright's automatic synchronization is one of its standout capabilities. Before executing any action, Playwright waits for all relevant actionability checks to succeed. This means you don't have to manually reason about timing or add artificial delays — the framework handles that for you. For instance, if you attempt to click a button, Playwright will first verify that the button is visible, enabled, and ready to receive the click.
Playwright also has a thoughtful approach to assertions. Instead of expecting an immediate match, assertions define conditions that should hold true eventually. Playwright will retry these assertions until they pass or the timeout expires, making tests far less brittle in scenarios where server response times vary.
Each test runs in a fully isolated browser context. Even though multiple tests may share a single browser process, every test functions like it's using a fresh browser profile. This isolation prevents data leakage or state contamination between tests, so results are reproducible and consistent.
test('Test 1', async ({ page }) => {
  // page is isolated
});

test('Test 2', async ({ page }) => {
  // page is completely isolated from the page in Test 1
});
A Simple Test Case
For our first test, we'll verify that the start page shows the expected welcome message — specifically the text "Welcome to Angular E2E with Playwright".
To make the element easy to target, we'll assign it a data-testid attribute. The markup looks like this:
<header class="header">
    <h1 data-testid="start-page-welcome-message" class="title">Welcome to Angular E2E with Playwright</h1>
    <p class="subtitle">A demonstration project for end-to-end testing</p>
  </header>
Once that's in place, we can use Playwright's getByTestId() method — provided by the built-in Page fixture — to locate and interact with the element. Here's the test:
import { expect, test } from './fixtures';

test.describe('Start Page', () => {
  test('has welcome message', async ({ page }) => {
    await page.goto('/start');

    await expect(page.getByTestId('start-page-welcome-message'))
    .toContainText('Welcome to Angular E2E with Playwright');
  });
});
This test is functional, but there's room for improvement. Each test case currently has to repeat the navigation call await page.goto('/start'), and relying directly on data-testid selectors scattered through the test can obscure the intent of what's being verified.
To eliminate duplication and improve readability, we can adopt the Page Object Model (POM) pattern. POM helps us hide UI details — such as locators and navigation — inside dedicated classes, leaving the test itself focused on the high-level behavior it validates.
Let's refactor this test using POM.
Adopting the Page Object Model
Page Object Models are a proven technique for structuring scalable test suites. By centralizing selectors and page interactions, POM reduces redundancy and makes tests easier to update when the UI changes. When you need to adjust a selector, you change it in one place — not across dozens of tests.
Let's walk through migrating our start page test to that pattern.
Step 1: Building the Page Class
First, we'll create a dedicated class for the start page. This class will contain all page-specific interactions — including how to navigate there and which elements are relevant. We'll place it in start.page.ts under the pages folder.
import type { Locator, Page } from '@playwright/test';

export class StartPage {
  readonly welcomeMessage: Locator = this.page.getByTestId('start-page-welcome-message');

  constructor(private readonly page: Page) {}

  async goto() {
    await this.page.goto('/start');
  }
}
Here, we've defined a locator for the welcome message along with a goto() method that handles navigation. All page detail lives in this single place.
Step 2: Simplifying the Test
Now the test no longer deals with raw DOM queries or explicit navigation. It simply uses the startPage instance, which exposes the page's elements and actions directly.
import { expect, test } from '@playwright/test';
import { StartPage } from './pages';

test.describe('Start Page', () => {
  test('has welcome message', async ({ page }) => {
    // Create an instance of the StartPage class and navigate to the page
    const startPage = new StartPage(page);
    await startPage.goto();

    await expect(startPage.welcomeMessage)
    .toContainText('Welcome to Angular E2E with Playwright');
  });
});
That's better, but we're still doing a bit of manual housekeeping — creating the class instance and calling goto() every time. A custom fixture can absorb that boilerplate.
Step 3: Introducing a Custom Fixture
Playwright's fixture model is designed to give each test precisely what it needs. Fixtures are scoped per test, so every test inherits a clean slate. You're already using fixtured resources when you write tests with the ({ page }) argument — that's Playwright's built-in page fixture providing a fresh page.
We can extend the base fixture with our own startPage instance. The fixture will handle the navigation automatically before each test runs, letting the test body focus exclusively on behavior.
Here's the custom fixture defined in start.fixture.ts (located in the fixtures directory):
import { test as base } from '@playwright/test';

import { StartPage } from '../pages';

export const test = base.extend<{ startPage: StartPage }>({
  startPage: async ({ page }, use) => {
    // Setup of the fixture
    const startPage: StartPage = new StartPage(page);
    await startPage.goto();

    // Use the fixture value in the test
    await use(startPage);

    // Potential teardown of the fixture
    // e.g. await startPage.close();
  },
});

export { expect } from '@playwright/test';
With this fixture, every test receives a startPage that's already pointing at the right URL.
The refactored test becomes much more concise:
import { expect, test } from './fixtures';

test.describe('Start Page', () => {
  test('has welcome message', async ({ startPage }) => {
    await expect(startPage.welcomeMessage)
    .toContainText('Welcome to Angular E2E with Playwright');
  });
});
The custom fixture removes all setup noise from the test body. What remains is clearly about the expected behavior, improving readability and simplifying ongoing maintenance.
The Payoffs of the Page Object Model
Refactoring around POM delivers tangible advantages that compound over time:
- cuts duplication: navigation and selectors are written once and reused everywhere,
- enhances clarity: tests describe intent rather than implementation mechanics, making them easier to follow,
- streamlines updates: UI changes require edits only in the page objects, keeping the test suite aligned with the UI quickly,
- supports growth: the architecture stays organized and easy to extend as the suite expands.
Reusable UI Elements
Just as we created page objects for whole pages, we can apply the same idea to smaller, reusable widgets — like buttons, inputs, or other shared controls. This pattern keeps tests consistent and easy to maintain when working with components that reappear across the app.
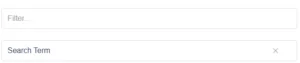
Let's build a reusable element for FilterInputComponent. This element will encapsulate how we interact with the filter field: typing values and resetting it when needed.
Step 1: Tagging the Component
First, we need to ensure the component, its input, and its reset button are easy to target in tests. We'll add data-testid attributes to each of these parts in FilterInputComponent.
Here's the component class after tagging:
@Component({
  selector: 'app-filter-input',
  templateUrl: './filter-input.component.html',
  styleUrl: './filter-input.component.scss',
  host: {
    'data-testid': 'filter-input-component',
  },
})
export class FilterInputComponent {
  // …
}
And here's the template, with data-testid attributes on both the input and reset button:
<div class="filter-container">
  <input
    type="text"
    placeholder="Filter..."
    class="filter-input"
    data-testid="filter-input"
    [(ngModel)]="searchTerm"
    (ngModelChange)="emitSearchTerm()"
  />

  @if (filterText()) {
  <button class="filter-reset" data-testid="filter-input-reset" (click)="resetFilter()">✕</button>
  }
</div>
Step 2: Crafting the Reusable Element
With the test IDs in place, we'll create a FilterInputElement class that provides clean methods for interacting with the filter input and its reset control.
We'll add this class to a new file, filter-input.element.ts, inside the shared/elements directory. Here's the implementation:
import type { Locator, Page } from '@playwright/test';

export class FilterInputElement {
  private readonly container: Locator = this.parent.getByTestId('filter-input-component');

  readonly input: Locator = this.container.getByTestId('filter-input');
  readonly resetButton: Locator = this.container.getByTestId('filter-input-reset');

  constructor(private readonly parent: Locator | Page) {}

  async fillInput(text: string): Promise<void> {
    await this.input.fill(text);
  }

  async clearInput(): Promise<void> {
    await this.resetButton.click();
  }
}
The FilterInputElement exposes two methods: fillInput(text) enters text into the field, and clearInput() clicks the reset button to wipe the value. This abstraction keeps the test code concise and focused on what the user is trying to do.
Step 3: Wiring it into a Page Object
Next, we'll build a page object for our todos view and embed the FilterInputElement inside it. This lets us access the filter's functionality directly from the context of the todos page.
The TodosPage class is defined as follows:
export class TodosPage {
  // Add the filter input element to the page class
  readonly filterInput: FilterInputElement = new FilterInputElement(this.page);

  constructor(private readonly page: Page) {}

  async goto() {
    await this.page.goto('/todos');
  }
}
Now the filterInput element is accessible through the TodosPage instance.
Step 4: Setting up the Fixture
We'll create a fixture for the todos page exactly as we did for the start page.
export const test = base.extend<{ todosPage: TodosPage }>({
  todosPage: async ({ page }, use) => {
    // Setup of the fixture
    const todosPage: TodosPage = new TodosPage(page);
    await todosPage.goto();

    // Use the fixture value in the test
    await use(todosPage);
  },
});

export { expect } from '@playwright/test';
Step 5: Composing the Test
Finally, we can write a test that exercises the filter input on the TodosPage. Using the filterInput from the todosPage fixture, we can verify that typing a value into the field works correctly.
Here's the test:
import { expect, test } from './fixtures';

test.describe('Todos Page', () => {
  test('input should have correct value', async ({ todosPage }) => {
    todosPage.filterInput.fillInput('Test value');

    await expect(todosPage.filterInput.input).toHaveValue('Test value');
  });
});
This test uses fillInput from the FilterInputElement to type the phrase "Test value", and then confirms the field's value matches.
Handling Authentication
Playwright makes it possible to run tests in isolated contexts while also reusing authentication state when needed. This is done by loading persisted session data from storage. The standard approach is to create a separate setup project — essentially a first-run script that signs in and captures the resulting session state to a file. This setup project is added as a dependency in the Playwright configuration, so subsequent tests start from an already-authenticated state.
You'll find detailed instructions and examples in the Official Playwright Documentation.
Executing and Debugging Tests
To run your test suite, use this command:
npx playwright test For projects using Nx, end-to-end tests are launched with:
nx e2e <PROJECT-NAME> By default, Playwright executes tests in every browser defined in the configuration file. Testing happens in headless mode by default, so all output goes straight to the terminal.
For a richer workflow, you can enable UI Mode to debug tests step by step. This mode includes a locator picker for pinpointing elements and watch mode, which restarts tests automatically when files change.
Add the –ui flag to the test command to activate UI Mode:
npx playwright test --uiThis opens a graphical interface where you can observe test execution live.
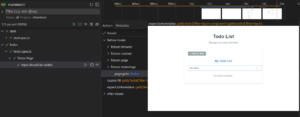
The screenshot below shows a timeline of a test run for the Todos page, breaking down each step's sequence and duration. This view is especially useful when debugging or checking performance.
The Playwright Inspector
Launching tests with the –debug flag starts the Playwright Inspector. This also opens the browser in headed mode and resets the test timeout to 0. Running the full suite with –debug processes tests one at a time, spawning a fresh browser window and Inspector for each individual test.
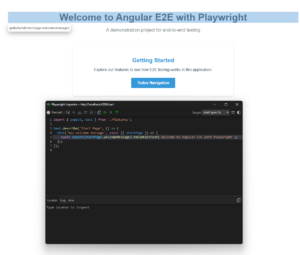
The Inspector allows you to play, pause, and step through each action. The current step is highlighted both in the test code and in the live browser, giving you a clear view of the process. To jump directly to a specific point, insert page.pause() in your test to halt execution at that line.
The locator picker is also built right in. Hovering over elements in the browser reveals the locator that matches that element in your code. Clicking places that locator into the Inspector's input field, ready to copy into your tests.

Parallelizing Tests
Out of the box, Playwright launches multiple worker processes to run test files concurrently. Inside a single file, tests execute one after another within the same worker.
To enable parallelism inside a file globally, set fullyParallel: true in the Playwright config. Alternatively, apply it per project in the configuration. For stricter control, parallel execution can be enabled for selected suites with test.describe.configure({ mode: 'parallel' });.
To turn off parallel execution entirely, set workers: 1 in the config or pass –workers=1 from the command line. With parallelism disabled, test files run in alphabetical order, one after another.
Integrating CI/CD

Playwright-based e2e tests run smoothly on virtually any CI platform. For specifics, check the Continuous Integration or Setting up CI pages in the official documentation.
Bonus: VS Code Extension
For regular Playwright users, the Playwright Test for VSCode extension is an excellent companion. It embeds Playwright directly into VS Code and puts a full toolkit at your fingertips.
Installation is easy. Open the command palette and select "Install Playwright". The extension walks you through the setup – pick the browsers you need and optionally add a ready-made GitHub Actions workflow for CI.

Additional prompts let you choose the browsers and add the GitHub Actions workflow.
Once active, the Test Explorer panel shows up. From here, launch a single test or the whole suite, enable watch mode for reruns on save, or switch to debug mode for troubleshooting right inside VS Code.
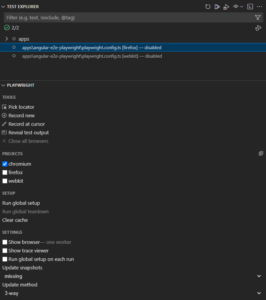
Extra utilities include a Pick Locator tool for grabbing selectors straight from the browser, plus a test recorder. If you want to see the browser in action, toggle "Show browser" to enter headed mode.
In my experience, the Playwright extension has become my go-to. It's intuitive, fast, and keeps everything in a single window. For anyone using Playwright on a daily basis, I recommend giving it a shot – it makes the whole process much smoother.
Summary
Playwright delivers powerful end-to-end testing for Angular apps while staying surprisingly approachable for developers. We covered setup in this article, wrote several example tests, and looked at some standout features that set Playwright apart for modern web development.
The surface hasn't even been scratched. Playwright also comes with capabilities such as screenshot-based visual comparisons, network request interception, multi-viewport and device testing, and plenty more. Whether you are validating responsive designs or intricate user journeys, there is likely a built-in feature for it.
For a modern, fast, and flexible approach to E2E testing – particularly within Angular – Playwright is definitely worth a look.