
Shifting a Legacy Server-Rendered Site to Angular Incrementally
I am currently developing a proof-of-concept project aimed at incrementally migrating a conventional server-rendered website to Angular. The goal is to share insights from our experiments, hoping this write-up proves useful to those undertaking a similar transition.
Our existing platform comprises numerous pages, making a full replacement in a single release impractical. Instead, we plan for the old interface and the new Angular-based UI to operate side-by-side over several iterations, gradually swapping out sections.
We evaluated two primary strategies:
1. Embedding Angular within the server-generated pages of the legacy site.
2. Adopting Angular as the main shell, with portions of the static site loaded inside iframes.
To clarify the discussion, the remainder of this article refers to the following page layout.
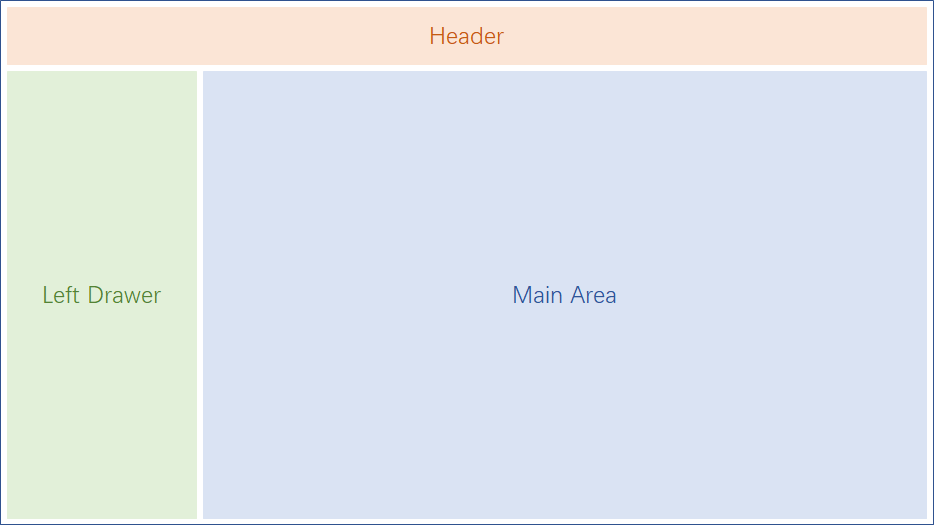
Strategy 1 – Integrating Angular into the Traditional Site
Our initial approach was to swap out specific sections of a server-rendered page with Angular components. Specifically, we targeted the "Main Area" for replacement, trying out two techniques.
Technique A: On-Demand Angular Bootstrapping in Specific Sections
Consider a basic scenario with the static HTML for the above layout.
<body>
   <div class="header"><span>Header</span></div>
   <div class="container">
      <div class="left-drawer">
         <span>Left Drawer</span>
      </div>
      <div id="main" class="main-area">
         <div class="action-bar">
            <div onclick="navigateTo('app-page1')" class="action-item">Page1</div>
            <div onclick="navigateTo('app-page2')" class="action-item">Page2</div>
         </div>
         <div class="text-area">
            <span>Main Area</span>
         </div>
      </div>
   </div>
</body>
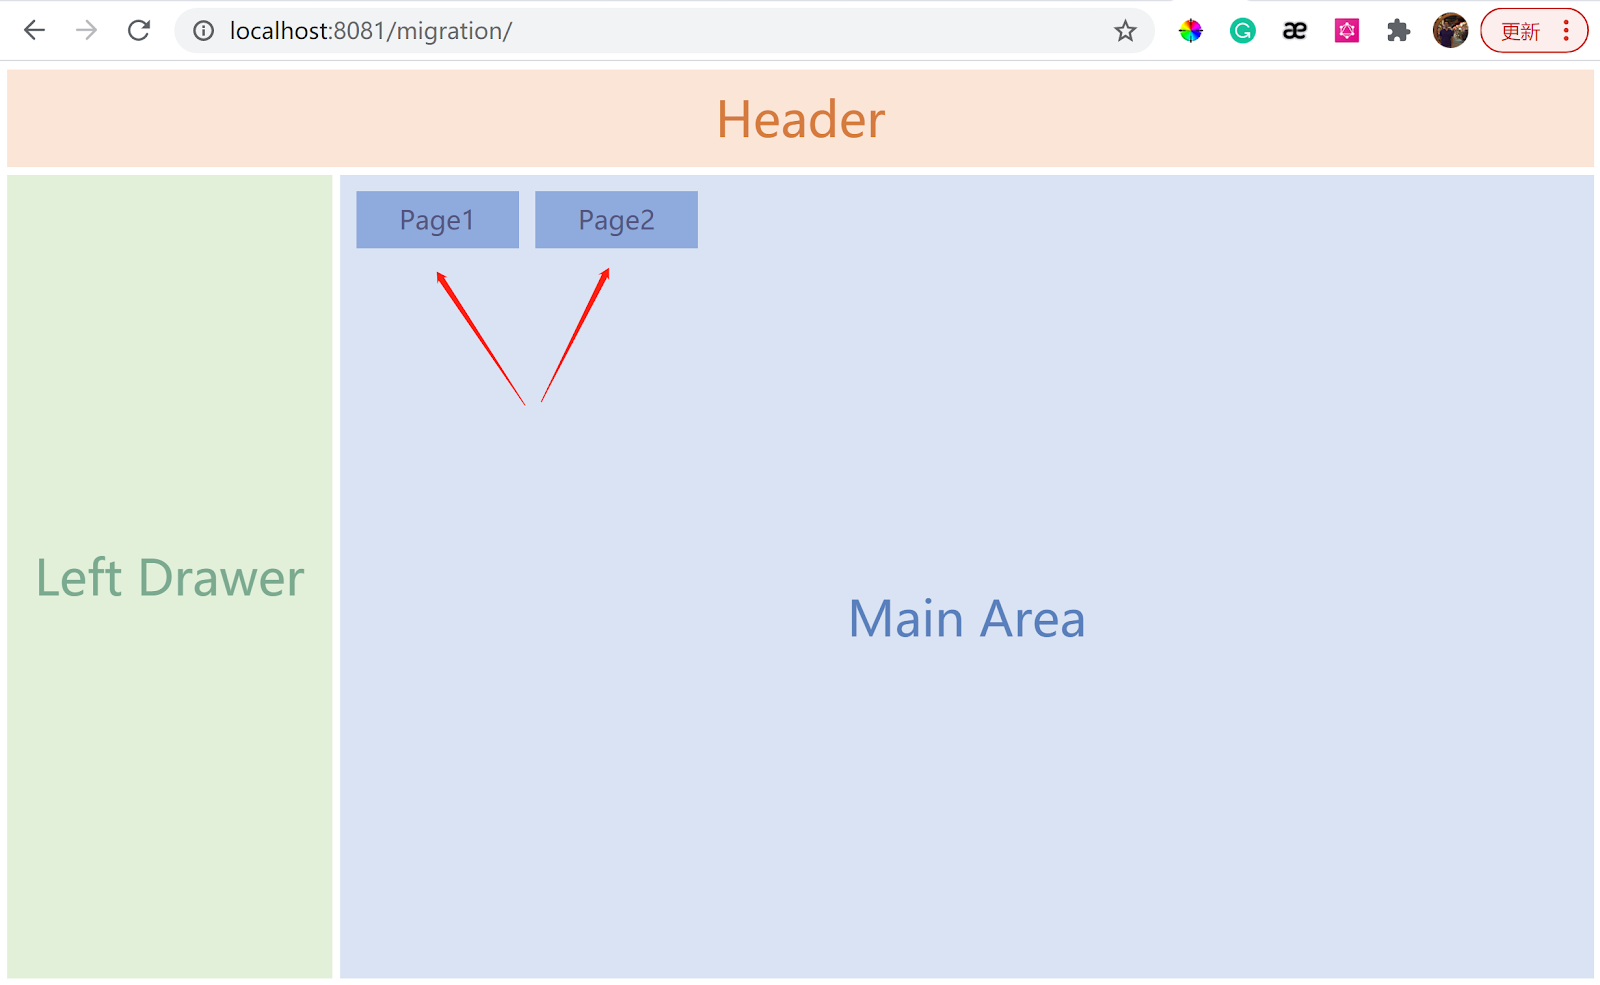
The "Main Area" contains two buttons that route to Angular-driven views. The "navigateTo" method inserts an Angular-specific HTML tag and adds the necessary scripts to launch Angular.
function navigateTo(tagName) {
    var mainArea = document.getElementById("main");
    var newTag = document.createElement(tagName);
    mainArea.parentNode.appendChild(newTag);
    ...
}
This function's primary job is to inject the Angular component's HTML tag and add the script to trigger the bootstrapping process. For convenience, this tag could also be inserted server-side.
Now for the Angular side: we set up a new project featuring two components, "app-page1" and "app-page2". Each acts as a root component for its corresponding view. The module configuration is updated as follows:
const entryComponents = [AppComponent, Page1Component, Page2Component];

@NgModule({
  declarations: [
    AppComponent,
    Page1Component,
    Page2Component
  ],
  imports: [
    BrowserModule,
    AppRoutingModule
  ],
  providers: [{provide: APP_BASE_HREF, useValue : '/migration' }],
  entryComponents: entryComponents,
  bootstrap: []
})
export class AppModule {
  constructor(private resolver: ComponentFactoryResolver) { }
  ngDoBootstrap(appRef: ApplicationRef) {
    for (const componentDef of entryComponents) {
        const factory = this.resolver.resolveComponentFactory(componentDef as Type<{}>);
        if (document.querySelector(factory.selector)) {
            appRef.bootstrap(factory);
            break;
        }
    }
  }
}
Two key points to note:
- The
bootstraparray in the NgModule should be left empty. - A custom
ngDoBootstrapmethod is required. It scans the document and initializes the desired component.
The implementation looks like this:
An alternative strategy relies on the URL. When a user clicks the “Page2” button, the URL becomes “/migration/page2”. The AppModule then examines the final URL segment to decide which component to bootstrap:
const entryComponents = [AppComponent, Page1Component, Page2Component];
const rootComponentsMap = {
  page1: Page1Component,
  page2: Page2Component
};

@NgModule({
...
})
export class AppModule {
  constructor(private resolver: ComponentFactoryResolver) { }
  ngDoBootstrap(appRef: ApplicationRef) {
    const lastSegment = window.location.href.split('/').pop();
    if (rootComponentsMap[lastSegment]) {
      const factory = this.resolver.resolveComponentFactory(rootComponentsMap[lastSegment] as Type<{}>);
      appRef.bootstrap(factory);
    }
  }
}
Handling it via the HTML tag proved more straightforward for us, since inserting such tags is easy from the server side.
One interesting aspect is the behavior when both 'app-page1' and 'app-page2' tags coexist and are bootstrapped in the same ngDoBootstrap call. The result is that both components get instantiated.
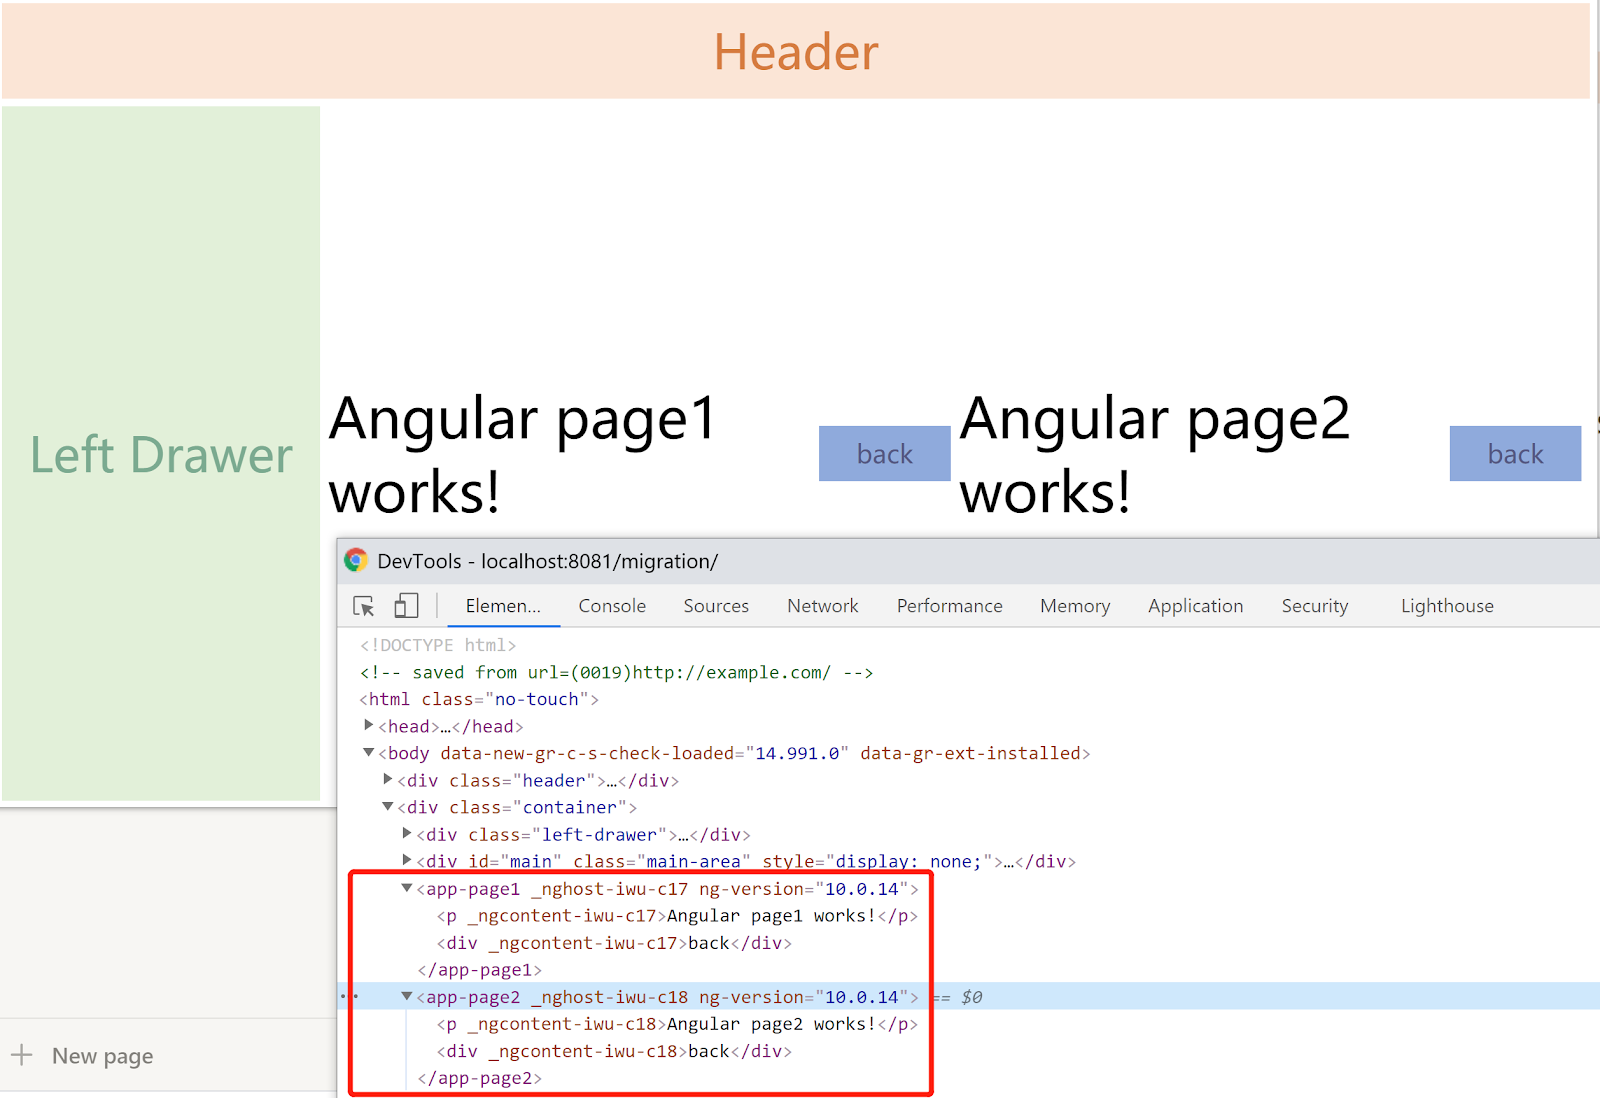
This opens up the possibility of replacing multiple sections, or even individual components, within the page—a topic worth exploring further.
Technique B: Single Bootstrap with Lazy Component Rendering
For scenarios where the "Main Area" is populated via Ajax calls, we aim to bootstrap Angular only once, rather than on each navigation to a new view.
This is achievable using Angular's dynamic component loader. We trigger Angular's bootstrapping in the static page's onload event, but initially render just an invisible root element. Later, when the user navigates, the loader brings in the relevant component and makes it visible.
export class AppComponent {
  pageMap = {
     page1: Page1Component,
     page2: Page2Component
  };

  ...
  loadComponent(pageName) {
    pageMap = {
       page1: Page1Component,
       page2: Page2Component
    }

    const componentFactory = this.componentFactoryResolver.resolveComponentFactory(pageMap[pageName]);

    const viewContainerRef = this.angularHost.viewContainerRef;
    viewContainerRef.clear();

    const componentRef = viewContainerRef.createComponent<PageComponent>(componentFactory);
    // componentRef.instance.data = parameter if needed;
  }
  ...
}
Details for this approach are available in the dynamic component loader guide.
With this strategy, a messaging mechanism between the legacy code and Angular is necessary. Since both function within the same context, options include global window objects, post messages, or custom events.
Strategy 2 – Hosting the Traditional Site Inside Angular
Here, we reconstruct the page frame—header and left drawer—using Angular, then introduce an iframe component that loads the legacy content within it.
The original site includes its own header and left-drawer. In the iframe's onload handler, we can conceal these elements, even adjusting some layout and style rules to create a more cohesive experience. This flexibility is a notable benefit of this method. It's also essential to show a loading indicator while the iframe and its adjustments execute.
If the content within the iframe refreshes, the old header and drawer might reappear. A MutationObserver is used to detect such changes and promptly hide them again.
watchSomeElementChange(element: any): void {
  const observer = new MutationObserver(e => {
    if (e[0].addedNodes) {
      for (const item of Object.keys(e[0].addedNodes)) {
        const dom = e[0].addedNodes[item];
        if ('header' === dom.id) {
          this.adjustLegacyPageUI();
        }
      }
    }
  });

  observer.observe(element, { childList: true });
}
A key advantage here is that both user interfaces can operate concurrently. Users have the freedom to interact with either variant.
Given that our legacy and Angular apps share the same origin, we sidestepped most typical iframe complications. We did address the issue of iframe navigation affecting the browser's history, though that warrants its own discussion.
Final Thoughts
Both approaches carry their own set of trade-offs, and the right choice depends on project specifics and constraints. For our use case, strategy 2 was selected, driven by the benefits of simultaneous UI operation and the styling flexibility it offers.