
Introducing Scully
Scully, developed and maintained by HeroDevs as an open source project, is the first Static Site Generator built specifically for Angular. This post explores how it works and demonstrates how to generate a static blog with it.
Understanding SSG and JAMstack
Static Site Generators have become increasingly popular, with the JAMstack architecture gaining significant traction since its introduction in 2017. The approach offers several advantages:
- Websites can operate entirely without server-side code
- Deployment is possible on any static hosting provider, such as Netlify
- Static pages render correctly even when JavaScript is disabled
JAM stands for JavaScript, APIs, and Markup. The concept involves using JavaScript to retrieve data from APIs and then combining that data with markup to produce static web pages.
A Static Site Generator is essentially a tool that processes all project resources and produces a fully static website. Unlike dynamic sites that rely on API calls to fetch data, static sites embed all content directly into the pages, making them ideal for blog posts and portfolios.
While frameworks like React and Vue have long had their own Static Site Generators—Gatsby and VuePress respectively—Angular, despite being released in 2016, lacked one until now. Scully fills this gap.
The Angular Build Process
Before diving into Scully, it's helpful to understand how Angular applications are compiled. This assumes familiar with Angular basics.
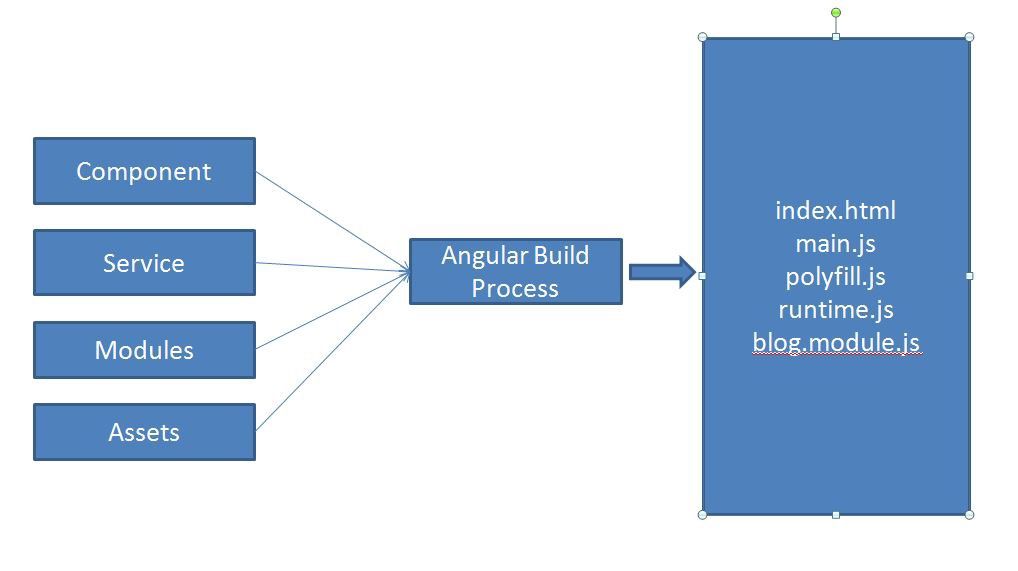
Figure 1 illustrates the standard Angular build process. Components, services, modules, and static assets go through the Angular Build Process, producing compiled output. In this example, the blog module is lazily loaded, and index.html serves as the main entry point.
How Scully Enhances the Build
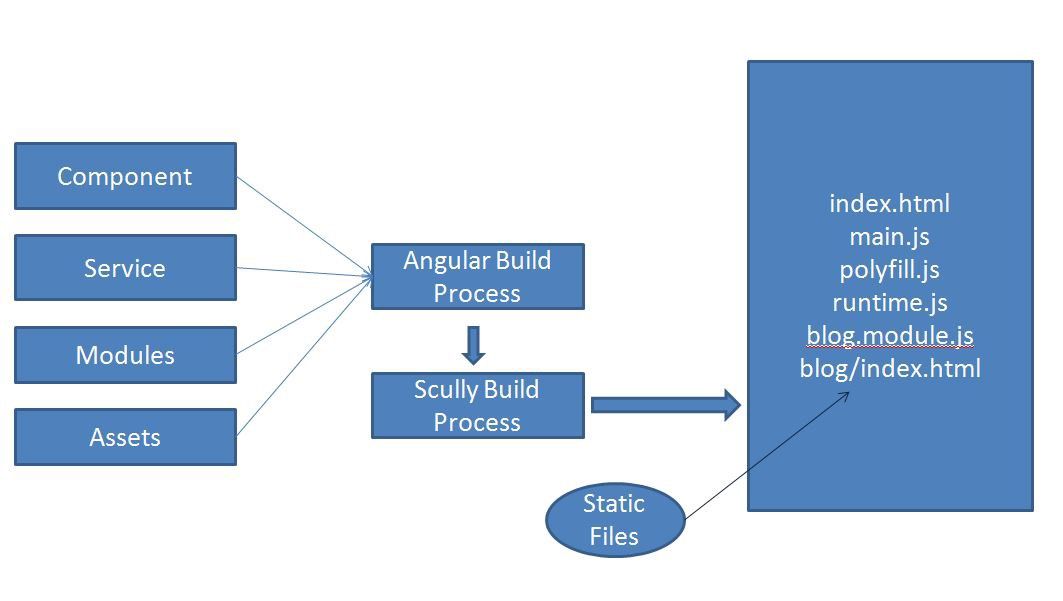
Scully inserts an additional build step after the Angular compilation phase. This extra processing converts all content into static pages. As shown in Figure 2, processing the same sample application with Scully results in an additional index.html for the lazy-loaded blog module.
Creating a Blog with Scully
To start, generate a new Angular application. You'll need Angular Ivy, which ships with Angular version 9. Since that version is in RC, use npx to create the application:
npx -p @angular/cli@next ng new blogpostdemo
After the app is ready, add Scully support with this command, which sets up all required configuration:
ng add @scullyio/init
Plugins are crucial to Static Site Generators. Gatsby's ecosystem, for example, thrives on its many community-contributed plugins. Scully, being new, offers three plugin types, each with some included plugins:
- Router: These plugins discover the data needed to pre-render pages.
- Render: These plugins transform the HTML output—for instance, processing Markdown into static HTML.
- File Handler: These handle static files, such as Markdown documents.
Adding Blog Support
Scully simplifies plugin configuration. To enable blog functionality, just run:
ng g @scullyio/init:blog
This command generates a new component, module, and lazy-load configuration in app.module.ts. It also creates an .md file in the blog folder where you can write content.
- Open the generated
.mdfile, add your content, and save it.
Working with Scully Routes
Scully determines routes through router plugins. A provided service exposes these routes, so no manual configuration is needed. The ScullyRoutesService can be used to render navigation menus.
- For this demonstration, Angular Material is also used, though it's optional.
- Create a nav-bar component with Angular Schematics using this command:
ng generate @angular/material:nav main-nav
- Replace the existing code in
app.component.html:
<app-main-nav></app-main-nav>
- Update
main-nav.component.tswith the following:
import { Component } from '@angular/core';
import { BreakpointObserver, Breakpoints } from '@angular/cdk/layout';
import { Observable } from 'rxjs';
import { map, shareReplay } from 'rxjs/operators';
import { ScullyRoutesService } from '@scullyio/ng-lib';
@Component({
selector: 'app-main-nav',
templateUrl: './main-nav.component.html',
styleUrls: ['./main-nav.component.css']
})
export class MainNavComponent {
isHandset$: Observable<boolean> = this.breakpointObserver.observe(Breakpoints.Handset).pipe(
map(result => result.matches),
shareReplay()
);
constructor(private breakpointObserver: BreakpointObserver,
public routerService: ScullyRoutesService ) {}
}
- The key addition here is the
**ScullyRoutesService**, which gives access to the list of available routes. - In
main-nav.component.html, add this code:
<mat-sidenav-container class="sidenav-container">
<mat-sidenav #drawer class="sidenav" fixedInViewport [attr.role]="(isHandset$ | async) ? 'dialog' : 'navigation'" [mode]="(isHandset$ | async) ? 'over' : 'side'" [opened]="(isHandset$ | async) === false">
<mat-toolbar>Menu</mat-toolbar>
<mat-nav-list *ngFor="let route of routerService.available$ | async ">
<a mat-list-item [routerLink]="route.route">{{route.title}}</a>
</mat-nav-list>
</mat-sidenav>
<mat-sidenav-content>
<mat-toolbar color="primary">
<button type="button" aria-label="Toggle sidenav" mat-icon-button (click)="drawer.toggle()" *ngIf="isHandset$ | async">
<mat-icon aria-label="Side nav toggle icon">menu</mat-icon>
</button>
<span>blogpostdemo</span>
</mat-toolbar>
<!-- Add Content Here -->
<router-outlet></router-outlet>
</mat-sidenav-content>
</mat-sidenav-container>
Going Further
To add articles to your existing app, use:
ng g @scullyio/init:post --name="<post-title>"
This creates a new .md file in the blog folder.
Generating the Static Site
With your additional post in place, run the build commands to verify everything compiles, then trigger the Scully build process:
- The first command outputs to
dist/blogpostdemo, while the second generates thedist/staticfolder:
ng build --prod
npm run scully
Install http-server to serve the site locally:
npm i -g http-server
Navigate to the dist/static directory in your terminal and run:
http-server
Here's what the site looks like when running locally:
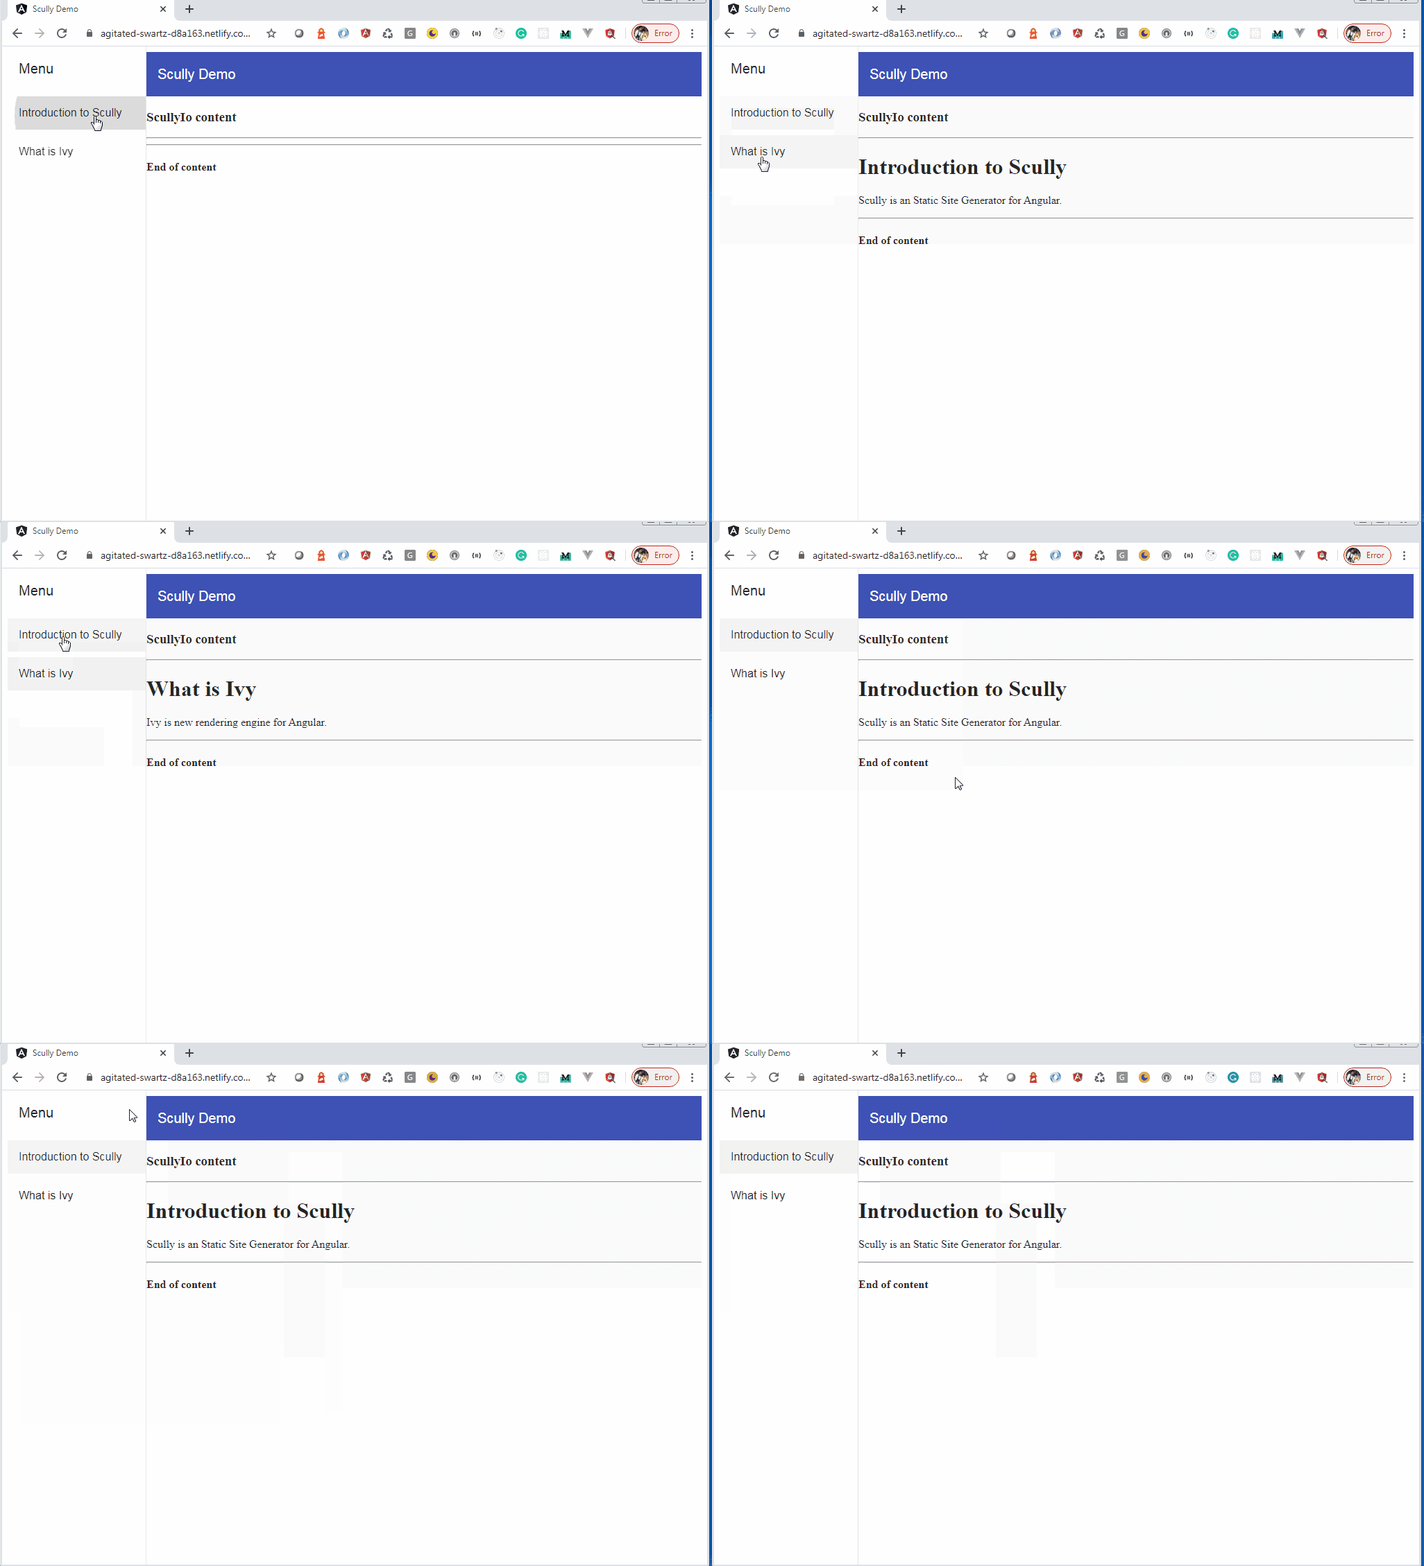
Scully App
Configuration Options
When you run ng add, the generated scully.config.js includes several properties:
- projectRoot: Specifies the path to the app folder, with a default of
./src/app. This is required. - outFolder: Determines the output directory, defaulting to
dist/static. This is optional. - routes: Define multiple routes to generate static pages.
Additional Tips
- While
.mdfiles default to theblogfolder, a different folder can be created with:
ng g @scullyio/init:markdown --name=articles --slug=article
This generates an articles folder and updates scully.config.js, changing routes to /articles/<article-title>.
- The static output folder can also be changed. By default, it's
dist/static. Override it by adding this toscully.config.js:
outFolder: './<output-path>'
Plugin Development
Plugins are the lifeblood of any SSG. Gatsby boasts more than 1500 plugins. Scully currently has three plugin types, and contributions are welcome. Refer to the docs to submit a new one.
The Scully team also conducts Office Hours every Tuesday at noon, MDT, where developers can ask questions: Scully Office Hours
Additionally, work is underway to enable fetching API data at build time, using TransferState to provide all necessary data immediately for the full Angular application.
Just got the first POC of TransferState working with @ScullyIO. This means that your @Angular app can fetch data during build time and NOT fetch it during run time. Once you let the power of that sink in, you realize how much static rendering in Angular will change your life!
— Frosty ⛄️ (@aaronfrost) January 2, 2020
Wrapping Up
Static Site Generators are gaining momentum. They enable the creation of static sites that serve pages even with JavaScript turned off, resulting in faster performance compared to API-driven approaches. Scully is the first SSG for Angular, and while new, it benefits from community contributions to expand its plugin ecosystem, similar to VuePress and Gatsby. A heartfelt thanks goes to Aaron Frost and the HeroDevs team for this valuable contribution to the Angular community.
The code from this article is available on GitHub
and is deployed at https://agitated-swartz-d8a163.netlify.com
Interested in contributing? Here are useful references:
Thanks to Lars for the review.