
Why Spectator makes Angular testing enjoyable
Angular is certainly a robust framework, but no tool is without flaws. One area that often frustrates developers is writing integration tests for templates and component classes. The built-in TestBed module leaves much to be desired in terms of developer experience. Tasks that should be straightforward often turn into verbose, awkward code:
- mocking component dependencies
- working with a limited set of assertions (only basic Jasmine ones)
- locating elements via
fixture.debugElement— tedious, to say the least - simple checks, like whether a button is disabled
In my view, these operations are neither simple nor intuitive. And that's exactly where Spectator steps in:

Spectator is a well-crafted layer built on top of the standard Angular testing module. It was created by Netanel Basal, who also maintains an excellent Angular blog at https://netbasal.com. With this library, writing, reading, and maintaining tests becomes noticeably easier.
Here are the key benefits it brings to the table:
- supports testing of pipes, components, directives, HTTP services, and routing
- simplified DOM element lookup (jQuery-style)
- rich API for dispatching events, including mouse and keyboard helpers
- comfortable setup with a HostComponent
- built-in support for testing
ng-content - additional matchers like
.toBeDisabled()and.toBeFocused() - works with entry components and component-level providers
- automatic service resolution — a real time-saver
- supports Jest and other test runners
- global queries available out of the box:
const element = spectator.query('.overlay', {
  root: true,
})
Putting it to the test
Let's see how Spectator compares to the traditional TestBed approach in a few straightforward examples.
- Checking if a button is disabled:
 // SPECTATOR
  expect(spectator.query('.button')).toBeDisabled();

  // TEST BED
  const button = fixture.debugElement.query(By.css('.button'));
  expect(button.nativeElement.disabled).toBeTruthy();
2. Verifying that *ngFor renders two components:
  // SPECTATOR
  expect('app-tshirt-item').toHaveLength(2);

  // TEST BED
  const items = fixture.debugElement.queryAll(By.directive(TshirtItemComponent));
  expect(items.length).toBe(2);
3. Mocking a service that the component depends on:
// SPECTATOR
  providers: [mockProvider(AuthService)], // mockProvider ze Spectator

  // TEST BED
  providers: [
    {
      provide: AuthService,
      useClass: MockAuthService, // nasza zamockowana klasa
    },
  ]
4. Simulating an "Enter" key press on an input field:
 // SPECTATOR
  const input = spectator.query('input');
  spectator.keyboard.pressEnter(input);

  // TEST BED
  const input = fixture.debugElement.query(By.css('input'));
  input.triggerEventHandler('keydown.enter', {});
5. Confirming that an element contains expected text:
// SPECTATOR
const title = spectator.query('h1');
expect(title).toContainText('Page title');

// TEST BED
const title = fixture.debugElement.query(By.css('h1'));
expect(title.nativeElement.textContent).toContain('Page title');
There's no doubt that tests written with Spectator are far cleaner and more readable. The official documentation is full of examples worth exploring: https://github.com/ngneat/spectator.
Getting started
If you're ready to try Spectator, the setup is simple. Install it along with ng-mocks using npm:
npm i -D @netbasal/spectator ng-mocksSchematics support
Spectator also comes with Schematics, which makes scaffolding test files effortless. For instance, to generate a test file for a component, you can run:
ng g cs path/component-nameOne more thing
If you develop in Visual Studio Code, don't miss the snippet plugin — it speeds up test authoring considerably:
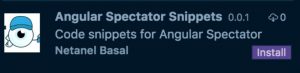
You can also experiment with the official playground provided by the authors:
Happy testing!