
Building a Custom Free-Drag Directive in Angular
This guide walks through creating an Angular directive that enables free dragging of any element without external dependencies.
Getting Started with Implementation
Step 1: Create a Basic Free Drag Directive
We begin with a straightforward directive and progressively enhance its capabilities.
1.1 Set Up the Workspace
npm i -g @angular/cli
ng new angular-free-dragging --defaults --minimal
Avoid using
--minimalin production projects—it omits testing frameworks. Additional details on CLI options can be found in the official docs.
1.2 Generate a Shared Module
ng g m shared
1.3.1 Create the Free Drag Directive
ng g d shared/free-dragging
1.3.2 Export the Directive
After creation, include it in the shared module's exports array:
// src/app/shared/shared.module.ts

import { NgModule } from "@angular/core";
import { CommonModule } from "@angular/common";
import { FreeDraggingDirective } from "./free-dragging.directive";

@NgModule({
	declarations: [FreeDraggingDirective],
	imports: [CommonModule],
	exports: [FreeDraggingDirective], // Added
})
export class SharedModule {}
1.3.3 Implement the Free Drag Logic
The implementation involves three core steps:
- Capture
mousedownevents on the target element to initiate dragging. - Listen for
mousemoveevents on the document to track the pointer and reposition the element. - Detect
mouseupevents on the document to end the drag and cease listening tomousemove.
We'll use observables for all listeners. Setting up the directive structure:
// src/app/shared/free-dragging.directive.ts

@Directive({
	selector: "[appFreeDragging]",
})
export class FreeDraggingDirective implements OnInit, OnDestroy {
	private element: HTMLElement;

	private subscriptions: Subscription[] = [];

	constructor(
		private elementRef: ElementRef,
		@Inject(DOCUMENT) private document: any
	) {}

	ngOnInit(): void {
		this.element = this.elementRef.nativeElement as HTMLElement;
		this.initDrag();
	}

	initDrag(): void {
		// main logic will come here
	}

	ngOnDestroy(): void {
		this.subscriptions.forEach((s) => s?.unsubscribe());
	}
}
The setup accomplishes three key tasks:
- Accesses the native HTML element for position manipulation.
- Initializes all drag operations, detailed shortly.
- Unsubscribes on destroy to free resources.
Here are the dragging functions:
// src/app/shared/free-dragging.directive.ts

...

  initDrag(): void {
    // 1
    const dragStart$ = fromEvent<MouseEvent>(this.element, "mousedown");
    const dragEnd$ = fromEvent<MouseEvent>(this.document, "mouseup");
    const drag$ = fromEvent<MouseEvent>(this.document, "mousemove").pipe(
      takeUntil(dragEnd$)
    );

    // 2
    let initialX: number,
      initialY: number,
      currentX = 0,
      currentY = 0;

    let dragSub: Subscription;

    // 3
    const dragStartSub = dragStart$.subscribe((event: MouseEvent) => {
      initialX = event.clientX - currentX;
      initialY = event.clientY - currentY;
      this.element.classList.add('free-dragging');

      // 4
      dragSub = drag$.subscribe((event: MouseEvent) => {
        event.preventDefault();

        currentX = event.clientX - initialX;
        currentY = event.clientY - initialY;

        this.element.style.transform =
          "translate3d(" + currentX + "px, " + currentY + "px, 0)";
      });
    });

    // 5
    const dragEndSub = dragEnd$.subscribe(() => {
      initialX = currentX;
      initialY = currentY;
      this.element.classList.remove('free-dragging');
      if (dragSub) {
        dragSub.unsubscribe();
      }
    });

    // 6
    this.subscriptions.push.apply(this.subscriptions, [
      dragStartSub,
      dragSub,
      dragEndSub,
    ]);
  }

...
- Three observables are created via
[fromEvent](https://rxjs.dev/api/index/function/fromEvent)for the listeners. - Helper variables are established for position calculations.
- The
mousedownlistener stores the initial position and adds afree-draggingclass for shadow effects. mousemoveis subscribed only aftermousedownto ensure dragging starts with a click. Position updates use the transform property.- The
mouseuplistener updates starting coordinates and removes thefree-draggingclass. - All subscriptions are stored for cleanup in
ngOnDestroy.
Let's test it in the AppComponent.
1.3.4 Update AppComponent
Replace the existing content with:
// src/app/app.component.ts

import { Component } from "@angular/core";

@Component({
	selector: "app-root",
	// 1 use directive
	template: ` <div class="example-box" appFreeDragging>Drag me around</div> `,
	// 2 some helper styles
	styles: [
		`
			.example-box {
				width: 200px;
				height: 200px;
				border: solid 1px #ccc;
				color: rgba(0, 0, 0, 0.87);
				cursor: move;
				display: flex;
				justify-content: center;
				align-items: center;
				text-align: center;
				background: #fff;
				border-radius: 4px;
				position: relative;
				z-index: 1;
				transition: box-shadow 200ms cubic-bezier(0, 0, 0.2, 1);
				box-shadow: 0 3px 1px -2px rgba(0, 0, 0, 0.2), 0 2px 2px 0 rgba(0, 0, 0, 0.14),
					0 1px 5px 0 rgba(0, 0, 0, 0.12);
			}

			.example-box.free-dragging {
				box-shadow: 0 5px 5px -3px rgba(0, 0, 0, 0.2), 0 8px 10px 1px rgba(0, 0, 0, 0.14),
					0 3px 14px 2px rgba(0, 0, 0, 0.12);
			}
		`,
	],
})
export class AppComponent {}
Run the application:
ng serve
Results:
Output after step 4
Currently, dragging works anywhere on the element, which can interfere with text selection. For practical widgets, a drag handle is preferable.
2. Adding Drag Handle Support
Support for a drag handle is added through a separate directive accessed via [@ContentChild](https://angular.io/api/core/ContentChild) in the main directive.
2.1 Create the Drag Handle Directive
ng g d shared/free-dragging-handle
2.2 Export from Shared Module
// src/app/shared/shared.module.ts

import { NgModule } from "@angular/core";
import { CommonModule } from "@angular/common";
import { FreeDraggingDirective } from "./free-dragging.directive";
import { FreeDraggingHandleDirective } from "./free-dragging-handle.directive";

@NgModule({
	declarations: [FreeDraggingDirective, FreeDraggingHandleDirective],
	imports: [CommonModule],
	exports: [FreeDraggingDirective, FreeDraggingHandleDirective], // Modified
})
export class SharedModule {}
2.3 Return ElementRef for the Handle
We use [ElementRef](https://angular.io/api/core/ElementRef) to access the handle's element:
// src/app/shared/free-dragging-handle.directive.ts

import { Directive, ElementRef } from "@angular/core";

@Directive({
	selector: "[appFreeDraggingHandle]",
})
export class FreeDraggingHandleDirective {
	constructor(public elementRef: ElementRef<HTMLElement>) {} // Modified
}
2.4 Drag with the Handle
The approach:
- Retrieve the child handle element from the main element
- Attach
mousedownto the handle—this initiates dragging - Listen for
mousemoveon the document to update the main element's position - Use
mouseupto finalize and stop listening
The only difference is the element receiving mousedown.
Implementation:
// src/app/shared/free-dragging.directive.ts

...

@Directive({
  selector: "[appFreeDragging]",
})
export class FreeDraggingDirective implements AfterViewInit, OnDestroy {

  private element: HTMLElement;

  private subscriptions: Subscription[] = [];

  // 1 Added
  @ContentChild(FreeDraggingHandleDirective) handle: FreeDraggingHandleDirective;
  handleElement: HTMLElement;

  constructor(...) {}

  // 2 Modified
  ngAfterViewInit(): void {
    this.element = this.elementRef.nativeElement as HTMLElement;
    this.handleElement = this.handle?.elementRef?.nativeElement || this.element;
    this.initDrag();
  }

  initDrag(): void {
    // 3 Modified
    const dragStart$ = fromEvent<MouseEvent>(this.handleElement, "mousedown");

    // rest remains same

  }

  ...

}
We use ngAfterViewInit instead of ngOnInit to ensure the view is fully initialized, allowing access to FreeDraggingDirective if present. More on this in Angular lifecycle hooks.
2.5 Update AppComponent
// src/app/app.component.ts

@Component({
	selector: "app-root",
	template: `
		<!-- 1 use directive -->
		<div class="example-box" appFreeDragging>
			I can only be dragged using the handle

			<!-- 2 use handle directive -->
			<div class="example-handle" appFreeDraggingHandle>
				<svg width="24px" fill="currentColor" viewBox="0 0 24 24">
					<path
						d="M10 9h4V6h3l-5-5-5 5h3v3zm-1 1H6V7l-5 5 5 5v-3h3v-4zm14 2l-5-5v3h-3v4h3v3l5-5zm-9 3h-4v3H7l5 5 5-5h-3v-3z"
					></path>
					<path d="M0 0h24v24H0z" fill="none"></path>
				</svg>
			</div>
		</div>
	`,
	// 3 helper styles
	styles: [
		`
			.example-box {
				width: 200px;
				height: 200px;
				padding: 10px;
				box-sizing: border-box;
				border: solid 1px #ccc;
				color: rgba(0, 0, 0, 0.87);
				display: flex;
				justify-content: center;
				align-items: center;
				text-align: center;
				background: #fff;
				border-radius: 4px;
				position: relative;
				z-index: 1;
				transition: box-shadow 200ms cubic-bezier(0, 0, 0.2, 1);
				box-shadow: 0 3px 1px -2px rgba(0, 0, 0, 0.2), 0 2px 2px 0 rgba(0, 0, 0, 0.14),
					0 1px 5px 0 rgba(0, 0, 0, 0.12);
			}

			.example-box.free-dragging {
				box-shadow: 0 5px 5px -3px rgba(0, 0, 0, 0.2), 0 8px 10px 1px rgba(0, 0, 0, 0.14),
					0 3px 14px 2px rgba(0, 0, 0, 0.12);
			}

			.example-handle {
				position: absolute;
				top: 10px;
				right: 10px;
				color: #ccc;
				cursor: move;
				width: 24px;
				height: 24px;
			}
		`,
	],
})
export class AppComponent {}
Observe the output:
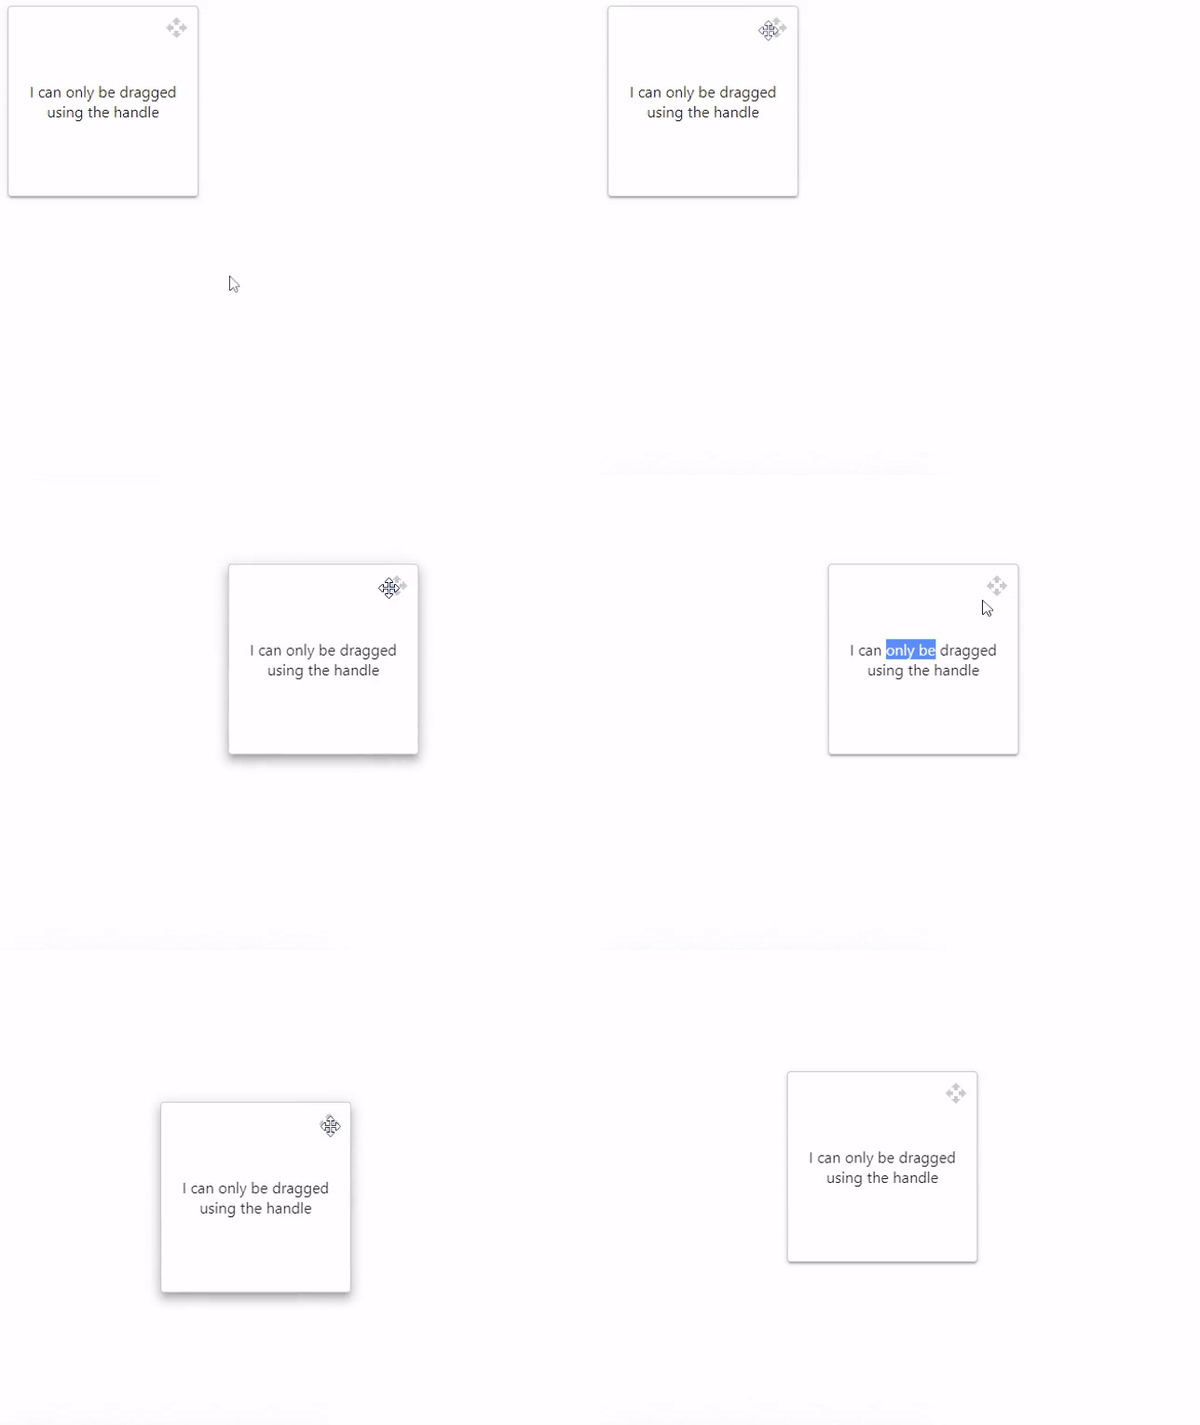
Output after step 7
Almost there, but elements can still be dragged outside the viewport:
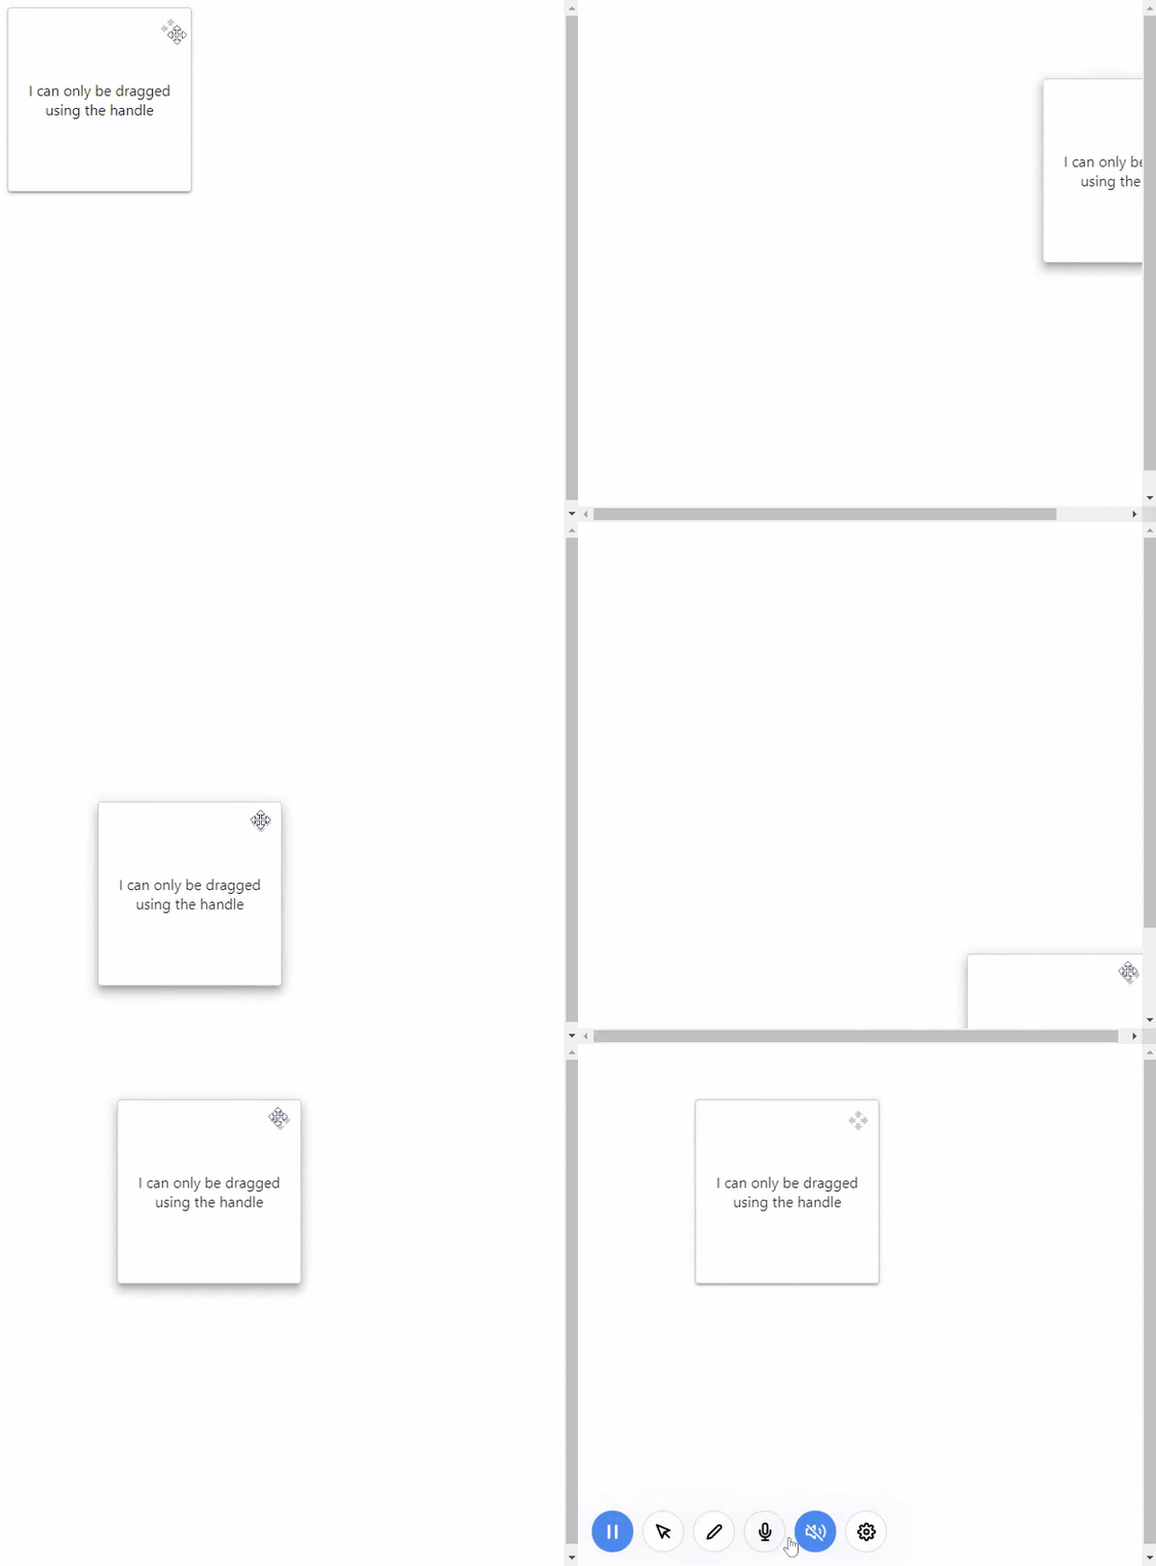
Dragging beyond the view
3. Adding Dragging Boundaries
Now we add boundary constraints to keep elements within a designated area.
3.1 Update the Directive
The plan:
- Add an
[@Input](https://angular.io/api/core/Input)to specify the boundary element; defaults tobody. - Use
[querySelector](https://developer.mozilla.org/en-US/docs/Web/API/Document/querySelector)to find the boundary; throw an error if missing. - Adjust the dragged element's position using the boundary's dimensions.
// src/app/shared/free-dragging.directive.ts

...

@Directive({
  selector: "[appFreeDragging]",
})
export class FreeDraggingDirective implements AfterViewInit, OnDestroy {

  ...

  // 1 Added
  private readonly DEFAULT_DRAGGING_BOUNDARY_QUERY = "body";
  @Input() boundaryQuery = this.DEFAULT_DRAGGING_BOUNDARY_QUERY;
  draggingBoundaryElement: HTMLElement | HTMLBodyElement;

  ...

  // 2 Modified
  ngAfterViewInit(): void {
    this.draggingBoundaryElement = (this.document as Document).querySelector(
      this.boundaryQuery
    );
    if (!this.draggingBoundaryElement) {
      throw new Error(
        "Couldn't find any element with query: " + this.boundaryQuery
      );
    } else {
      this.element = this.elementRef.nativeElement as HTMLElement;
      this.handleElement =
        this.handle?.elementRef?.nativeElement || this.element;
      this.initDrag();
    }
  }

  initDrag(): void {
    ...

    // 3 Min and max boundaries
    const minBoundX = this.draggingBoundaryElement.offsetLeft;
    const minBoundY = this.draggingBoundaryElement.offsetTop;
    const maxBoundX =
      minBoundX +
      this.draggingBoundaryElement.offsetWidth -
      this.element.offsetWidth;
    const maxBoundY =
      minBoundY +
      this.draggingBoundaryElement.offsetHeight -
      this.element.offsetHeight;

    const dragStartSub = dragStart$.subscribe((event: MouseEvent) => {
      ...

      dragSub = drag$.subscribe((event: MouseEvent) => {
        event.preventDefault();

        const x = event.clientX - initialX;
        const y = event.clientY - initialY;

        // 4 Update position relatively
        currentX = Math.max(minBoundX, Math.min(x, maxBoundX));
        currentY = Math.max(minBoundY, Math.min(y, maxBoundY));

        this.element.style.transform =
          "translate3d(" + currentX + "px, " + currentY + "px, 0)";
      });
    });

    const dragEndSub = dragEnd$.subscribe(() => {
      initialX = currentX;
      initialY = currentY;
      this.element.classList.remove("free-dragging");
      if (dragSub) {
        dragSub.unsubscribe();
      }
    });

    this.subscriptions.push.apply(this.subscriptions, [
      dragStartSub,
      dragSub,
      dragEndSub,
    ]);
  }
}
Set body height to 100% for full-page dragging.
// src/styles.css

html,
body {
	height: 100%;
}
Check the final output:
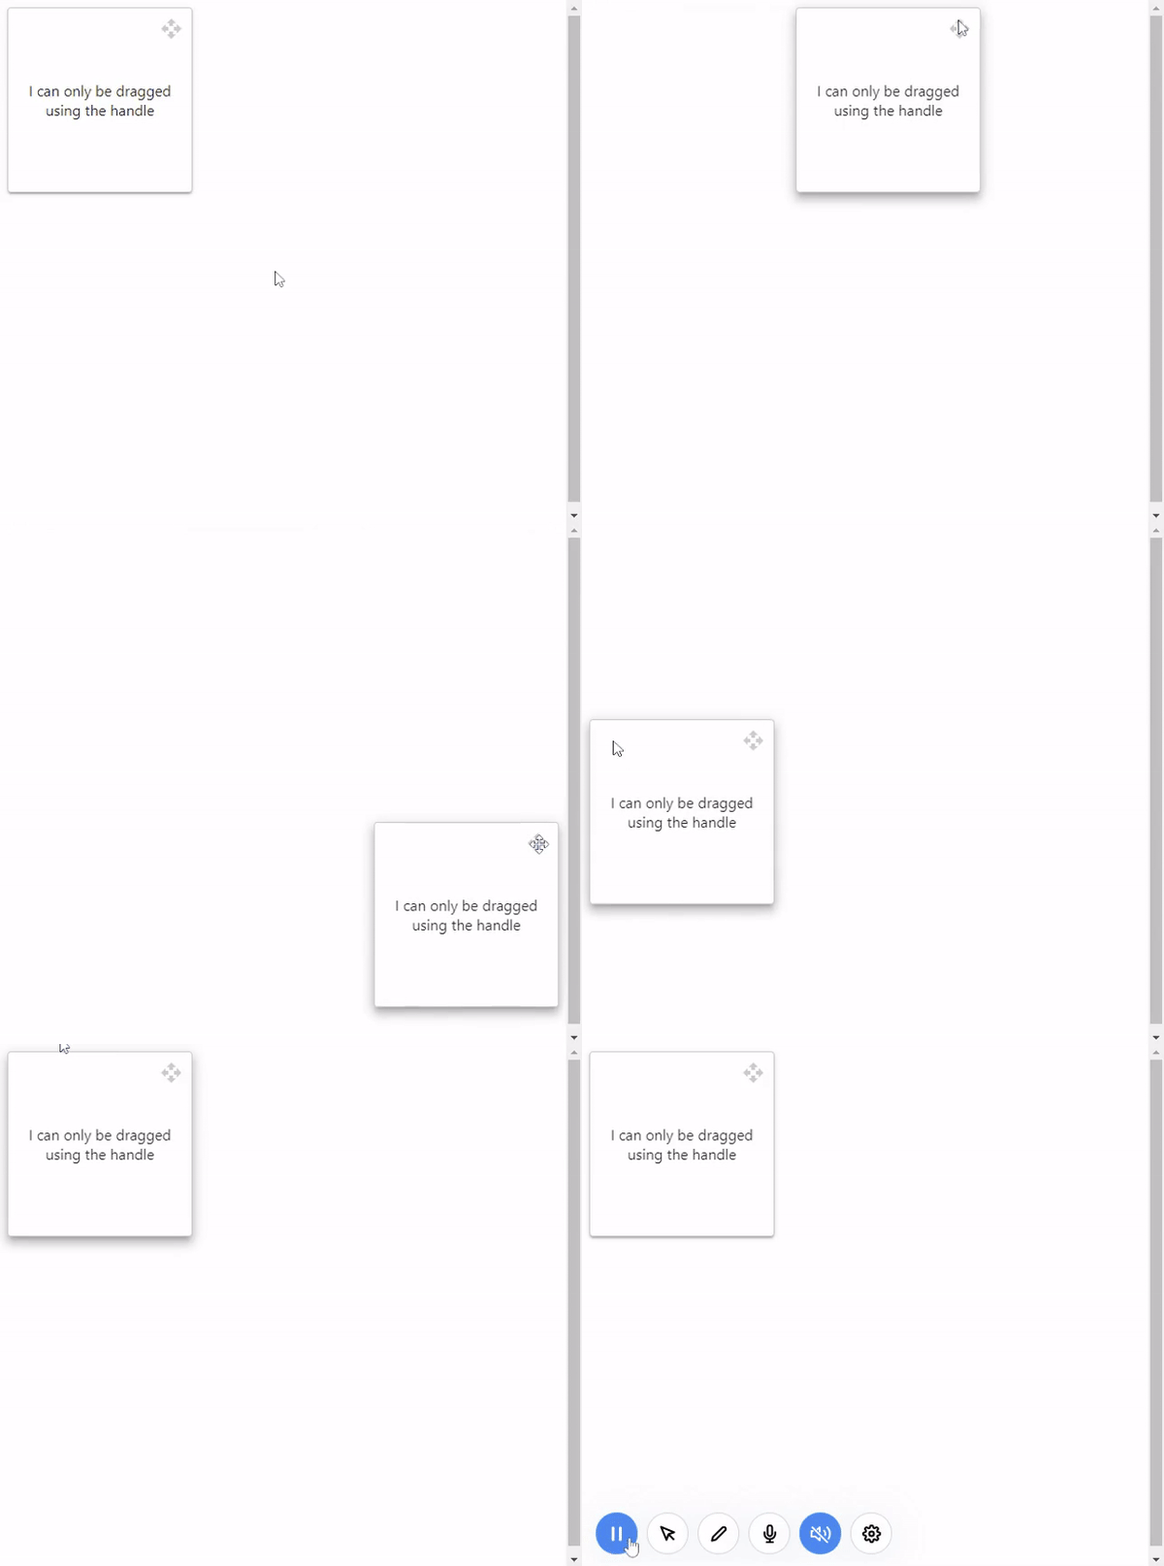
Final result
That's all—great job!
Wrap-Up
Quick recap of what we accomplished:
✔️ Built a free-drag directive
✔️ Added a drag handle to enable other interactions
✔️ Implemented boundary constraints to limit dragging areas
✔️ No third-party libraries were used
Potential enhancements include:
- Axis locking—limit dragging to horizontal or vertical
- Event emission—emit drag-start, dragging, and drag-end events
- Position reset—return to the original coordinates
This feature suits floating widgets, chat boxes, help icons, and even full editors with draggable elements.
All code is available on GitHub:
Feedback is welcome in the comments.
Acknowledgments
References were drawn from snippets on w3schools and stackoverflow.