The information in this article applies to Angular version 6 and 7. For the most recent Angular 9 check out The Angular Ivy guide for library authors.
A substantial portion of the Angular 6 enhancements landed in the CLI tooling. The feature I've been waiting for is the seamless CLI integration with ng-packagr for scaffolding and compiling Angular libraries. ng-packagr, crafted by David Herges, is a powerful utility that converts your code into the Angular Package Format.
We'll dive into the specifics of constructing an Angular library. Additionally, I'll share some essential guidelines to ensure your library starts off on solid footing, preventing complications down the road.
For your reference, I've set up a GitHub repository at t-palmer/example-ng6-lib containing the finished project.
Overview
Executing ng new causes the Angular CLI to set up a fresh workspace. Within this Angular workspace, we'll structure two distinct projects:
- A library project
This houses the components and services we intend to share. This is the codebase that could be, for instance, uploaded tonpm. - An application project
This serves as a testing environment for our library. Often, this app also functions as documentation and a demonstration of the library's capabilities.
The CLI also automatically generates a third project for End to End testing, which we'll skip over for the purpose of this guide.
With that broad understanding of our workspace structure, let's outline some clear objectives for this walkthrough:
Objectives
- Leverage the Angular CLI to establish a workspace titled after our target library: example-ng6-lib
- Set up an application for testing our example-ng6-lib library, named:
example-ng6-lib-app - Within the example-ng6-lib workspace, scaffold an Angular library named:
example-ng6-lib - Assign our Angular library the prefix enl, standing for Example Ng6 Library.
- Validate our example-ng6-lib by incorporating it as a dependency in our example-ng6-lib-app application.
Angular 6
Given that Angular 6 was recently released at the time of writing, there are a few modifications that impact this tutorial.
The CLI version numbering now aligns with Angular itself, jumping directly from 1.7 to version 6.0.0. Furthermore, the CLI configuration file has transitioned from angular-cli.json to angular.json.
With this release, the CLI introduces a workspace concept that natively accommodates multiple projects.
Setting Up an Angular Workspace
Our initial objective is to construct an Angular workspace christened example-ng6-lib.
For Angular 7
Angular 7 introduced the handy --createApplication flag. For those on Angular 7, I recommend following the method outlined in my piece:
Angular Workspace: No Application for You!
rather than the Angular 6 workaround involving a workspace rename discussed below.
For Angular 6
Due to how projects function in Angular 6, establishing the workspace takes a slightly circuitous path. The approach involves first creating a workspace named example-ng6-lib-app, which we subsequently rename to example-ng6-lib:
ng new example-ng6-lib-app
rename example-ng6-lib-app example-ng6-lib
cd example-ng6-lib
ng serve
For IE support considerations, please refer to my article: Angular and Internet Explorer.
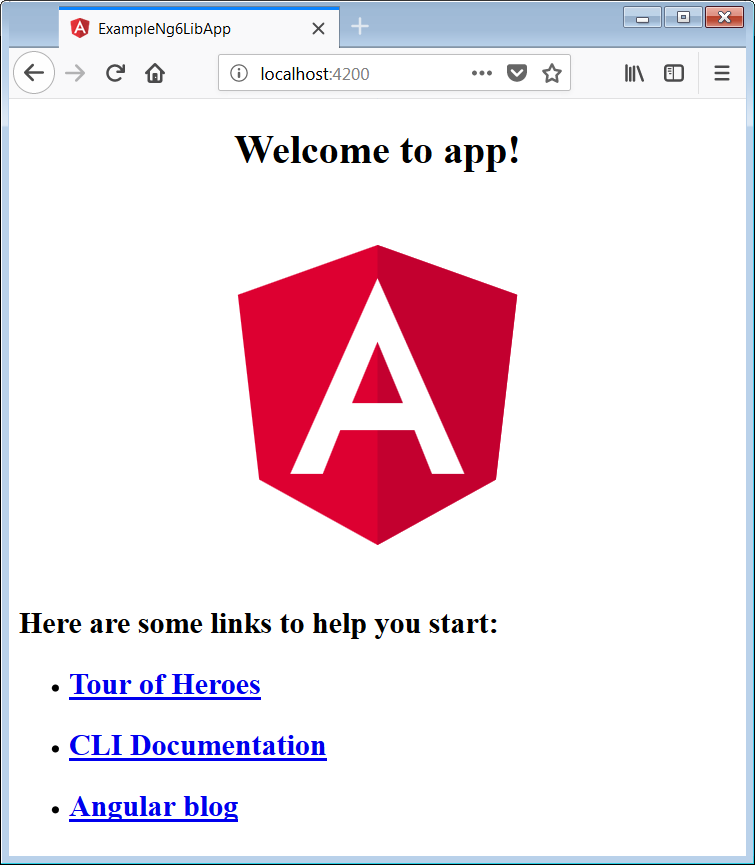
Upon navigating to:
http://localhost:4200/
we are greeted by the familiar starter Angular application.
Angular 6 Configuration: angular.json
Before we proceed to library creation, let's briefly inspect the new Angular configuration file: angular.json.
The former angular-cli.json has been superseded by angular.json, which has also seen some structural changes.
The key element to observe is the projects object, which contains an entry for every individual project.
"projects": {
  "example-ng6-lib-app": {
    ...
  },
  "example-ng6-lib-app-e2e": {
    ...
  }
},
At this moment, we have two projects:
- example-ng6-lib-app: This is the application serving as the testing ground for our library.
- example-ng6-lib-app-e2e: This is the standard end-to-end testing project. For this guide, you can disregard it.
Recall that we instructed the CLI to create the workspace named:
example-ng6-lib-app
Consequently, it generated the default application titled example-ng6-lib-app. This naming leaves us with the opportunity to call our library project example-ng6-lib. Once the library is created, a new entry will appear within the projects object.
ALWAYS: Begin by creating your workspace with the name of your library-app. Afterwards, rename it to match your library's intended name.
Scaffolding a Library Module
The next step is to generate a new library titled example-ng6-lib within our workspace.
ng generate library example-ng6-lib --prefix=enl
Observe the use of the --prefix flag to ensure our library components have a unique identifier. Without it, the CLI defaults to lib.
ALWAYS: Specify a custom prefix when generating a library.
A notable advantage of the CLI's generate command is its transparency regarding the files it modifies:
$ ng generate library example-ng6-lib --prefix=enl
CREATE projects/example-ng6-lib/karma.conf.js (968 bytes)
CREATE projects/example-ng6-lib/ng-package.json (191 bytes)
CREATE projects/example-ng6-lib/ng-package.prod.json (164 bytes)
CREATE projects/example-ng6-lib/package.json (175 bytes)
CREATE projects/example-ng6-lib/src/test.ts (700 bytes)
CREATE projects/example-ng6-lib/src/public_api.ts (191 bytes)
CREATE projects/example-ng6-lib/tsconfig.lib.json (769 bytes)
CREATE projects/example-ng6-lib/tsconfig.spec.json (246 bytes)
CREATE projects/example-ng6-lib/tslint.json (317 bytes)
CREATE projects/example-ng6-lib/src/lib/example-ng6-lib.module.ts (261 bytes)
CREATE projects/example-ng6-lib/src/lib/example-ng6-lib.component.spec.ts (679 bytes)
CREATE projects/example-ng6-lib/src/lib/example-ng6-lib.component.ts (281 bytes)
CREATE projects/example-ng6-lib/src/lib/example-ng6-lib.service.spec.ts (418 bytes)
CREATE projects/example-ng6-lib/src/lib/example-ng6-lib.service.ts (142 bytes)
UPDATE angular.json (4818 bytes)
UPDATE package.json (1724 bytes)
UPDATE tsconfig.json (471 bytes)
Here's a concise breakdown of what the library generation process accomplishes:
- Introduces a new example-ng6-lib project within angular.json
- Adds ng-packagr to the devDependencies in package.json
- Registers the example-ng6-lib build output path in tsconfig.json
- Creates the library's source files under projects/example-ng6-lib
Given that this is INDEPTH DEV, let's delve deeper into each of these changes.
example-ng6-lib project in angular.json
Examine angular.json. Specifically, note the new project entry within the projects object: example-ng6-lib.
"projects": {
  "example-ng6-lib-app": {

  },
  "example-ng6-lib-app-e2e": {

  },
  "example-ng6-lib": {
    "root": "projects/example-ng6-lib",
    "sourceRoot": "projects/example-ng6-lib/src",
    "projectType": "library",
    "prefix": "enl",
    "architect": {
      "build": {
        "builder": "@angular-devkit/build-ng-packagr:build",
        "options": {
          "tsConfig": "projects/example-ng6-lib/tsconfig.lib.json",
          "project": "projects/example-ng6-lib/ng-package.json"
        },
        "configurations": {
          "production": {
            "project": "projects/example-ng6-lib/ng-package.prod.json"
          }
        }
      },
      "test": {
        "builder": "@angular-devkit/build-angular:karma",
        "options": {
          "main": "projects/example-ng6-lib/src/test.ts",
          "tsConfig": "projects/example-ng6-lib/tsconfig.spec.json",
          "karmaConfig": "projects/example-ng6-lib/karma.conf.js"
        }
      },
      "lint": {
        "builder": "@angular-devkit/build-angular:tslint",
        "options": {
          "tsConfig": [
            "projects/example-ng6-lib/tsconfig.lib.json",
            "projects/example-ng6-lib/tsconfig.spec.json"
          ],
          "exclude": [
            "**/node_modules/**"
          ]
        }
      }
    }
  }
},
Noteworthy elements here include:
root
This specifies the base folder for our library project.
sourceRoot
This points to the directory where the library's actual source code resides.
projectType
This distinguishes our project as a library, unlike the other two which are of type application.
prefix
This serves as the prefix for our components' selectors. Recall that we designated enl during generation. You're likely accustomed to the app prefix for main application components.
architect
This object contains settings dictating how the CLI handles build, test, and lint operations. The build section notably leverages ng-packagr as its builder.
ng-packagr dependency in package.json
Upon library generation, the CLI recognizes the need for ng-packagr and consequently adds it to the devDependencies section of our workspace's package.json:
"ng-packagr": "^3.0.0-rc.2",
build path in tsconfig.json
For testing purposes, we aim to import example-ng6-lib as a proper library rather than just additional files within our app. Typically, a third-party library is installed via npm install and placed in the node-modules folder.
While example-ng6-lib won't reside in node-modules, it will be compiled into a subdirectory under the workspace's dist folder. The CLI adds this output path to tsconfig.json, enabling its import as a library.
The added path is as follows:
"paths": {
  "example-ng6-lib": [
    "dist/example-ng6-lib"
  ]
}
example-ng6-lib sources
The library's src directory is located at projects/example-ng6-lib. Here, the CLI has scaffolded a new module featuring a service and a component. Additionally, we find several other files:
package.json
This is the package.json designated for our library. It's the manifest published alongside the library as an npm package upon sharing, detailing its dependencies for consumers.
public_api.ts
This file is referred to as the entry file, dictating which parts of the library are publicly exposed. You might wonder, "But Todd, doesn't the export keyword in modules handle that?" Yes, but it's more nuanced than that. We'll explore this further later.
Note: this file was renamed to public-api.ts starting with CLI version 7.3.
ng-package.json
This is the configuration file for ng-packagr. In earlier times, familiarity with its contents was necessary. Now, with the improved CLI, it's sufficient to know that it guides ng-packagr to our entry file and specifies the build output location.
Compiling the Library
Prior to utilizing our newly generated library, it must be compiled:
ng build example-ng6-lib
This process outputs the library to the example-ng6-lib-app\dist\example-ng6-lib folder. Starting with version 6.1, Angular performs a production build of libraries by default. For those on 6.0.x, it's necessary to include the --prod flag when building.
Incorporating the Library into Our Application
A core principle of library development is creating a companion application for testing. In our scenario, example-ng6-lib-app serves that purpose.
Let's perform a basic test by integrating our library into the example-ng6-lib-app. This involves importing our library's module and then rendering the default component generated during scaffolding.
Importing the example-ng6-lib Module
We'll adjust the AppModule located in src\app\app.module.ts.
Include the ExampleNg6LibModule in the imports array. Beware of your IDE attempting to auto-import the file path directly. Instead, we want the application to resolve the library by its package name:
import { ExampleNg6LibModule } from 'example-ng6-lib';
This method functions because, when a library is imported by name, the Angular CLI searches the tsconfig.json paths initially, followed by node_modules.
ALWAYS: In your test application, import using your library by name, not by referencing individual files.
Our app.module.ts should now resemble:
import { BrowserModule } from '@angular/platform-browser';
import { NgModule } from '@angular/core';

import { AppComponent } from './app.component';
import { ExampleNg6LibModule } from 'example-ng6-lib';

@NgModule({
  declarations: [
    AppComponent
  ],
  imports: [
    BrowserModule,
    ExampleNg6LibModule
  ],
  providers: [],
  bootstrap: [AppComponent]
})
export class AppModule { }
Rendering the example-ng6-lib Component
For simplicity, we'll place the default component generated for our library into the AppComponent template in src\app\app.component.html.
We can simply swap the lower part of the AppComponent template with:
<enl-example-ng6-lib></enl-example-ng6-lib>
The resulting src\app\app.component.html should look like:
<div style="text-align:center">
  <h1>
    Welcome to {{ title }}!
  </h1>
  <img width="300" alt="Angular Logo" src="data:image/svg+xml;base64,PHN2ZyB4bWxucz0iaHR0cDovL3d3dy53My5vcmcvMjAwMC9zdmciIHZpZXdCb3g9IjAgMCAyNTAgMjUwIj4KICAgIDxwYXRoIGZpbGw9IiNERDAwMzEiIGQ9Ik0xMjUgMzBMMzEuOSA2My4ybDE0LjIgMTIzLjFMMTI1IDIzMGw3OC45LTQzLjcgMTQuMi0xMjMuMXoiIC8+CiAgICA8cGF0aCBmaWxsPSIjQzMwMDJGIiBkPSJNMTI1IDMwdjIyLjItLjFWMjMwbDc4LjktNDMuNyAxNC4yLTEyMy4xTDEyNSAzMHoiIC8+CiAgICA8cGF0aCAgZmlsbD0iI0ZGRkZGRiIgZD0iTTEyNSA1Mi4xTDY2LjggMTgyLjZoMjEuN2wxMS43LTI5LjJoNDkuNGwxMS43IDI5LjJIMTgzTDEyNSA1Mi4xem0xNyA4My4zaC0zNGwxNy00MC45IDE3IDQwLjl6IiAvPgogIDwvc3ZnPg==">
</div>
<h2>Example</h2>
<enl-example-ng6-lib></enl-example-ng6-lib>
Executing Our Application
As is standard, we launch the application with:
ng serve
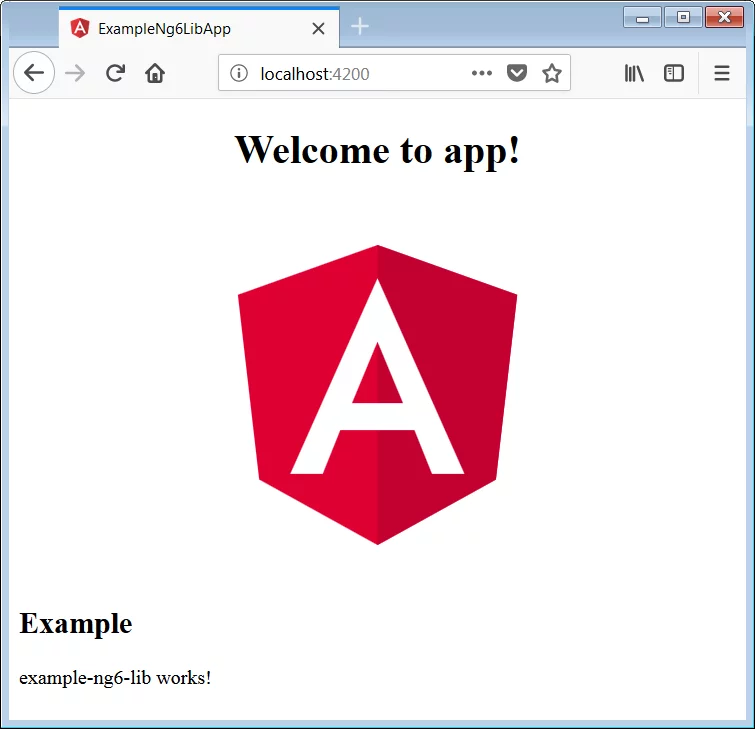
Now, when we browse to http://localhost:4200/, we should see the test output for our library's component.
Extending the Library Further
With a solid grasp of building the library and wiring it into an app, let’s push beyond the initial setup. We’ll add a second component to the library and walk through every necessary adjustment, from generation to final use.
Here’s the roadmap for adding the new component:
- Create a new component inside the library project.
- Make sure the component is listed in the library module’s exports.
- Expose the component class through the library’s entry point.
- Rebuild the library to incorporate our changes.
- Reference the new component in the host application.
Creating the Component in the Library
To generate a component meant for our library, we must pass the --project flag to Angular CLI. This directs the generator to place the new files under our library project rather than the main app. Let’s request a simple component named foo:
ng generate component foo --project=example-ng6-lib
Angular CLI, as always, replies with a clear summary of its actions:
CREATE projects/example-ng6-lib/src/lib/foo/foo.component.html (22 bytes)
CREATE projects/example-ng6-lib/src/lib/foo/foo.component.spec.ts (607 bytes)
CREATE projects/example-ng6-lib/src/lib/foo/foo.component.ts (257 bytes)
CREATE projects/example-ng6-lib/src/lib/foo/foo.component.css (0 bytes)
UPDATE projects/example-ng6-lib/src/lib/example-ng6-lib.module.ts (347 bytes)
The new component now exists in the library’s directory structure. Angular CLI has also automatically registered it in the declarations array of the library module, which lives at:
projects\example-ng6-lib\src\lib\example-ng6-lib.module.ts
Declaring the Component for External Use
Merely declaring the component isn’t enough for it to be usable from outside. We must explicitly add it to the exports array of our library module. Failing to do so will trigger a template parse error — specifically, an unknown element message like "enl-foo" is not a known element — as soon as we attempt to embed it in the app.
Open the example-ng6-lib.module.ts file and include FooComponent in the exports array. After the edit, your ExampleNg6LibModule should match this structure:
import { NgModule } from '@angular/core';
import { ExampleNg6LibComponent } from './example-ng6-lib.component';
import { FooComponent } from './foo/foo.component';

@NgModule({
  imports: [
  ],
  declarations: [
    ExampleNg6LibComponent,
    FooComponent
  ],
  exports: [
    ExampleNg6LibComponent,
    FooComponent
  ]
})
export class ExampleNg6LibModule { }
Updating the Public API Entry Point
Earlier, we identified the entry file as the contract for the library’s public API: projects\example-ng6-lib\src\public_api.ts
To ensure that the new component class is part of the package’s official interface, add an export line to this file. This signal instructs ng-packagr to expose the class to downstream consumers:
export * from './lib/foo/foo.component';
You might wonder if this step is redundant, given that we already exported the component from the module. It’s a fair observation. The truth is that the <enl-foo></enl-foo> tag will work in templates regardless. However, without this entry-file addition, the FooComponent class itself remains private and inaccessible to importing code.
I verified this behavior firsthand: I added a type reference, such asfooComponent: FooComponent;, in the app.component.ts file while leaving the foo component out of the entry point. After rebuilding the library, running ng serve resulted in an immediate failure, flagged by a Module has no exported member 'FooComponent' error. This demonstrates why the distinction matters.
Keep this principle in mind:
FOR COMPONENTS:
Exporting from the module makes the element usable in templates.
Adding to the entry file makes the class importable in code.
After adding the necessary line, your public_api.ts file should look like this:
/*
 * Public API Surface of example-ng6-lib
 */

export * from './lib/example-ng6-lib.service';
export * from './lib/example-ng6-lib.component';
export * from './lib/example-ng6-lib.module';
export * from './lib/foo/foo.component';
Rebuilding the Library Artifacts
Since we’ve modified the library source, a rebuild is required before the app can pick up the changes. Execute the build command:
ng build example-ng6-lib
This manual build approach works, but there’s a better way. Starting with Angular CLI version 6.2, a watch mode is available. This feature performs an incremental build: it detects file alterations and recompiles only the affected parts. To leverage this, run:
ng build example-ng6-lib --watch
Integrating the New Component
Last but not least, we need to use the component in the app. Place the element <enl-foo></enl-foo> at the end of your app.component.html file. The final markup should resemble:
<div style="text-align:center">
  <h1>
    Welcome to {{ title }}!
  </h1>
  <img width="300" alt="Angular Logo" src="data:image/svg+xml;base64,PHN2ZyB4bWxucz0iaHR0cDovL3d3dy53My5vcmcvMjAwMC9zdmciIHZpZXdCb3g9IjAgMCAyNTAgMjUwIj4KICAgIDxwYXRoIGZpbGw9IiNERDAwMzEiIGQ9Ik0xMjUgMzBMMzEuOSA2My4ybDE0LjIgMTIzLjFMMTI1IDIzMGw3OC45LTQzLjcgMTQuMi0xMjMuMXoiIC8+CiAgICA8cGF0aCBmaWxsPSIjQzMwMDJGIiBkPSJNMTI1IDMwdjIyLjItLjFWMjMwbDc4LjktNDMuNyAxNC4yLTEyMy4xTDEyNSAzMHoiIC8+CiAgICA8cGF0aCAgZmlsbD0iI0ZGRkZGRiIgZD0iTTEyNSA1Mi4xTDY2LjggMTgyLjZoMjEuN2wxMS43LTI5LjJoNDkuNGwxMS43IDI5LjJIMTgzTDEyNSA1Mi4xem0xNyA4My4zaC0zNGwxNy00MC45IDE3IDQwLjl6IiAvPgogIDwvc3ZnPg==">
</div>
<h2>Example</h2>
<enl-example-ng6-lib></enl-example-ng6-lib>
<enl-foo></enl-foo>
Start the development server with ng serve and navigate to http://localhost:4200/:
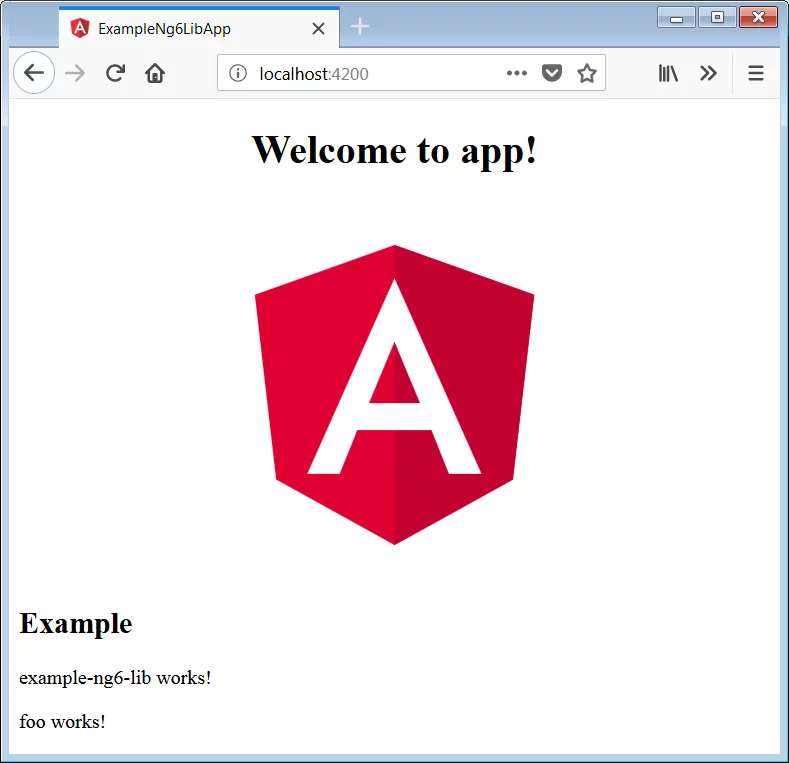
And there we see our new library component in action.
What Comes Next
In Part 2 of this series we discuss building, packaging, and actually using our generated library in another application.