
Getting Started with the Angular Material Drag and Drop CDK
With the first release candidate of Angular and Angular Material out, I decided to take a closer look at the drag and drop CDK that's been teased for the upcoming version. The potential here is exciting, and I'm guessing you're just as curious as I am. Rather than diving straight into complex scenarios, let's build up gradually—starting with a basic draggable element and working toward a functional task board.
Your first draggable element
The most straightforward way to get acquainted with the API is to create a simple div that responds to drag gestures.
To begin, you'll need to install Angular Material. Since this is still a pre-release version, installation requires specifying the exact version:
This post has been updated on 2018-10-09 to work with @angular/material@7.0.0-rc.1. In this release, the cdk-drop component has been refactored into a cdkDrop directive. Additionally, all input and output properties now carry the cdkDrop prefix—for instance,
databecomescdkDropData. These changes streamline the API and provide developers with greater flexibility. https://github.com/angular/material2/pull/13441
$ npm install @angular/material@7.0.0-rc.1
After installation, the DragDropModule needs to be imported into your module:
import { NgModule } from '@angular/core';
import { BrowserModule } from '@angular/platform-browser';
import { DragDropModule } from '@angular/cdk/drag-drop';
import { AppComponent } from './app.component';
@NgModule({
  imports: [BrowserModule, DragDropModule],
  declarations: [AppComponent],
  bootstrap: [AppComponent]
})
export class AppModule { }
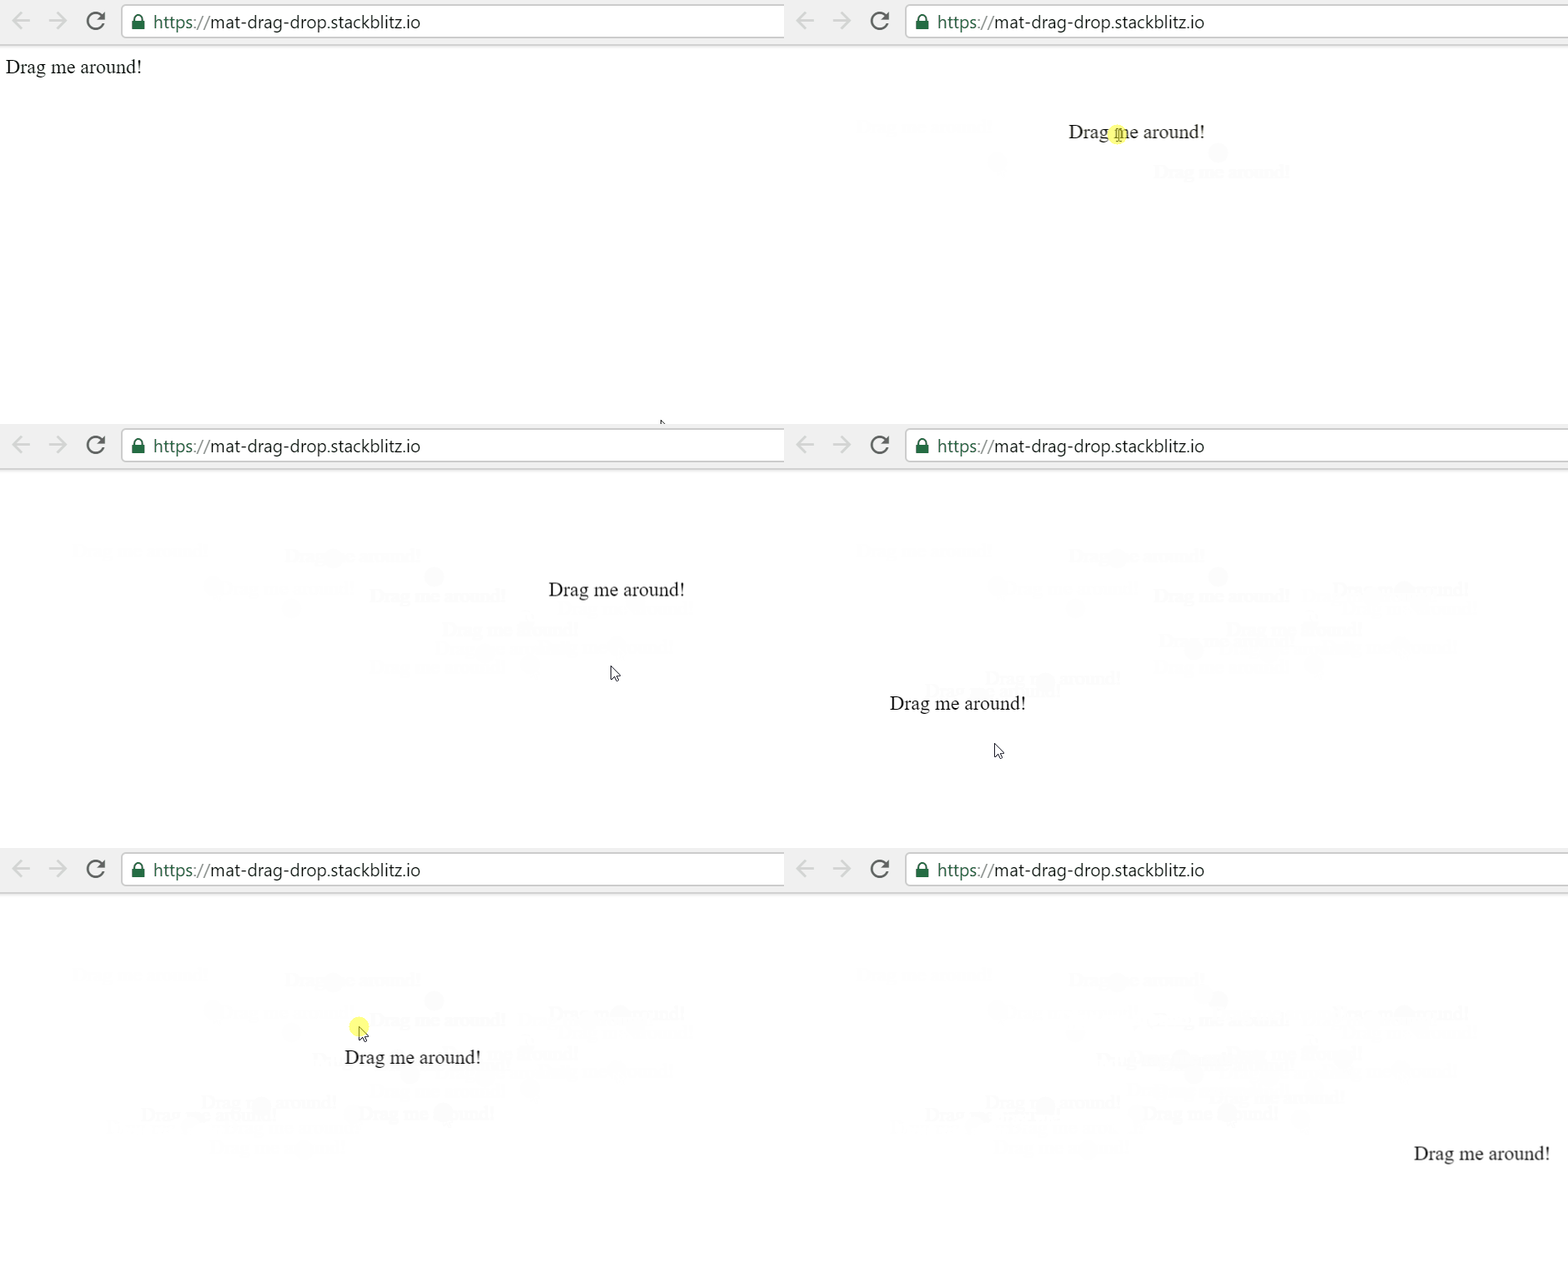
With the module in place, the cdkDrag directive transforms any element into a draggable one.
<div class="box" cdkDrag>Drag me around!</div>
That's all it takes—running this code gives you a div you can pick up and move around the screen. Impressively straightforward.
Tweet: I'm exploring the new Angular Material Drag and Drop CDK with @tim_deschryver.
Defining a drop target
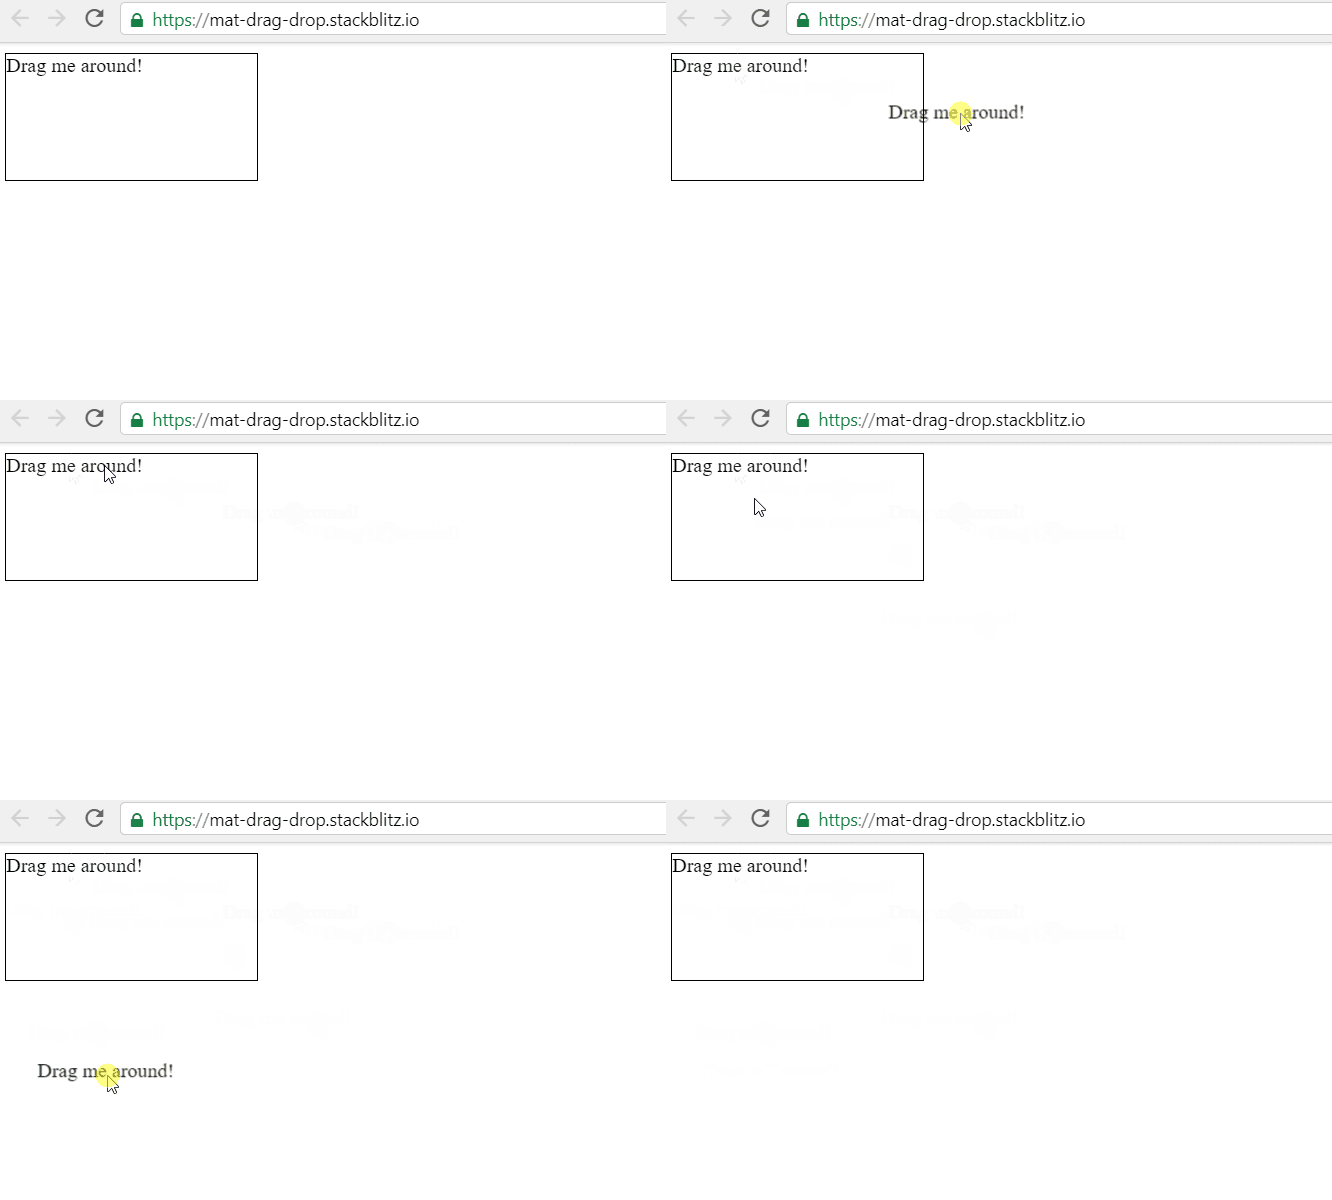
Dragging is only half the story. To complete the picture, we need a designated area where items can be released. The cdkDrop directive serves exactly this purpose—it acts as a container for draggable elements. Any item dropped outside this container simply snaps back to its original position.
<div cdkDrop>
  <div class="box" cdkDrag>Drag me around!</div>
</div>
Reordering within a list
The next logical step is combining the drag functionality with list rendering. Using *ngFor, we can generate list items inside a cdkDrop container.
<div cdkDrop>
  <div *ngFor="let item of items" cdkDrag>{{item}}</div>
</div>
The AppComponent holds the items as a simple string array:
@Component({
  selector: 'my-app',
  templateUrl: './app.component.html',
}),
export class AppComponent  {
  items = [
    'Item 0',
    'Item 1',
    'Item 2',
    'Item 3',
    'Item 4',
    'Item 5',
    'Item 6',
    'Item 7',
  ]
}
Notice in the demonstration below that while dragging, the items visually rearrange themselves to make space. However, upon release, the item always returns to its starting index.
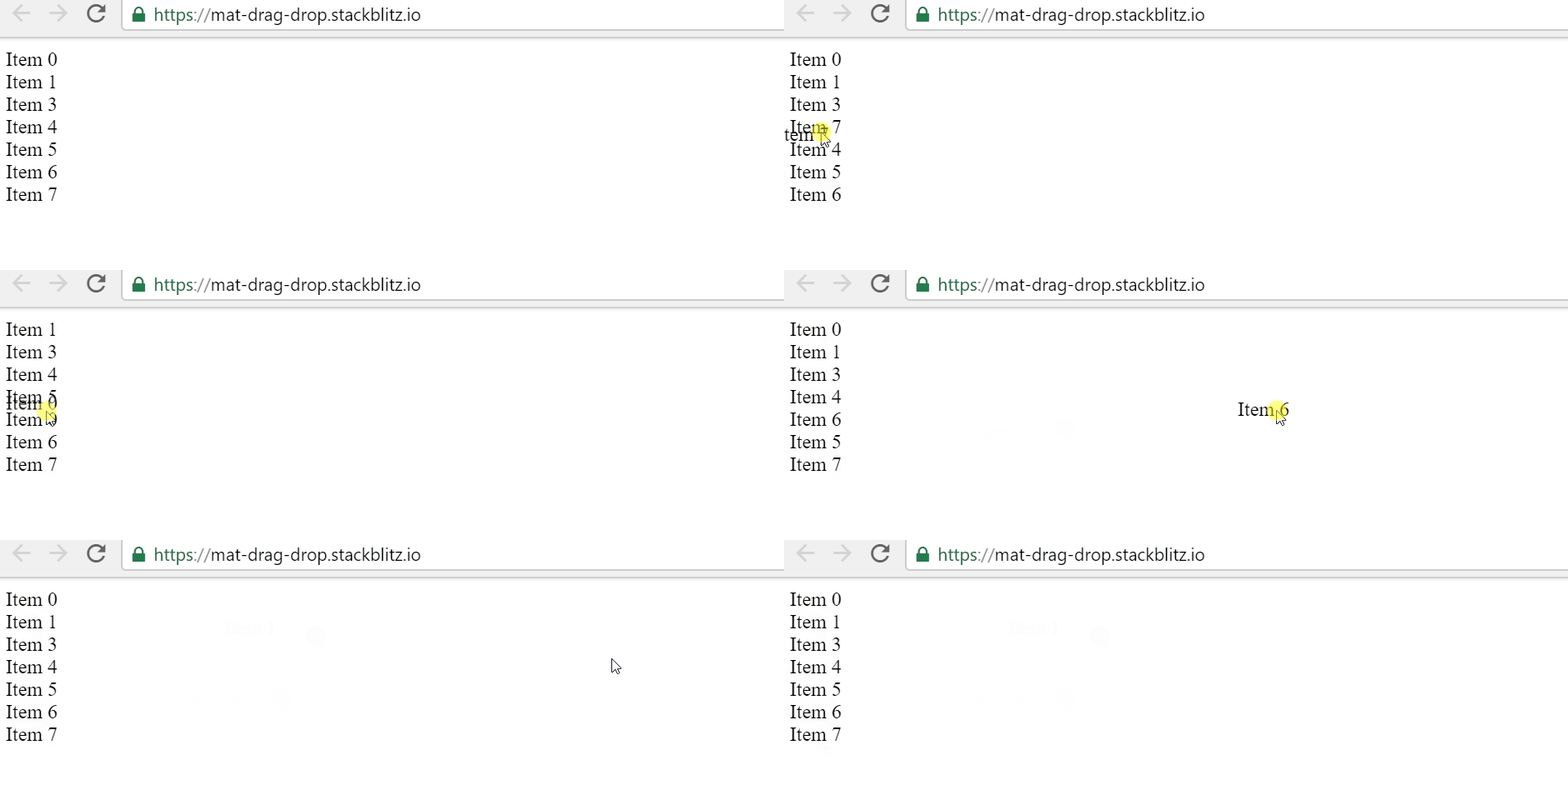
To persist the new ordering, we need to hook into the cdkDropDropped event. This method fires every time an item is released within the container. Here's the signature:
@Output('cdkDropDropped')
dropped: EventEmitter<CdkDragDrop<T, any>> =
  new EventEmitter<CdkDragDrop<T, any>>();
Using this information, we can implement the dropped handler in the AppComponent:
import { Component } from '@angular/core';
import { CdkDragDrop, moveItemInArray } from '@angular/cdk/drag-drop';
@Component(...)
export class AppComponent {
  items = [...]
dropped(event: CdkDragDrop<string[]>) {
  moveItemInArray(
     this.items,
     event.previousIndex,
     event.currentIndex
    );
  }
}
You might have noticed the utility function [moveItemInArray](https://github.com/angular/material2/blob/master/src/cdk/drag-drop/drag-utils.ts#L15) in the snippet above. The CDK includes this helper to calculate the item's new position within the array—a real time-saver.
Now we simply bind the handler to the cdkDrop element in the template:
<div cdkDrop (cdkDropDropped)="dropped($event)">
  <div *ngFor="let item of items" cdkDrag>{{item}}</div>
</div>
And just like that, items can be dragged and reordered within the container.
All of this functionality, accomplished in minutes, with hardly any manual code.

Moving items across lists
Let's increase the complexity and build a basic task board.
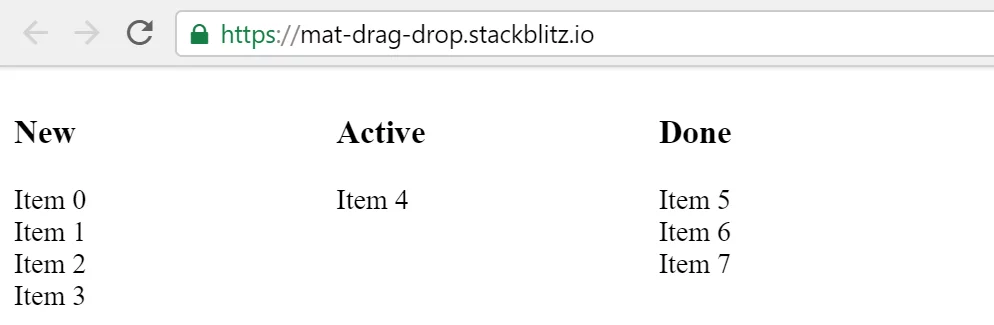
The first step is to restructure the data. Instead of one items array, we'll use three: one for new tasks, one for in-progress tasks, and a final one for completed tasks.
newItems = [
 'Item 0',
 'Item 1',
 'Item 2',
 'Item 3',
]
activeItems = [
 'Item 4',
]
doneItems = [
 'Item 5',
 'Item 6',
 'Item 7',
]
Three separate lists require three distinct drop zones. The cdkDropData input ties each container to its corresponding array.
<div cdkDrop #new="cdkDrop" [cdkDropData]="newItems" [cdkDropConnectedTo]="[active]" (cdkDropDropped)="dropped($event)">
   <div *ngFor="let item of newItems" cdkDrag>{{ item }}</div>
</div>
Linking the drop zones
The [cdkDropConnectedTo] input creates a relationship between two cdkDrop instances. Without this configuration, items are confined to their own container.
For the task board, the following connections are necessary:
- the
newlist connects to theactivelist; - the
activelist connects to both thenewanddonelists; - the
donelist connects to theactivelist;
Essentially, tasks can move between the new and active columns, and also between active and done. Direct movement from new to done is disallowed—items must pass through the active column. The configuration looks like this:
<div class="board">
 <div class="column">
  <h3>New</h3>
  <div cdkDrop #new="cdkDrop"
    [cdkDropData]="newItems"
    [cdkDropConnectedTo]="[active]"
    (cdkDropDropped)="dropped($event)"
   >
   <div *ngFor="let item of newItems" cdkDrag> {{ item }} </div>
  </div>
 </div>
<div class="column">
  <h3>Active</h3>
  <div cdkDrop #active="cdkDrop"
    [cdkDropData]="activeItems"
    [cdkDropConnectedTo]="[new, done]"
    (cdkDropDropped)="dropped($event)"
   >
   <div *ngFor="let item of activeItems" cdkDrag> {{ item }} </div>
  </div>
 </div>
<div class="column">
  <h3>Done</h3>
  <div cdkDrop #done="cdkDrop"
    [cdkDropData]="doneItems"
    [cdkDropConnectedTo]="[active]"
    (cdkDropDropped)="dropped($event)"
   >
   <div *ngFor="let item of doneItems" cdkDrag> {{ item }} </div>
  </div>
 </div>
</div>
The final piece is enhancing the dropped function to handle cross-list transfers.
import { CdkDragDrop, moveItemInArray, transferArrayItem } from '@angular/cdk/drag-drop';
dropped(event: CdkDragDrop<string[]>) {
  if (event.previousContainer === event.container) {
   moveItemInArray(
     event.container.data,
      event.previousIndex,
      event.currentIndex
   );
  } else {
    transferArrayItem(
     event.previousContainer.data,
     event.container.data,
     event.previousIndex,
     event.currentIndex
   );
 }
}
When the source and target containers match, items are reordered as before. When they differ, the dragged item is removed from its original array and inserted into the target array. Another built-in utility, [transferArrayItem](https://github.com/angular/material2/blob/master/src/cdk/drag-drop/drag-utils.ts#L41), handles this logic for us.

It's worth noting that you're not locked into these provided utilities. If your scenario calls for custom behavior, you can replace moveItemInArray and transferArrayItem with your own implementations.
The dropped function is also the place to prevent certain drops. If an item shouldn't be moved for some reason, an early return is all that's needed.
dropped(event: CdkDragDrop<string[]>) {
    if (event.item.data === 'Try to move me') {
      console.log("this isn't happening today");
      return;
    }

    if (event.previousContainer === event.container) {
     moveItemInArray(
       event.container.data,
        event.previousIndex,
        event.currentIndex
     );
    } else {
      transferArrayItem(
       event.previousContainer.data,
       event.container.data,
       event.previousIndex,
       event.currentIndex
     );
   }
}

Bonus 1: Hook into entering and exiting
The API also exposes events for when an item enters or leaves a drop zone. The cdkDropEntered and cdkDropExited handlers behave similarly to cdkDropDropped and live on the same cdkDrop element.
<div cdkDrop #new="cdkDrop"
  (cdkDropEntered)="entered($event)"
  (cdkDropExited)="exited($event)"
>
  <div *ngFor="let item of newItems" cdkDrag [cdkDragData]="item">
    {{ item }}
  </div>
</div>
Use the [cdkDragData] input to attach your data to the dragged item.
import { CdkDragEnter, CdkDragExit } from '@angular/cdk/drag-drop';
entered(event: CdkDragEnter<string[]>) {
 console.log('Entered', event.item.data);
}
exited(event: CdkDragExit<string[]>) {
  console.log('Exited', event.item.data);
}

Bonus 2: Animating drag and drop interactions
The CDK provides CSS classes for styling draggable elements and for animating transitions, such as when items shift during a reorder operation.
.cdk-drop-dragging .cdk-drag {
  transition: transform 500ms cubic-bezier(0, 0, 0.2, 1);
}
.cdk-drag-animating {
  transition: transform 550ms cubic-bezier(0, 0, 0.2, 1);
}
.cdk-drag-placeholder {
  background: rgba(0, 0, 0, .2);
}

Bonus 3: A custom drag preview
So far, our examples have used simple text. But imagine dragging larger elements, like cards, between columns—the full-sized card could feel unwieldy. The CDK solves this with the *cdkDragPreview directive, letting you define a compact or stylized representation that follows the cursor instead.
<div cdkDrop #new="cdkDrop">
   <div *ngFor="let item of newItems" cdkDrag>
        New item: {{ item }}
        <div *cdkDragPreview>{{ item }}</div>
    </div>
</div>
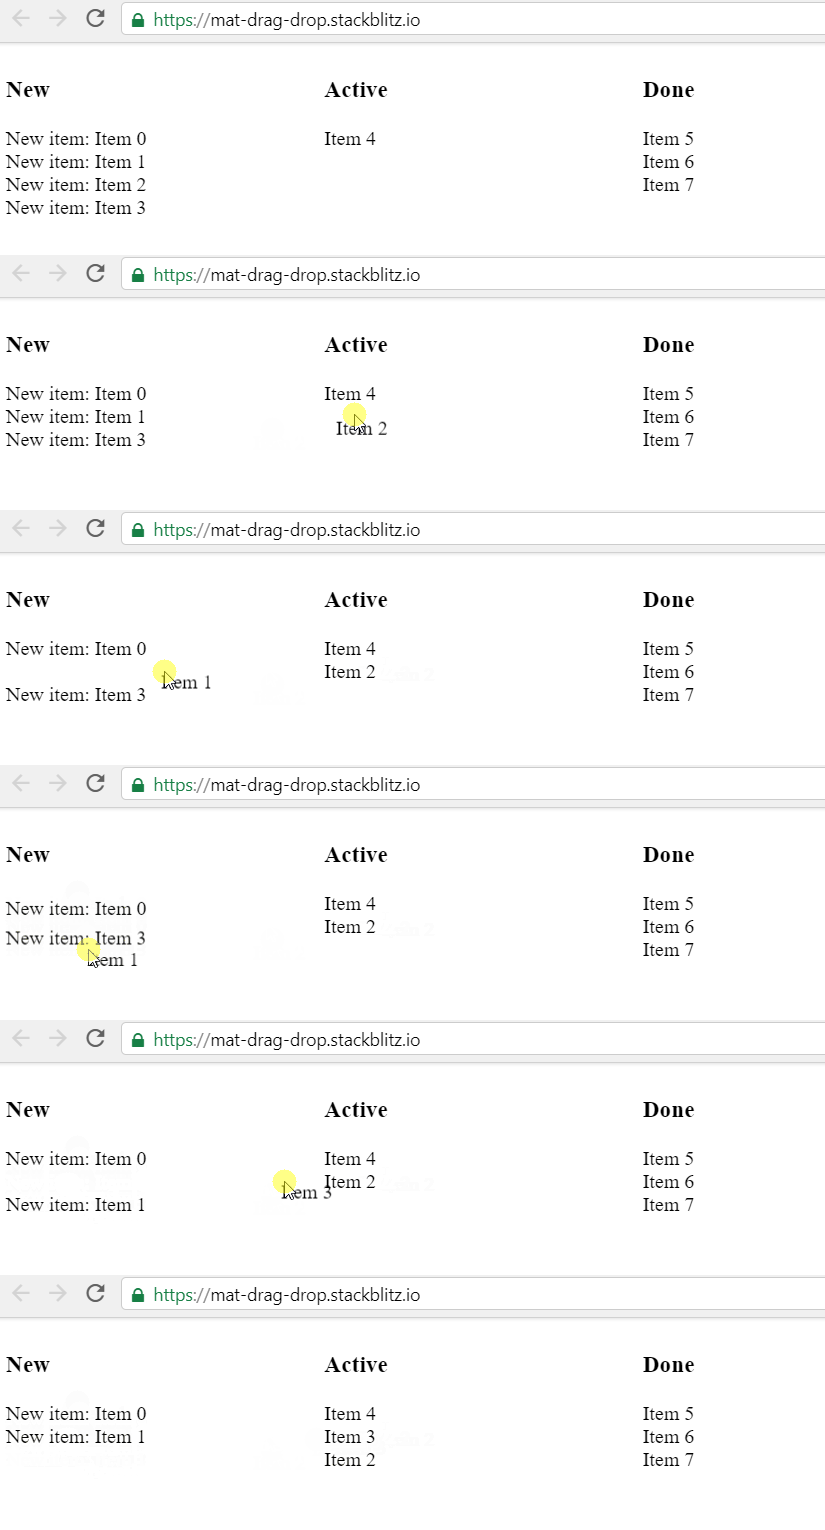
In the GIF, the cards display "New item: Item" as their state. Once dragged, the *cdkDragPreview template takes over—here it shows just the item name, but the possibilities are endless.
Bonus 4: Conditional drop acceptance
The enterPredicate property on cdkDrop accepts a boolean-valued function that runs when an item approaches the zone. Returning false blocks the drop. Below is an example that controls whether items can be placed into the done list.
specialUseCase(drag?: CdkDrag, drop?: CdkDrop) {
  if (drop.data.length <= 2) {
    console.log("Can't drop you because there aren't enough items in 'Active'");
    return false;
  }
  const allowedItems = ['Item 5', 'Item 6', 'Item 7', 'Item 2'];
  if (allowedItems.indexOf(drag.data) === -1) {
    console.log("Can't drop you because only Item 2, 5, 6 and 7 are allowed here");
    return false;
  }
  return true;
};
The corresponding template code:
<div cdkDrop #done="cdkDrop"
  [cdkDropData]="doneItems"
  [cdkDropConnectedTo]="[active]"
  (cdkDropDropped)="dropped($event)"
  [cdkDropEnterPredication]="specialUseCase"
>
  <div *ngFor="let item of doneItems" cdkDrag [cdkDragData]="item">
    {{ item }}
  </div>
</div>
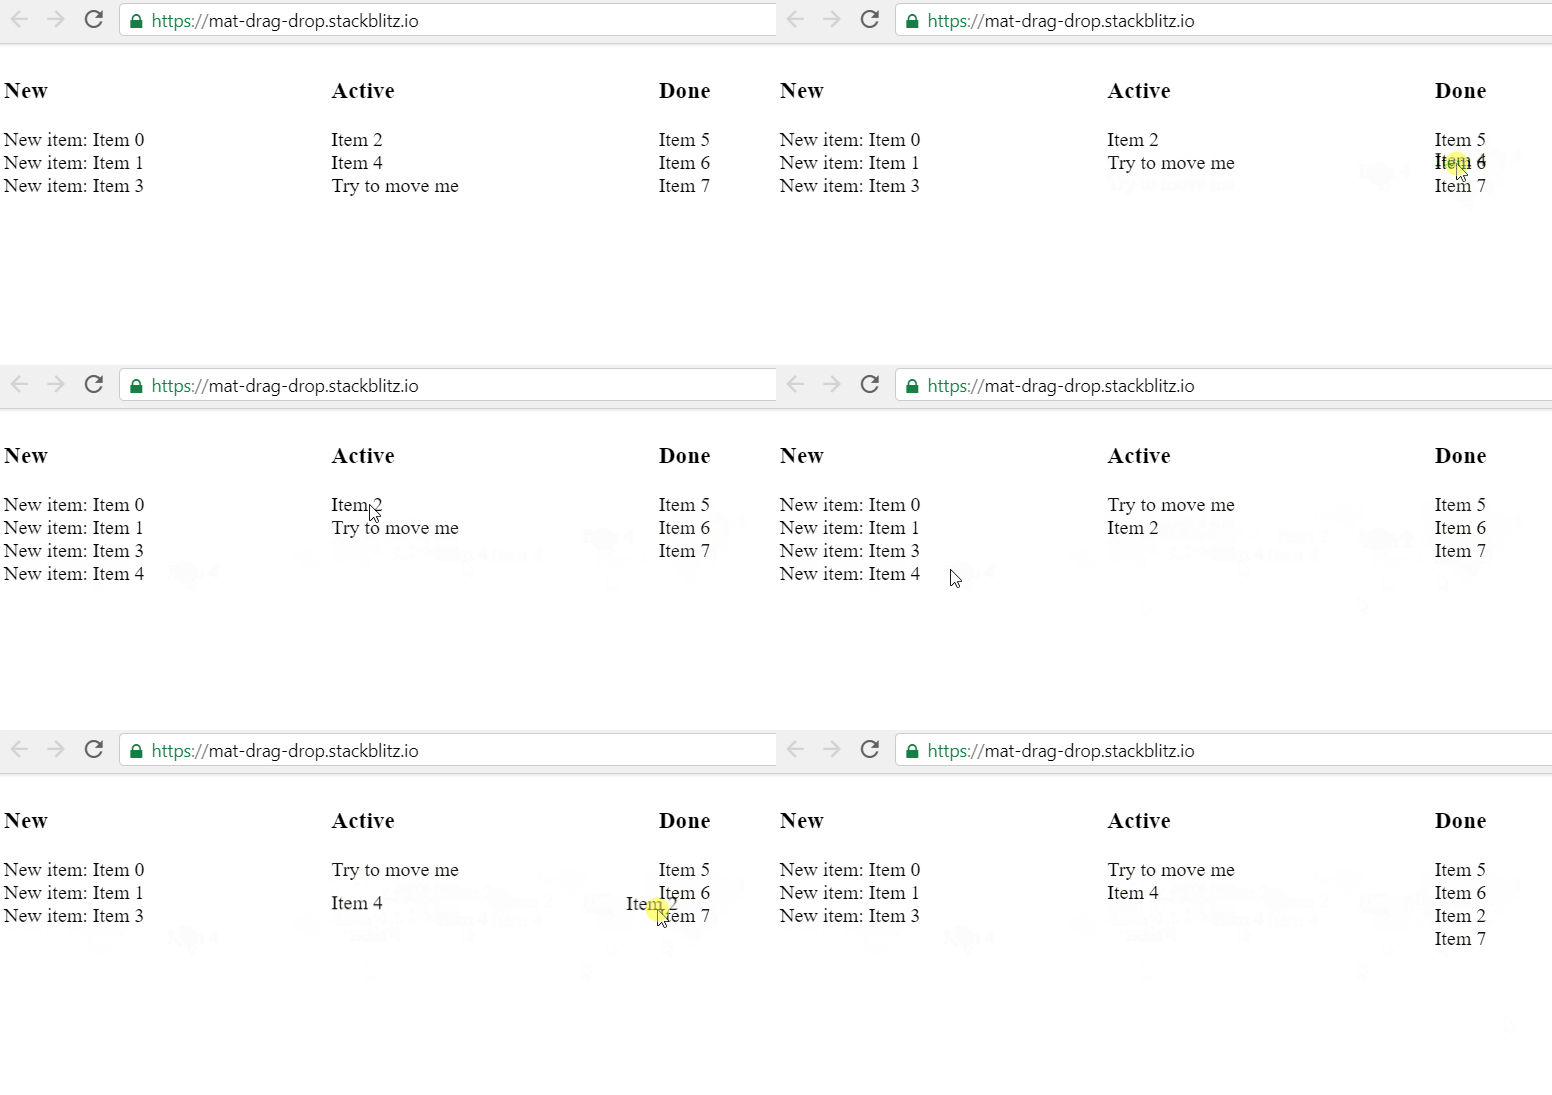
The animation above shows that Item 2 is only allowed in the done column once the active list has at least two other items.
Wrapping Up
I'm eagerly anticipating using this API in production. Having explored it early during the release candidate phase, I'm genuinely impressed. The API strikes an excellent balance between simplicity and control—easy to pick up, yet powerful enough to customize when needed.
If you share my enthusiasm, the beta documentation and the source code itself offer deeper insights.
The complete example is available on StackBlitz for you to experiment with:
Enjoyed this article?
Clap, share, and spread the word if you found this useful.
Follow me on Twitter and Medium for more content like this.
I always appreciate hearing your thoughts!