1. Choosing concatLatestFrom over withLatestFrom
If you’re familiar with the earlier post linked above, you know that withLatestFrom is often the go-to operator when an effect needs to read a slice of state. What’s less widely known is that withLatestFrom can cause an unintended subscription when used without a flattening operator such as switchMap, concatMap, mergeMap, or exhaustMap. In those cases, the operator subscribes to the state selector even if the source observable never emits. When you want to skip the flattening operator altogether, concatLatestFrom is the better option.
Consider the following example:
@Injectable()
export class CollectionEffects {
  addBookToCollectionSuccess$ = createEffect(
    () =>
      this.actions$.pipe(
        ofType(CollectionApiActions.addBookSuccess),
        withLatestFrom(
        this.store.select(fromBooks.getCollectionBookIds)),
        tap(([action, bookCollection]) => {

...
Here, the fromBooks.getCollectionBookIds selector is subscribed regardless of whether the AddBookSuccess action is dispatched:
In contrast, the next snippet ensures the fromBooks.getCollectionBookIds selector only becomes active when the AddBookSuccess action is actually dispatched:
@Injectable()
export class CollectionEffects {
  addBookToCollectionSuccess$ = createEffect(
    () =>
      this.actions$.pipe(
        ofType(CollectionApiActions.addBookSuccess),
        concatLatestFrom(action => this.store.select(fromBooks.getCollectionBookIds)),
        tap(([action, bookCollection]) => {
...
2. Nx DataPersistence – doing it right
Nx DataPersistence ships with helper functions designed to streamline state management in Angular apps while accounting for synchronization and error handling. The available strategies are:
- Optimistic update – the UI is updated immediately before the backend call completes. If the server-side update fails, the provided
undoActionhandler lets you revert the local changes. - Pessimistic update – the inverse of the optimistic approach. The API is called first, and only after success is the local state updated. Since the server call happens before any local changes, rollback isn’t needed. While the request is in flight, the user should be informed—typically via a loading indicator.
- Fetch – used for retrieving data. A notable feature is the ability to pass an ID to the effect, enabling parallel requests when the same action targets different entities.
- Navigate – checks whether the currently active route contains a specific component. If it does, a given command is executed.
Thanks to its straightforward integration, Nx DataPersistence pairs nicely with NgRx, so it’s worth reviewing the official docs and considering it for your own projects.
3. Managing navigation with NgRx
As the app grows, routing logic tends to become harder to follow. The router-store can make debugging much more manageable. With it, the store emits a set of actions on every navigation, giving you full visibility into routing events when used alongside Redux Devtools.
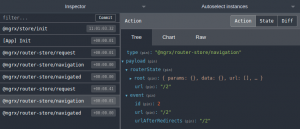
If you’re already using @ngrx/entity, you can take advantage of the pre-built selectors designed for router-store. These allow you to pull data from the store based on the URL path without needing to access route details inside the component.
4. Using facades between state and components
Facades are a sensible pattern when you want to keep components cleaner and reduce direct coupling to the store. They introduce an intermediate layer that acts like a public API for state management. This approach has been nicely explained in Thomas Burleson’s article, so there’s no need to rehash the details here. From my own experience—once I introduced the first facade into a project, I never wanted to go back to handling the store directly inside components.
5. Enabling runtime checks
To make sure your NgRx-based logic aligns with the library’s key concepts, consider turning on runtime checks. These are part of the store configuration and will log errors to the console when something is off. They’re a useful guard during development. For a full list of configuration options, the documentation covers everything thoroughly.
6. Extracting the payload in effects
When you pass an object as an action payload and only need one property from it, the pluck operator can simplify things considerably.
Suppose we have an action defined like this:
export const removeBook = createAction(
'[Book Collection] Remove Book',
props<{ bookId }>()
);
The corresponding effect might typically look like the following:
removeBook$ = createEffect(() => this.actions$.pipe(
ofType(removeBook),
switchMap((action) =>
  this.booksService.removeBook(action.bookId).pipe(
    map(() => removeBookSuccess({bookId: action.bookId}))
  )
)
));
Switching to pluck removes the need to repeat action.bookId multiple times:
removeBook$ = createEffect(() => this.actions$.pipe(
ofType(removeBook),
pluck('bookId'),
switchMap((bookId) =>
  this.booksService.removeBook(bookId).pipe(
    map(() => removeBookSuccess({bookId}))
  )
)
));
That wraps up today’s selection of tips. Let me know in the comments whether you discovered something new and whether you’d like to see more posts like this in the future!