The Angular Router is under active development, but the component-building API has reached a stable state. This article explores how to construct components using this modern Angular approach, with practical examples.
We will cover the fundamentals of component creation, along with common pitfalls to steer clear of:
- Angular - setting the stage
- Components - examining the public API
- Component Internals - introducing the Controller
- Properties and the mechanics of bindings
- Property Best Practices and Anti-patterns
- Handling Events
- Event Best Practices and Anti-patterns
- Wrap-up
Starting Point - Native Browser Components
Consider the native select element. Like all browser components, it possesses two defining traits:
-
Its internal workings are a black box; we only need to understand its public API to use it effectively.
-
Its behavior and purpose are self-contained, requiring no inspection of other application parts.
Angular empowers us to create UI components that mirror these native elements: self-contained, reusable, and straightforward to reason about.
A Glimpse at the Angular Component API
Below is an example of an Angular component: a dropdown, akin to the native select but enhanced with features like disabled options.
Several key things are happening:
-
It accepts an input property,
options, which supplies the list of countries. Properties serve as the component's input, delivering an input model that the view is built upon. -
It emits an output event,
selection, whenever a new option is chosen. Events are the component's output, announcing significant internal state changes to the outside world.
Anatomy of a Component
Each component comprises two key internal elements:
- An encapsulated HTML/CSS tree that defines the component's view structure.
- A Controller class that orchestrates the view based on the input model and user interactions.
With this foundation, let's dive into the two core concepts—properties and events—using examples.
Diving into Properties
First up are properties. Let's introduce the color-me component, used as follows:
Here's a live demonstration:
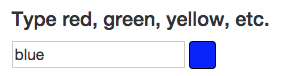
The color-me component is an input box. As you type a color name, it paints a sample square with that color.
Properties Under the Hood
From the outside, it looks like a standard component except for the [sampleColor] syntax. This notation signals that the string blue should be passed to the component as an input property.
This input property is automatically linked to a corresponding property on the component's controller, making it accessible internally.
The Component Controller
The controller for color-me looks like this:
Here, the sampleColor input property is bound to the controller but is locally renamed to color. Inside the controller, it's accessed via this.color, which is used, for instance, to set the initial color in the view.
The Component View Template
The internal view of the component, defined in color-me.html, is as follows:
Several things are at play here:
-
A local variable,
input, is defined using#input. -
The input's
valueproperty is populated with the color name using[value]="color". -
The sample square's background color is updated via
[style.background]="input.value".
This demonstrates that properties aren't just for data passing. They can write to any valid DOM element property, such as input.value for the text field's content or style.background for the sample square's color.
When the Color Gets Applied
In this example, the paint happens as the user types. This relies on an event listener for the keyup event. This listener triggers Angular's change detection, which updates the view. Without it, e.g., if you remove the empty (keyup) listener, the color wouldn't update.
Avoiding Property Misuse
Properties are intended for passing input data that may evolve. They should be avoided in certain scenarios:
-
For static strings, like
[width]="100px". The Attribute annotation is the correct tool for this. -
For passing commands or instructions to trigger specific actions. This creates a tight coupling between the component and its caller. A well-designed component should only receive data and react to it, with the data provider remaining oblivious to how the data is rendered or what side effects it causes.
Handling Events
Let's examine the second component API pillar: Events. We'll start with the scroll-me component:
Here's how it behaves:
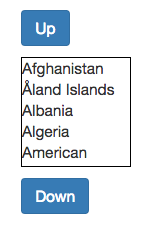
This component scrolls a list vertically in response to button clicks. Notice the template, where the click event on the down button is bound using the (click)="expression" syntax:
Once again, we're using a property binding, [scroll-top], to write directly to the DOM. This writes to the JavasScript scrollTop property of the selection div. This exemplifies Angular's encouragement of direct DOM API usage.
But wait—the Up button in the template lacks a (click) binding, yet the component still functions! The controller reveals why:
The constructor manually adds an event listener to the up button. This is plain DOM API code. Angular's (click) syntax is essentially a shorthand for this manual approach.
How the Event is Processed
Events are picked up by Angular's change detection, which runs at the end of each virtual machine turn. This process is rooted in the concept of Zones, detailed in this previous post. For a visual explanation of events and their connection to Zones, check out this video:
Best Practices for Using Events
The event mechanism can be misused more easily than properties. With properties, you must intentionally attempt to pass a command object to trigger an action.
Events, however, make it easy to fall into the trap of triggering actions in external components. The crucial principle: to keep the event emitter decoupled from its subscribers, the emitter should only announce changes to its internal state—for instance, "a selection happened" in a dropdown.
This keeps the emitting component unaware of its subscribers, ensuring no information about the event's purpose leaks back to it.
Summary
Angular's component API is significantly simpler to grasp and use correctly than Angular 1's. It offers fewer concepts, which are easier to reason about.
Components are better isolated. When applied correctly, properties and events make it easier to write truly reusable components, whose behavior is understandable from their HTML template alone.
To experiment with the Angular component API, you can find the complete runnable code from this article here, or clone the angular2-seed repository for a clean project scaffold.
For a deeper dive into Angular, explore the Angular for Beginners Course:

Other Angular Articles
If you found this useful, you might like these other popular posts on our blog:
- Angular Router - A Detailed Tour and Common Pitfalls
- Running Angular in Production Today
- Building Angular Apps with Observable Data Services - Pitfalls to Avoid
- Introduction to Angular Forms - Template-Driven vs. Model-Driven
- Angular Universal: Building SEO-Friendly SPAs
- How Angular Change Detection Really Works