
What is @ViewChild and Why Test It?
If you've spent any time with Angular, you've likely encountered a parent component that accesses a child component through @ViewChild. Testing such a parent component becomes straightforward when you include the actual child component in your test bed. The real challenge emerges when you need to substitute the real child with a mock version using a stub component.
This discussion will cover:
- A quick overview of
@ViewChildusage - Strategies for unit testing a parent component with the real child
- Approaches for unit testing when using a stub for the child component
A foundational grasp of Angular Unit Testing will help you follow along.
A Simple Look at @ViewChild
If you're already comfortable with @ViewChild and its applications, you may skip ahead to the next part.
In essence, @ViewChild allows a parent component to invoke methods on its child components. This moves beyond the declarative nature of @Input() properties, treating the child component more like an API that exposes its public methods.
A basic child component
Consider this straightforward component:
import { Component, OnInit } from '@angular/core';

@Component({
  selector: 'app-child',
  template: `Timestamp: {{timeStamp}}`
})
export class ChildComponent implements OnInit {
  public timeStamp: Date;

  ngOnInit() {
    this.updateTimeStamp();
  }

  updateTimeStamp() {
    this.timeStamp = new Date();
  }
}
This ChildComponent shows the current timestamp upon initialization. It also has a public method, updateTimeStamp(), which refreshes the displayed time.
A basic parent component
Now, imagine a parent component that not only displays ChildComponent but also needs to instruct it to refresh the timestamp. It might look similar to this:
import { Component, ViewChild } from '@angular/core';
import { ChildComponent } from '../child/child.component';

@Component({
  selector: 'app-parent',
  template: `
    <button type="button" (click)="update()">Update</button>
    <br>
    <app-child></app-child>`
})
export class ParentComponent {
  @ViewChild(ChildComponent) childComponent: ChildComponent;

  update() {
    this.childComponent.updateTimeStamp();
  }
}
The ParentComponent renders a button labeled Update. When this button is clicked, the update() function within ParentComponent is triggered, which then calls the updateTimeStamp() method on the child component instance.
The key line that gives the parent a handle to the child's instance is:
@ViewChild(ChildComponent) childComponent: ChildComponent;
A live demo of this can be viewed on StackBlitz:
import { Component } from '@angular/core';

@Component({
  selector: 'app-root',
  templateUrl: './app.component.html',
  styleUrls: ['./app.component.css']
})
export class AppComponent {
  title = 'viewchild-unit-test-example';
}
Creating Tests with the Actual Child Component
Our goal is to write a unit test for ParentComponent. For the sake of clarity, we'll skip testing the button's event handler and focus only on verifying that invoking update() in the parent calls the updateTimeStamp() method on the child.
Here is the initial content of our parent.component.spec.ts:
import { async, ComponentFixture, TestBed } from '@angular/core/testing';
import { ParentComponent } from './parent.component';
import { ChildComponent } from '../child/child.component';

describe('ParentComponent', () => {
  let component: ParentComponent;
  let fixture: ComponentFixture<ParentComponent>;

  beforeEach(async(() => {
    TestBed.configureTestingModule({
      declarations: [
        ParentComponent,
        ChildComponent
      ]
    })
    .compileComponents();
  }));

  beforeEach(() => {
    fixture = TestBed.createComponent(ParentComponent);
    component = fixture.componentInstance;
    fixture.detectChanges();
  });

  it('should create', () => {
    expect(component).toBeTruthy();
  });

  it('should call updateTimeStamp', () => {
    spyOn(component.childComponent, 'updateTimeStamp');
    component.update();
    expect(component.childComponent.updateTimeStamp).toHaveBeenCalled();
  });
});
Pay attention to line 13, where ChildComponent is included in the declarations array of our testing module.
Lines 30 through 32 contain the simple test logic that verifies the interaction between the update() and updateTimeStamp() functions.
Executing the test suite with:
$ npm run test
All the tests pass without any issues:
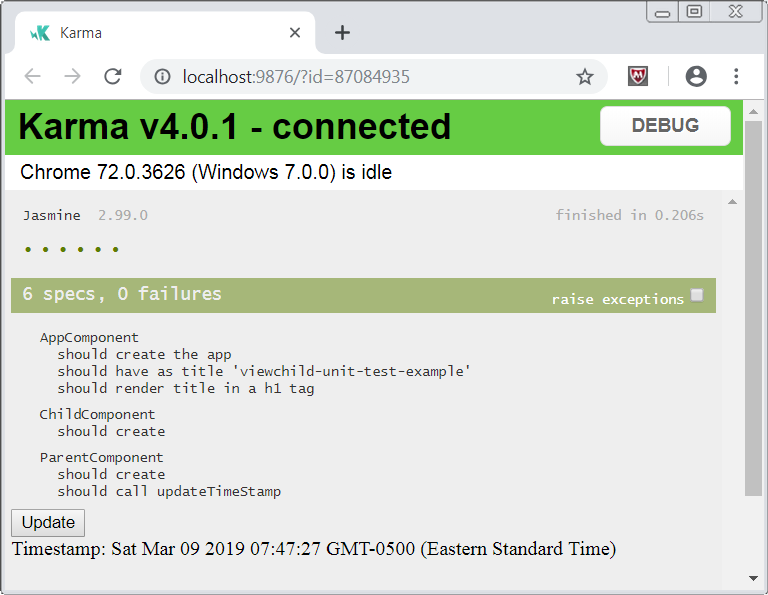
Everything seems fine at this point.
The Problem with Using the Real Child Component
Simply declaring ChildComponent in the test module isn't the best practice. Any defect found in ChildComponent will cause our ParentComponent tests to fail as well. For true unit tests, we aim to isolate the component under test from its collaborators.
The common solution is to replace real child components with simple stubs. Here is how we might mock ChildComponent:
import { Component } from '@angular/core';

@Component({
  selector: 'app-child',
  template: ''
})
export class ChildStubComponent {
  updateTimeStamp() {}
}
You're likely familiar with this pattern already. To be thorough, let me clarify how this stub operates. It's a minimal representation of the real thing:
- The
selectoris kept asapp-child, matching the original component. - The
templateis defined as an empty string. - It includes a basic version of the
updateTimeStamp()method since our test will call it.
Swapping in the stub
Now, we want to use this stub in our tests. We can update the declarations in our spec file, replacing ChildComponent with ChildStubComponent. For instance, the asynchronous beforeEach() in parent.component.spec.ts should be modified to:
beforeEach(async(() => {
  TestBed.configureTestingModule({
    declarations: [
      ParentComponent,
      ChildStubComponent
    ]
  })
  .compileComponents();
}));
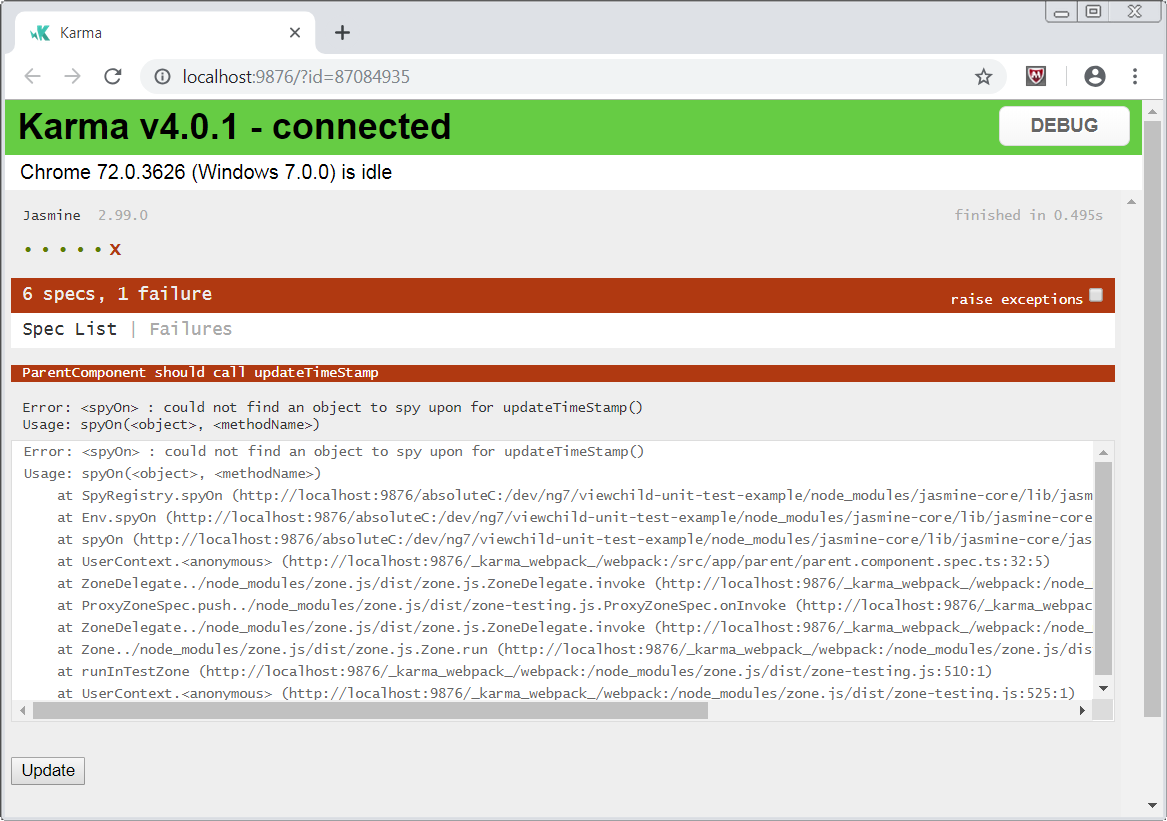
However, when you run the tests again with:
$ npm run test
It fails, which is frustrating.
Solutions for Providing the Stub to @ViewChild
The error message indicates the test is unable to locate an instance of ChildStubComponent. We have to find a way to make the instance available to the @ViewChild property.
There are two main strategies to accomplish this task:
- Creating and assigning the child component instance manually in the test.
- Setting up a custom provider within the stub component itself.
Personally, I find the **provider approach** to be the cleanest. However, since this is the Angular In Depth blog, not the "Todd's Personal Best Practices" blog, we'll explore both options so you can decide for yourself.
Approach 1: Manually creating the component instance
We'll adjust our synchronous beforeEach() function:
beforeEach(() => {
  fixture = TestBed.createComponent(ParentComponent);
  component = fixture.componentInstance;
  // populate childComponent with an instance of the stub
  component.childComponent =
      TestBed.createComponent(ChildStubComponent).componentInstance;
  fixture.detectChanges();
});
Here, we manually create an instance of the stub using the line:
TestBed.createComponent(ChildStubComponent).componentInstance;
When you run the tests after this change with $ npm run test, you'll encounter:
ERROR in src/app/parent/parent.component.spec.ts(23,5): error TS2739: Type 'ChildStubComponent' is missing the following properties from type 'ChildComponent': timeStamp, ngOnInit
A compile error, which is surprising at first.
Addressing TypeScript's strict type checking
This compile error arises because TypeScript enforces strong typing. Even if they aren't used in your tests, the properties and methods like timeStamp and ngOnInit() are part of the ChildComponent's public interface, and TypeScript expects any type assigned to it to have these members.
We could add the missing ngOnInit() method and timeStamp property to the stub. Alternatively, we can use a type assertion to force the stub to be treated as a ChildComponent.
Employing type assertions
TypeScript, like other statically typed languages, supports type casting. There are typically two syntaxes for this.
The first uses angle brackets:
const myFoo: Foo = <Foo> bar;
The second uses the as operator:
const myFoo: Foo = bar as Foo;
My **tslint** configuration favors the latter. My colleague Tim Deschryver noted that this is because of the "no-angle-bracket-type-assertion": true rule in my tslint.json file.
Applying this change to your parent.component.spec.ts would look like this:
import { async, ComponentFixture, TestBed } from '@angular/core/testing';
import { ParentComponent } from './parent.component';
import { ChildComponent } from '../child/child.component';
import { ChildStubComponent } from '../child/child-stub.component.spec';

describe('ParentComponent', () => {
  let component: ParentComponent;
  let fixture: ComponentFixture<ParentComponent>;

  beforeEach(async(() => {
    TestBed.configureTestingModule({
      declarations: [
        ParentComponent,
        ChildStubComponent
      ]
    })
    .compileComponents();
  }));

  beforeEach(() => {
    fixture = TestBed.createComponent(ParentComponent);
    component = fixture.componentInstance;
    component.childComponent = TestBed.createComponent(ChildStubComponent).componentInstance as ChildComponent;
    fixture.detectChanges();
  });

  it('should create', () => {
    expect(component).toBeTruthy();
  });

  it('should call updateTimeStamp', () => {
    spyOn(component.childComponent, 'updateTimeStamp');
    component.update();
    expect(component.childComponent.updateTimeStamp).toHaveBeenCalled();
  });
});
With this modification, the tests should compile and run successfully.
Approach 2: Adding a Provider to the Stub
My preferred technique involves adding a provider directly to the stub component. This clever idea was proposed by Alexander Poshtaruk, and thekiba provided the practical implementation steps.
You may have seen and used components that look like this:
@Component({
  selector:    'app-hero-list',
  templateUrl: './hero-list.component.html',
  providers:  [
    {
      provide: HeroService,
      useClass: BetterHeroService
    }
  ]
})
export class HeroListComponent {
/* . . . */
}
Note that this component has a providers array in its **metadata**. Within this array, you'll find a configuration object that looks like:
{ provide: HeroService, useClass: BetterHeroService }
This is known as a Dependency Provider. The useClass element is the provider-definition key. You've likely used this pattern when mocking services in your tests.
Interestingly, thekiba originally suggested using useExisting instead. However, explaining the distinction between useClass and useExisting in detail would bloat this already lengthy article. Who knows, it might even become the topic of a future post, if I'm not afraid you'll all stop following me due to too many digressions down the rabbit hole...
A quick look at the providers array:
Just as you can register services as providers, it turns out you can also register component classes as providers. This is a clever twist.
Let's update ChildStubComponent to use a useClass provider for ChildComponent. Here is the result:
import { Component } from '@angular/core';
import { ChildComponent } from './child.component';

@Component({
  selector: 'app-child',
  template: '',
  providers: [
    {
      provide: ChildComponent,
      useClass: ChildStubComponent
    }
  ]
})
export class ChildStubComponent {
  updateTimeStamp() {}
}
With this setup, we are telling Angular that whenever this stub is used, it should provide itself (the ChildStubComponent) whenever a ChildComponent is requested. Since this is in a .spec file, it only affects the testing environment.
Remember, when we use this provider method, we don't need to manually create the component anymore with TestBed.createComponent.
Confirming the Tests Pass
After implementing the provider, run the tests once more:
$ npm run test
You'll see that they all compile and pass successfully:
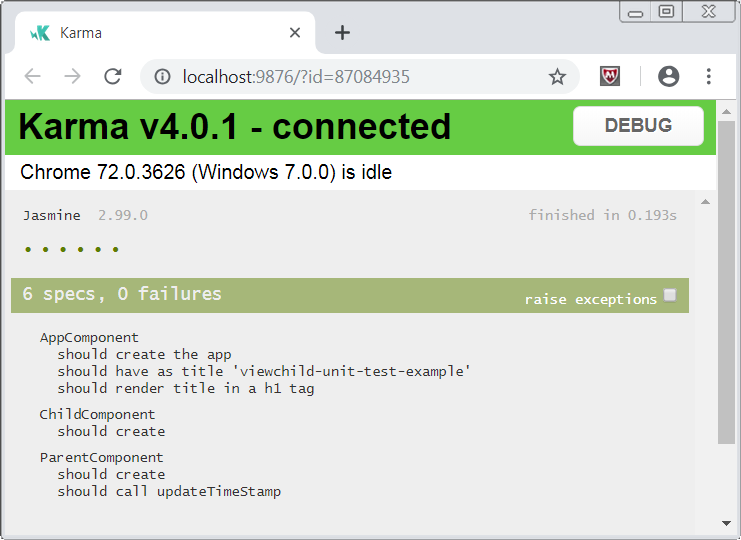
Success!
A Brief Recap
To summarize, here are the steps to test a component that uses @ViewChild with a stub:
- Create a simple stub component to mock the real child.
- Declare this stub in the
declarationsof your parent's.specfile. - Set up a
useClass**Dependency Provider** within the stub'sprovidersarray, mapping the real component type to the stub.
{ provide: HeroService, useClass: BetterHeroService }
Related Code and Resources
I've also created a **GitHub repository** with all the code used in this article available for you to explore:
[
t-palmer/viewchild-unit-test-example
Angular Example of Unit Testing for ViewChild. Contribute to t-palmer/viewchild-unit-test-example development by creating an account on GitHub.
GitHubt-palmer

](https://github.com/t-palmer/viewchild-unit-test-example)