
Have you ever worked with a tree component in your application? When I needed one for a project at my company, the first thing I did was explore the solution offered by Angular CDK.
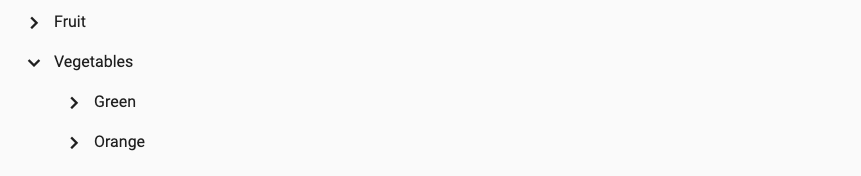
<cdk-tree [dataSource]="dataSource">
  <cdk-tree-node *cdkTreeNodeDef="let node">
    <span>{{ node.label }}</span>
  </cdk-tree-node>
</cdk-tree>
Even though I use Angular on a daily basis, I had no idea how to get this working. Is it some kind of special syntax reserved for the Angular core team? It turns out it’s not—but it does depend on several advanced framework capabilities. The real issue is that most of these capabilities are only touched on briefly in the official Angular documentation.
Down below, I’m going to walk through every feature that’s needed to create a tree component using the exact same API as Angular Material. Here’s the lineup:
- Content projection (
ng-content) - Dynamic templates (
ng-template,ngTemplateOutlet) - Content queries (
@ContentChild) - Structural directives
This isn’t meant to be an exhaustive tutorial on these underdocumented concepts, but rather a hands-on example with clear explanations. I’ll also point you to the best resources I’ve found for diving deeper into each topic.
Content Projection
The coolest thing about the cdk-tree component is that it lets you pass a dynamic HTML template between its opening and closing tags. Let’s figure out how to grab that template and apply it to render each node from the dataSource input.
<cdk-tree [dataSource]=”dataSource”>
  <span>My node template</span>
</cdk-tree>
app.component.html
There’s nothing out of the ordinary here—just plain HTML. After all, pages are made by combining elements, right? What sets this apart from a standard element is that cdk-tree happens to be a component. The markup enclosed between its opening and closing tags is what’s known as the HTML element content.
Now, let’s build the cdk-tree component and examine how that content gets processed.
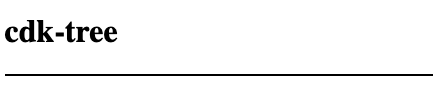
@Component({
  selector: 'cdk-tree',
  template: `
     <h1>cdk-tree</h1>
     <div class="border--black">
       <!-- Expect the content to appear here -->
     </div>
  `,
})
export class CdkTreeComponent {
  @Input() dataSource;
}
cdk-tree.component.ts
Unfortunately, the span placed inside its body fails to appear—it's as if no content exists. By default, a component renders solely the HTML from its own template. To display that content, you must use ng-content, which functions like slots in Web components and Vue.js, as well as the children prop in React.
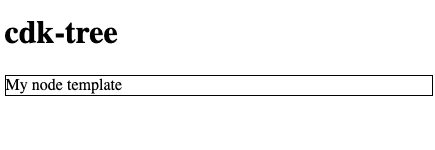
<h1>cdk-tree</h1>
<div class="border--black">
   <!-- Replaced by cdk-tree content -->
   <ng-content></ng-content>
</div>,
cdk-tree.component.html
Now the content is displayed! You've successfully implemented content projection. The parent component generates the content elements, yet they are rendered within a different component. Although it appears the DOM fragment was relocated, it wasn’t. The CdkTree component merely references content belonging to the parent component.
Parent-created projected content is displayed inside the child component.
This unique element contains a select attribute that functions similarly to a CSS selector. You have the option to render only specific portions of the content. In the upcoming example, we pick the node header from the content and enclose it within a header element.
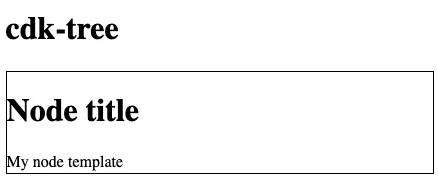
<!-- app.component.html -->
<cdk-tree [dataSource]="dataSource">
  <span header>Node title</span>
  <span>My node template</span>
</cdk-tree>

<!-- cdk-tree.component.html -->
<h1>
  <!-- Extract the HTML element with header attribute from content -->
  <ng-content select="[header]"></ng-content>
</h1>

<!-- Get everything not yet selected from the content -->
<ng-content></ng-content>
Pick a portion of the content
In the cdk-tree, every node displays distinct values, so you need a template that adapts at runtime. The resulting HTML has to vary per node depending on its label property.
<cdk-tree [dataSource]="dataSource">
   <!-- Error: Property 'node' does not exist on type 'AppComponent' -->
   <div>{{ node.label }}</div>
</cdk-tree>
app.component.html
ng-content fails here. A node property must be defined inside the App component with cdk-tree for this to function. Still, the cdk-tree itself should handle node discovery through dataSource and iterate accordingly.
This ng-content approach doesn’t satisfy our needs, though it serves as a decent starting point. In alternative contexts, such content projection might be sufficient on its own.
To dive deeper into ng-content, see this issue requesting additional docs, which points to this Medium write-up as a reference. If you're wondering why ng-content involves more than simply relocating DOM, read up on views.
Dynamic template
Initially, ng-content let us place a template with data bound to a parent (host) component into the cdk-tree. Our next move is to have the cdk-tree supply each node its own data for that template.
<cdk-tree [dataSource]="dataSource">
  <!-- Can’t get a reference to the node to display -->
  <div>{{ node.label }}</div>
</cdk-tree>
app.component.html
App component renders its template within its own context, rather than inside the cdk-tree's context. Even so, the content shows up in the cdk-tree because of content projection.
We supply a template rather than HTML content. Think of it as a pattern: it lays out the HTML structure, but it also takes data to become dynamic. Down the road, that template serves to create DOM elements.
<cdk-tree [dataSource]="dataSource">
  <!-- Creates a template with node parameter -->
  <ng-template let-node="data">
     <div>{{ node.label }}</div>
  </ng-template>
</cdk-tree>
app.component.html
Here you go — fresh new syntax. The tag ng-template is how a template gets defined. Keep in mind, it’s just a blueprint: even if you attempt to render it via ng-content, nothing will show. It must be instantiated first to produce DOM elements, just like the HTML5 template tag that backs Web Components.
Notice that this template carries a let-node attribute. That syntax mirrors how variables are declared in JavaScript, because you’re really defining a variable named node whose value is data. You’re free to pick any name for that variable—it just needs to align with what you reference inside the template’s body. At instantiation time, the data value gets injected, and in our setup, the CdkTree component is what supplies it.
Whenever you instantiate a template, you can pass a context that sets up variables, making the whole thing flexible and reactive.
<ng-container
  [ngTemplateOutlet]="referenceToTheTemplate"
  [ngTemplateOutletContext]="{ data: { label: 'My node' } }">
</ng-container>
Presenter: cdk-tree.component.html
This is where the NgTemplateOutlet directive steps in. Compared with the official docs, this form is more elaborate. That’s deliberate—I find this syntax more readable, though it behaves identically to the more concise variant. The ngTemplateOutlet input holds the template itself, whereas the ngTemplateOutletContext input supplies the context, which includes the data field.
Dive deeper into ngTemplateOutlet
What is the source of referenceToTheTemplate? It’s a template reference variable. With such variables, you can tag any segment of markup and obtain a handle to it. Think of it as pairing the id attribute with getElementById, but implemented through a hashtag syntax.
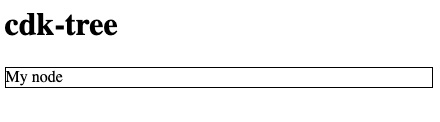
<ng-template #referenceToTheTemplate let-node="data">
  <div>{{ node.label }}</div>
<ng-template>

<ng-container
  [ngTemplateOutlet]="referenceToTheTemplate"
  [ngTemplateOutletContext]="{ data: { label: 'My node' } }">
</ng-container>
cdk-tree.component.html
The output closely matches what we achieved earlier with ng-content. The host component no longer supplies the node value. Instead, the cdk-tree, which has access to the dataSource, is responsible for it. Up next, you’ll discover how to relocate the node template back to the host component.
For additional reading on ng-template and ngTemplateOutlet, I recommend this excellent resource. There’s also a compelling presentation on Angular Connect featuring a real-world application. If ng-container is unfamiliar, that same article covers it (equivalent to React Fragments). Additionally, the concept of dynamic templates exists in Vue.js under the name scoped slots.
Content query
We managed to render a template through ngTemplateOutlet using a reference variable. The catch, however, is that this approach requires both the template and the reference variable to reside in the same component.
<cdk-tree [dataSource]="dataSource">
  <ng-template let-node="data">
    <div>{{ node.label }}</div>
  <ng-template>
</cdk-tree>
app.component.html
When working with cdk-tree, the view template lives inside a parent component, but it gets rendered within the cdk-tree itself. The challenge is retrieving that node template from the parent component’s content.
With ng-content, you can reach the component’s content, but you still lack a direct reference to the template. To obtain it, you can extract the content by leveraging the ContentChild decorator for querying.
@Component({
  selector: 'cdk-tree',
  template: `
     <!-- Node template is back to the host component -->
      <ng-container
        [ngTemplateOutlet]="nodeTemplate"
        [ngTemplateOutletContext]="{ data: { label: 'My node' } }"
      ></ng-container>
  `,
})
export class CdkTreeComponent {
  // Get node template reference from component content
  @ContentChild(TemplateRef) nodeTemplate: TemplateRef<any>;
}
cdk-tree.component.ts
Using ContentChild, you can extract a particular piece of content from the component by providing a selector. If the special token TemplateRef is passed to ContentChild, it grabs the initial ng-template found inside the projected content. In essence, this decorator behaves like document.querySelector.
There are additional decorators of the same kind available in Angular. When you need the counterpart of document.querySelectorAll, ContentChildren gives you a QueryList. Meanwhile, ViewChild and ViewChildren target elements located within the component's own template.
Our example only scratches the surface of what query decorators can do. Beyond reaching into DOM nodes, they also provide direct references to Component instances.
@ContentChild(CdkTreeComponent) treeInstance: CdkTreeComponent;

@ContentChild('referenceToTheTemplate', { read: TemplateRef })
nodeTemplate: TemplateRef<any>;
The initial example using a class selector defaults to returning the component instance. The next example, which is the extended form, targets a template through a template reference variable combined with the read parameter. The query supports retrieving TemplateRef, ElementRef, ViewRef, ViewContainerRef, and component or directive instances via their defining classes.
You’re nearing the completion stage. The cdk-tree supplies the current node through ngTemplateOutletContext. Meanwhile, the node template originates from the host component via ContentChild. The only remaining task is aligning with Angular Material tree syntax.
Consult the ViewChild documentation for additional selector examples—it’s the sole resource covering this topic. If the query’s potential return values interest you, review this In-depth article. For a contrast between ViewChildren and ContentChildren, see this blog post.
Structural directives
Now, it’s time to combine ng-template, ngTemplateOutlet, and @ContentChild seamlessly. These three elements suffice to construct a functional cdk-tree. Still, there’s potential for refinement. The ng-template syntax for declaring variables derived from context properties remains challenging to master.
<cdk-tree [dataSource]="dataSource">
  <ng-template let-node="data">
     <div>{{ node.label }}</div>
  </ng-template>
</cdk-tree>
app.component.html
You’re likely already familiar with the *ngIf and *ngFor directives. The latter performs tasks closely resembling what our cdk-tree does—it grabs the template for rendering a single item, iterates through the supplied array, and for each iteration it displays the template with the current entry placed into the context.
<ul>
  <li *ngFor="let node of nodes; let index = index">
    {{ node.label }}
  </li>
</ul>
The asterisk notation is essentially shorthand for an ng-template along with its input variables. This concise form is what enables structural directives — those that take a TemplateRef argument and optionally render it against a given context.
Be careful not to mistake this for the more basic attribute directives, which attach themselves to already existing DOM elements.
<div *cdkTreeNodeDef="let node; let isLeaf = leaf">
  {{ isLeaf ? '' : '>' }} {{ node.label }}
</div>

<!-- Without structural directive -->
<ng-template let-node let-isLeaf="leaf">
  <div>{{ isLeaf ? '' : '>' }} {{ node.label }}</div>
</ng-template>
app.component.ts
Consider a minimal illustration of how Angular transforms nodes using the (*) asterisk notation into ng-template. The string that declares template variables has to follow Angular micro syntax. Have you noticed the node variable? It plays no direct role in binding; instead, it corresponds to the default $implicit property in the template context.
// cdk-tree.component.ts
const context = {
  $implicit: { label: 'My node' },
  leaf: true
};

// cdk-tree.component.html
<ng-container
   [ngTemplateOutlet]="nodeTemplate"
   [ngTemplateOutletContext]="context”
></ng-container>
Multi-variable context provisioning
In Angular Material’s cdk-tree, the cdkTreeNodeDef structural directive serves as a name match. A structural directive is built by declaring a class adorned with the Directive decorator. Beyond that, no additional logic is required, since the sole purpose is to leverage the asterisk (*) syntactic sugar.
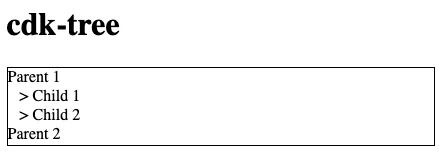
// cdk-internal-tree-node-def.directive.ts
@Directive({
  selector: '[cdkTreeNodeDef]'
})
export class CdkTreeNodeDefDirective {}

// cdk-tree.component.html
<ng-container *ngFor=”let data of dataSource”>
  <ng-container
    [ngTemplateOutlet]="nodeTemplate"
    [ngTemplateOutletContext]="{ $implicit: data }">
  </ng-container>
</ng-container>
Create a structural directive and loop over the data source
When building this component as part of a library, make sure the directive is exported as well. This allows you to access it with @ContentChild and expose it to consumers.
For a deeper look at structural directives and their micro syntax, refer to this piece by Netanel. The official docs are also worth checking out — they’re detailed, though not the easiest to follow.
Wrapping up
By now, you’ve covered every advanced Angular feature required to assemble your cdk-tree. The Material tree implementation takes a slightly different path, relying on createEmbeddedView rather than ngTemplateOutlet. Beyond that, the logic stays largely the same.
The full source and a live demo are available on this Stackblitz
Keep in mind these features are rather sophisticated. Structural directives aren’t something you’ll likely write on a daily basis. In many cases, simplicity wins. Insights from the 2020 Developer survey prompted the Angular team to prioritize clearer documentation, and content projection is one of the topics they plan to address in the first quarter of 2021.
Enjoyed the read? Curious about how we push innovation at Smart AdServer? Head over to our official blog. See you over there!
Many thanks to the reviewers who contributed to improving this article: Thomas Mainguy, Yann Mentzos, Erwan Azzoug, Romain Pertin and Amy Bornong from Smart AdServer, as well as Hayden Braxton, Max Koretskyi, Natan Br and Amadou Sall from the InDepthDev community.