Automated End-to-End Testing in Angular With Cypress
In this guide, we'll explore how to set up and run automated end-to-end tests for an Angular Todo application using Cypress. We'll walk through several test scenarios step by step, though the focus will remain on the testing side rather than Angular specifics.
If you'd like to jump straight into writing tests, grab the repository I've prepared with the Angular Todo App and Cypress already configured: https://gitlab.com/mquanit/angular-items. Clone it and you're ready to experiment.
Before diving into examples, let's clarify what Cypress is. According to its official website:
Cypress is an automated end-to-end testing framework for writing automated tests
With alternatives like Protractor, Karma, and Mocha available, why choose Cypress? While Protractor is the conventional choice for Angular projects, Cypress runs tests noticeably faster and offers a smoother debugging experience. Beyond handling full end-to-end flows independent of the application, Cypress can also perform unit testing on methods within model and service classes. It delivers a complete testing experience right inside the browser, with tests running automatically.
Cypress ships with its own test runner designed for local execution. Some standout capabilities include Time Travel, Debuggability, Real-time reloads, and Automatic waiting. These features set Cypress apart, and we'll see them in action shortly.
Enough introduction. If you've cloned the repository, you're set. Otherwise, with an existing Angular project, all you need is to install Cypress as a dependency. Run the following command to add the cypress NPM package:
npm i -D cypress
The cypress package bundles both a desktop application and the Cypress binary. The initial install can take a bit, as the binary needs to be downloaded. Once saved in a global cache, future installations of the same version will be much quicker.
After the installation finishes, you'll notice a cypress folder and a cypress.json file at the root of your project. The cypress folder is where test files and generated artifacts live. The configuration file starts as an empty JSON object, but this is where you define Cypress's default behavior. Let's apply some configuration before writing tests.
Add the following to your cypress.json:
{
  "baseUrl": "http://localhost:4200",
  "ignoreTestFiles": "**/examples/*",
  "viewportHeight": 760,
  "viewportWidth": 1080
}
As the name implies, baseUrl points to localhost:4200, the standard development port for Angular projects.
The Cypress installation also generates an examples directory containing demo tests. Since these default tests aren't useful in our project, we remove them from the test suite.
That covers the setup. Now let's write our first test.
Inside the cypress folder, you'll find an integration directory — this is where you'll place every test that should appear in your test suite.
Create a file called DemoTest.spec.js and populate it with the code below:
describe("Our Todo App Test Suite", () => {
  it("Visiting our app", () => {
    cy.visit("/");
    cy.get(".nav-wrapper").contains("Items Manager");
  });
});
Here we use the describe function, which groups all related test cases and is often referred to as a Suite or Test Suite. Inside it, the it function holds the actual test logic. In this example, we navigate to the root route with cy.visit("/") and then verify that a nav-wrapper class exists and contains the text Items Manager.
Cypress offers a wide range of APIs, from selecting elements to making assertions. One of the most frequently used is cy.get(), which retrieves a reference to a DOM element.
Open a second terminal and run:
npx cypress open //to open cypress test runner
Initial startup may be slow, but soon you'll see the interface below.
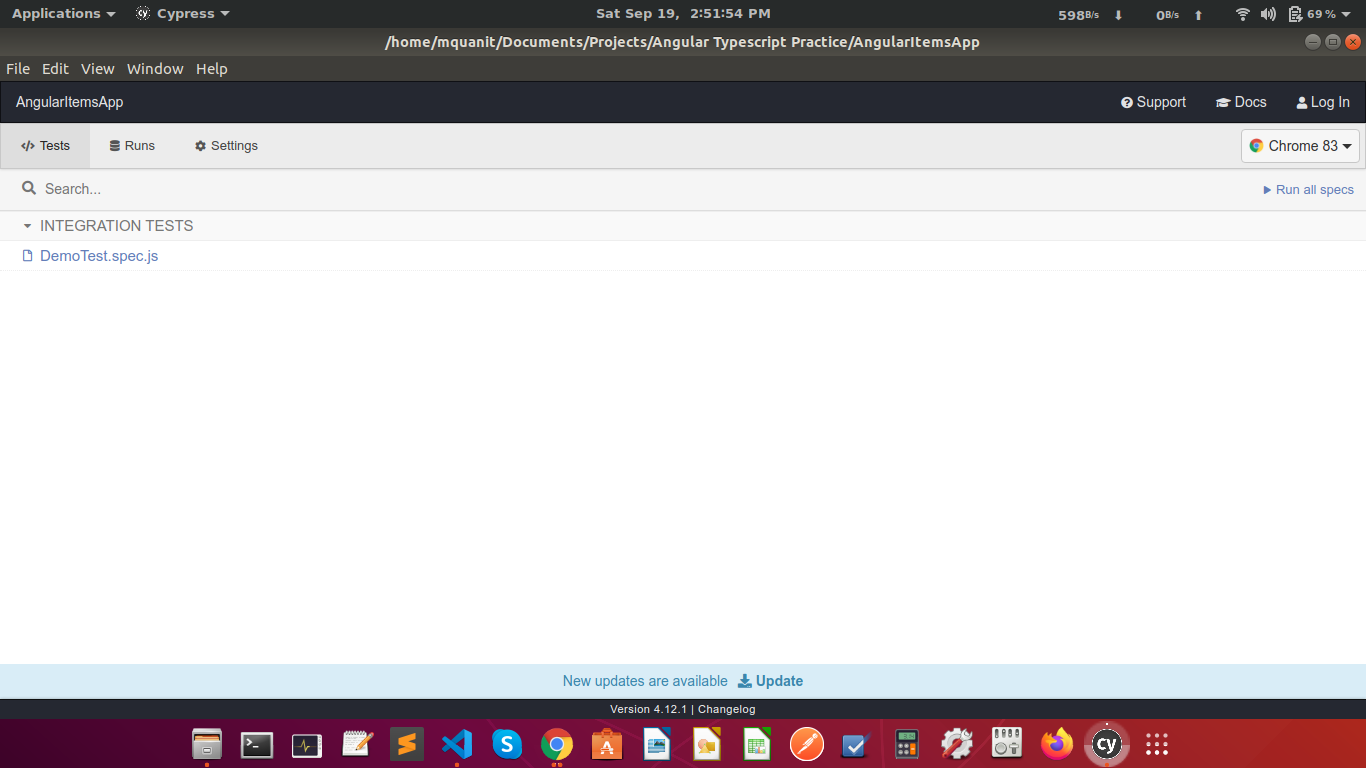
This is the Cypress Test Runner. Click on DemoTest.spec.js, and a separate browser instance will launch to execute the test. You'll immediately notice how fast and straightforward working with Cypress is.
Next, let's create a test that types into input fields and adds a new todo via the Submit button.
describe("Our Todo App Test Suite", () => {
  it.only("Type title and description", () => {
    cy.visit("/");
    cy.get("input[name='title']").type("Lunch")
    cy.get("input[name='description']").type("Eating lunch at 1")
    cy.get('input[type="submit"]').click()
    cy.get("ul.collection").find("li > strong").should("contain", "Lunch")
  });
  });
});
When this test runs, it fills both input fields, clicks the Submit button, which adds a new Todo Item to the list, and finally, we assert that the new todo contains the text Lunch.
Now we'll look at a test for deleting a todo item and confirming its removal.
describe("Our Todo App Test Suite", () => {
  it.only("Type title and description", () => {
    cy.visit("/");
    cy.get("ul.collection > li").eq(1).find("a").click()
    cy.get("ul.collection > li").eq(1).find("form").find('button[class="btn red"]').click()
    cy.get("ul.collection > li").eq(1).should("not.exist")
  });
  });
});
That's the essence of performing e2e testing with Cypress. Go ahead and try updating a value using Cypress on your own. If you succeed, congratulations — you're operating like an Automation Test Engineer, because that's precisely what the role entails.
I hope this walkthrough has been helpful and that you've picked up something valuable. Happy testing! ✌️✌️