Slots and templates: the foundation
The fundamental concept behind flexible components is straightforward. You build a host component that carries the shared behavior and markup. This host also declares one or more slots, which are the designated insertion points for dynamic content. The same host can then receive different content depending on the context it is used in.
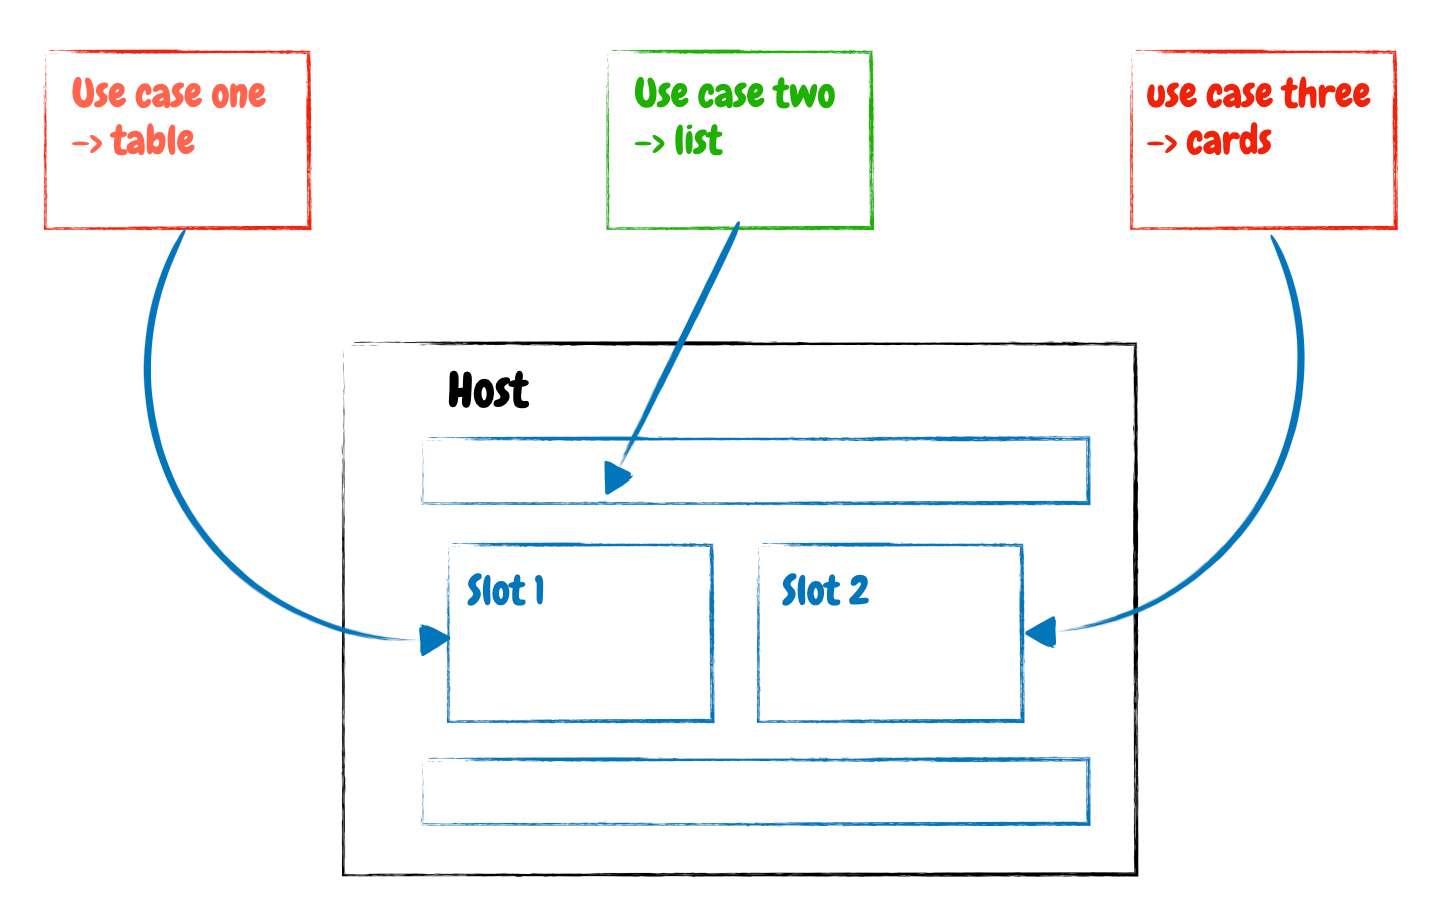
Modern browsers provide native support for this pattern through the <slot> and <template> elements.
The <template> element holds markup but produces no visible output on its own.
<template id="foo">
 <style>
  h4 { color: blue }
 </style>
 <h4><slot name="title"></slot></h4>
</template>
To bring the content of a <template> into the DOM, a few lines of JavaScript are required. In the following example, the template is registered as a customElement.
customElements.define('foo',
  class extends HTMLElement {
    constructor() {
      super();
      let template = document.getElementById('foo');
      let templateContent = template.content;

      const shadowRoot = this.attachShadow({mode: 'open'})
        .appendChild(templateContent.cloneNode(true));
    }
  }
);
After the web component is registered, it can be instantiated with dynamic content passed in.
<foo>
  <span slot="title">Title of the foo web component</span>
</foo>
Dynamic content is provided inside an element that carries the slot attribute. The attribute’s value tells the browser which slot inside the component should receive that content.
This foo component can be dropped into many different scenarios, with the content varying for each one.
Angular’s answer to dynamic content
Angular provides two comparable mechanisms for handling dynamic content: ng-content and ng-template.
Working with ng-template
The ng-template element is capable of holding content without displaying it. It serves as the engine behind every structural directive, which is why it is the core concept underpinning Angular’s built-in directives like *ngIf and *ngFor.
Beyond powering structural directives, ng-template is a valuable tool for building flexible components by handing a template reference to a host component.
Consider a simple heading component that is meant to display any kind of title — be it an h1, h2, or any other tag.
The first step is to prepare the dynamic content that will be passed to the host.
<ng-template #theTruth>
  <h4>Real Madrid - best football club ever</h4>
</ng-template>
Because this markup is enclosed in an ng-template, nothing is rendered. The useful part here is the template reference variable (#theTruth), which lets us grab the template, pass it around, and use it anywhere.
To display this title inside a heading component, the template can be supplied through an @Input property and then rendered.
<ng-template #theTruth>
  <h4>Real Madrid - best football club ever</h4>
</ng-template>

<heading [title]="theTruth"> </heading>
Inside the heading component, *ngTemplateOutlet combined with ng-container can be used to output the template.
<!-- some other HTML -->
<ng-container *ngTemplateOutlet="title"></ng-container>
That is one route to flexible components in Angular. The more common path, however, is ng-content.
Check: ngTemplateOutlet: The secret to customisation
Projecting content with ng-content
Functionally, ng-content resembles the slot tag. It marks the locations inside a host component where dynamic content will be placed. Using ng-content is commonly referred to as content projection.
A host component is not limited to a single slot. When multiple slots are defined, the select property on ng-content is used, along with a selector, to route the correct content to the correct slot. Any projected content that does not match a selector falls through to the ng-content slot that has no select attribute.
Consequently, the template for the heading component is minimal — a bit of HTML plus an empty slot for the projected content.
<!-- some other HTML -->
<ng-content></ng-content>
The heading component is then used like this.
<heading>
  <h4>Real Madrid - best football club ever</h4>
</heading>
Both approaches for building flexible components have now been introduced. The natural question is: which one should be used, and do they behave differently? To answer that, we will build a real expander component.
Building a flexible “expander” component
A typical expander has three parts: a header, an expand indicator, and the body. The text in the header is the only part that changes, while the body can contain any kind of HTML, an Angular component, or even plain text. The body will look different in almost every use case.
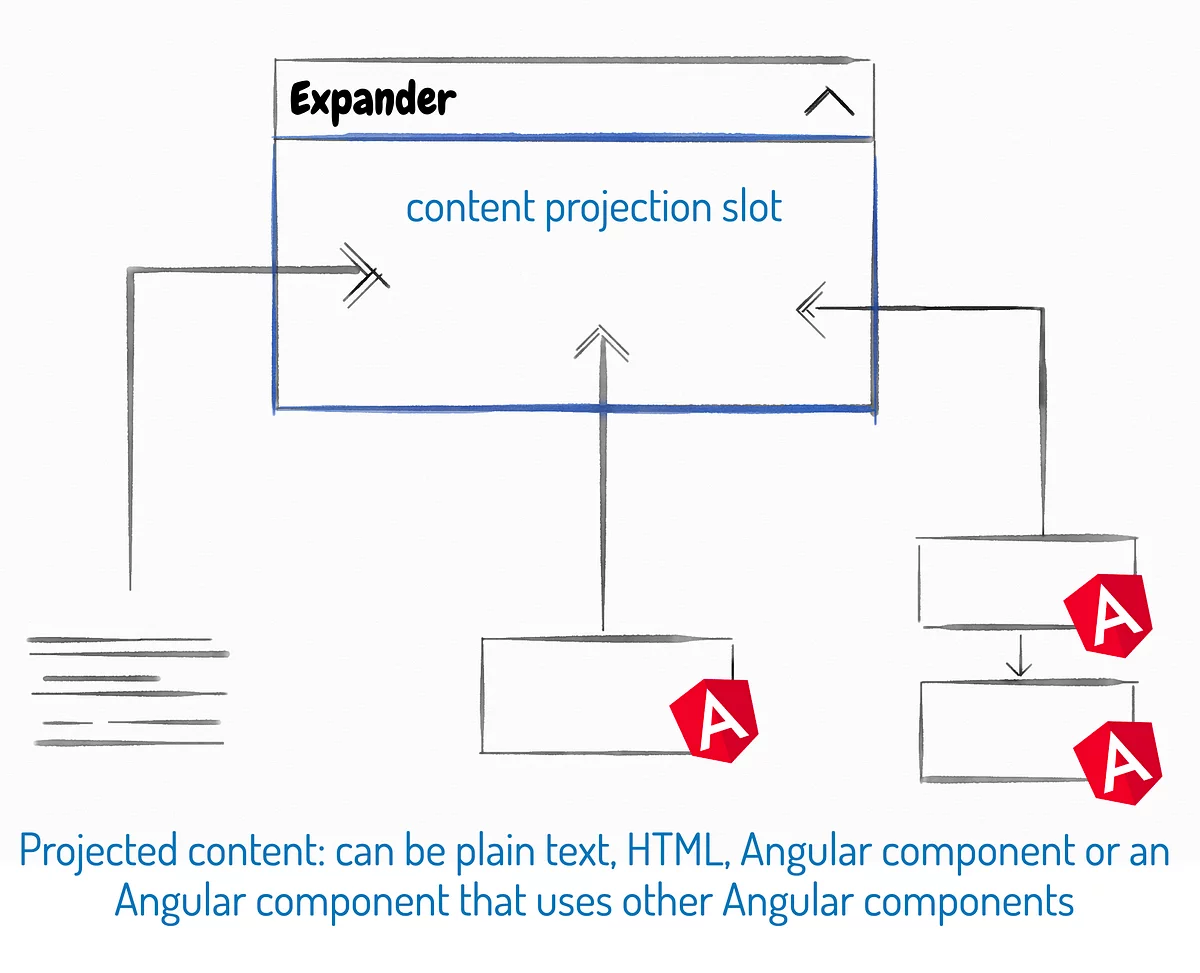
Content projection in Angular — Any type of content can be projected, HTML elements, components, or plain text.
This looks like a perfect job for ng-content.
Building the expander with ng-content
The ng-content tag lives inside the host component — the component that receives the flexible content. It acts as a stand-in where the projected content will appear, giving us control over the exact placement.
Let’s walk through an expander implementation.
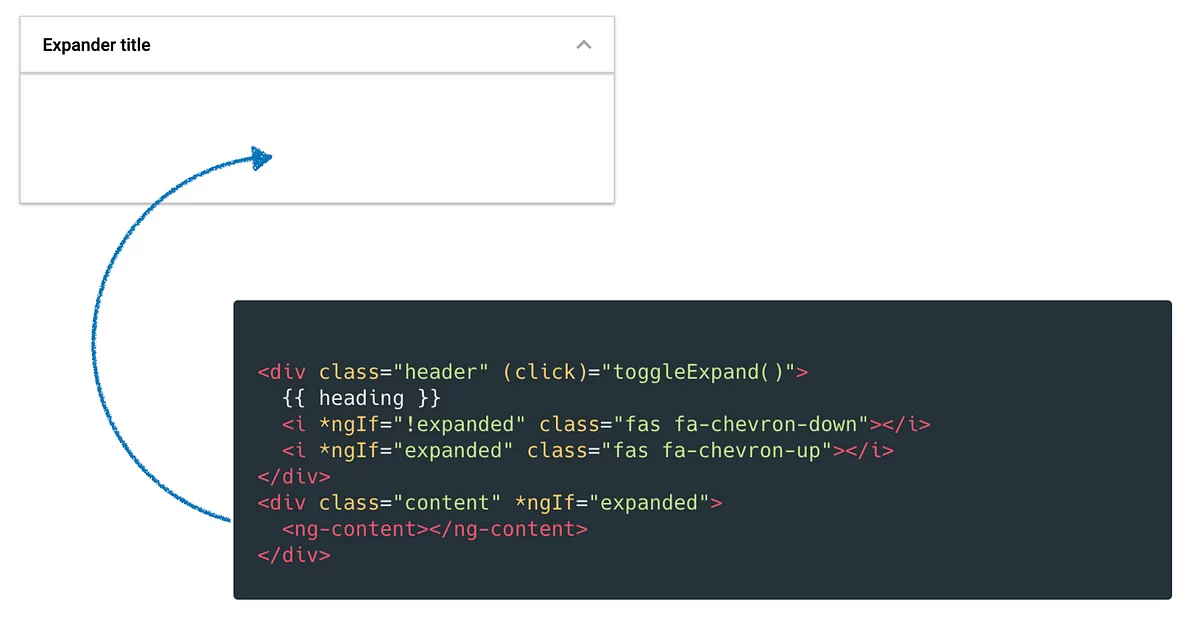
Expander component that uses ng-content to project content to a dedicated slot
The div with the header class shows the value of the heading property, which is passed in through @Input. The ng-content tag marks where the projected content will be inserted. A click on the header toggles the visibility of the projected content.
The expander is then used in the application as shown below.
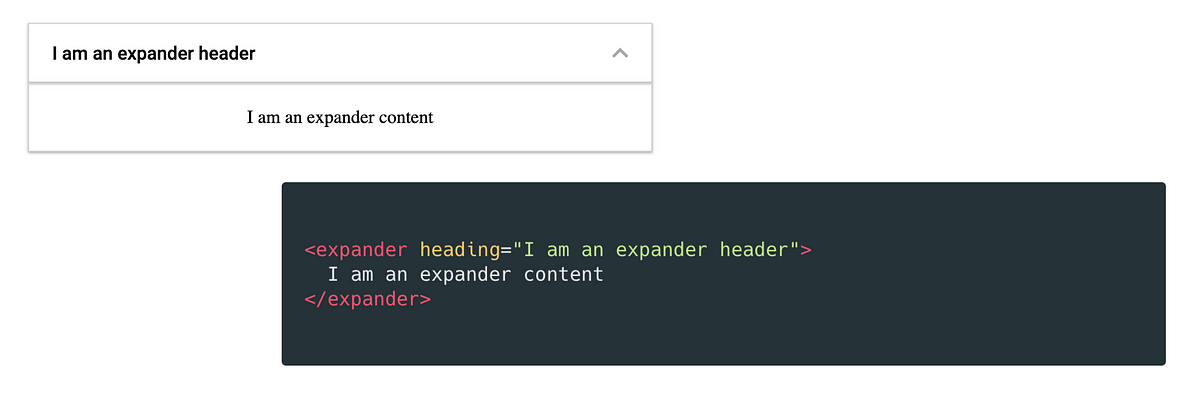
Project some simple text into our expander
Projecting a component instance
Text alone is not particularly interesting. Let’s project a clock component that shows the current time.
@Component({
	selector: 'clock',
	template: `{{currentTime}}`,
	styleUrls: ['./clock.component.scss']
})
export class ClockComponent implements OnInit {
	currentTime: string;

	ngOnInit() {
		const date = new Date();
		this.currentTime = `${date.getHours()}:${date.getMinutes()}`
	}
}
The clock component is simple. Inside the ngOnInit lifecycle hook, it reads the current hour and minute and stores them in a variable that the template displays.
Now we can place this component inside our expander.
<expander heading="Expand to see the current time">
    <clock></clock>
</expander>
The time is rendered correctly at first.
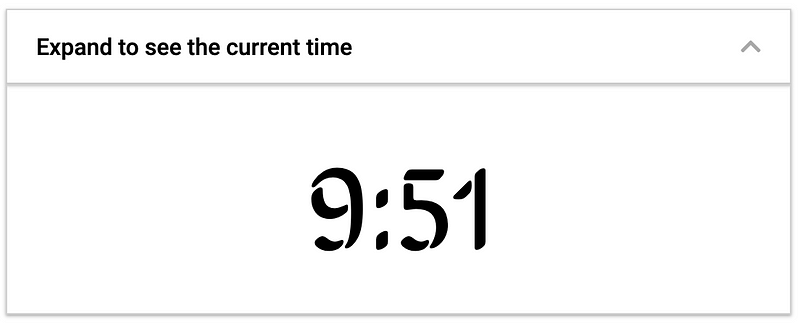
But wait — if you close and reopen the expander after five minutes, it still shows 9:51. Why is that?
The impact on lifecycle hooks
This behavior stems from how ng-content relates to lifecycle hooks. Let’s trace the ngOnInit and ngOnDestroy hooks of the clock component by adding some logging.
With the dev tools open, refresh the application.
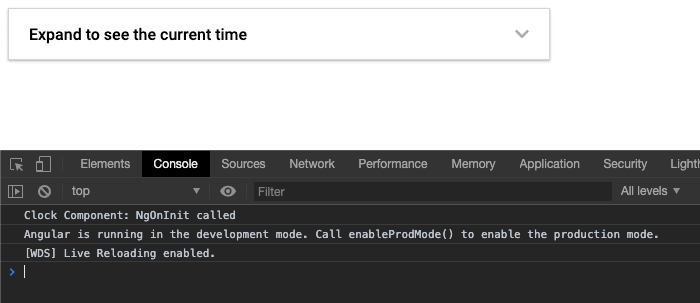
ngOnInit is called even though the component has not been rendered yet
Even though the clock is not yet visible (since the expander’s ngIf expression is still false), ngOnInit has already fired.
Now expand the component without clearing the console.
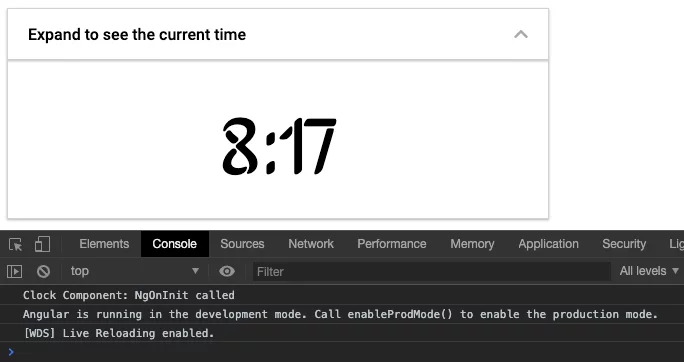
ngOnInit is not called again — even if the component is rendered for the first time
The ngOnInit hook does not fire again when the content is finally shown. We see the time from when the app started, not the current time.
It gets worse. What about ngOnDestroy? Close the expander again, keeping the console log intact.

ngOnDestroy is not called — even though the component is removed from the DOM
There is no ngOnDestroy call, even though the clock has been completely removed from the DOM.
When do these hooks actually run?
With ng-content projection, the lifecycle hooks of the projected content follow the lifecycle of the parent component, not the projected content itself.
A quick test: add a button to toggle the entire expander on and off.

Lifecycle hooks of the projected content are bound to the hooks of the host component
The log confirms it — the projected content’s hooks run when the expander is created or destroyed.
The lifecycle hooks of the projected content are bound to the lifecycle of the host.
To recap:
ngOnInitis triggered when the host is first rendered.ngOnDestroyis triggered when the host is removed.- Toggling the projected content with
ngIfdoes not trigger either hook.
Why this behavior can be a problem
This behavior is most problematic when the projected component relies on ngOnInit for serious work, such as heavy logic or position calculations.
It is also a concern when using RxJS. Since ngOnDestroy may never be called, any subscriptions opened in the projected component are never cleaned up. Left unchecked, this can lead to memory leaks as the application grows.
If you want to find out more about subscription managment and memory leaks I highly recommend you to check out this post How to create a memory leak in Angular
The fix: switching to ng-template
One solution is to replace ng-content with ng-template. Let’s refactor the expander to use this approach.
First, add an @Input property that accepts a TemplatRef — this will be our content.
@Input() content: TemplateRef<any>;
Next, update the expander’s template to render the supplied template.
<div class="header" (click)="toggleExpand()">
    {{heading}}
    <i *ngIf="!expanded" class="fas fa-chevron-down"></i>
    <i *ngIf="expanded" class="fas fa-chevron-up"></i>
</div>
<div class="content" *ngIf="expanded">
    <ng-container [ngTemplateOutlet]="content"></ng-container>
</div>
This also changes the component’s API and how it is used.
<expander heading="Expand to see the current time" [content]="content">
</expander>

<ng-template #content>
  <clock></clock>
</ng-template>
The clock component is now wrapped in an ng-template, and a template reference is passed down to the expander.
Has this changed the lifecycle behavior?

templates life cycle hooks get correctly called
The hooks now fire at the right time — whenever the component is rendered or destroyed, i.e., every time the expanded flag toggles.
The trade-off is a less intuitive API. Many developers find the ng-content syntax more natural. Placing projected content directly inside a component’s tags is easier to read than passing a template reference.
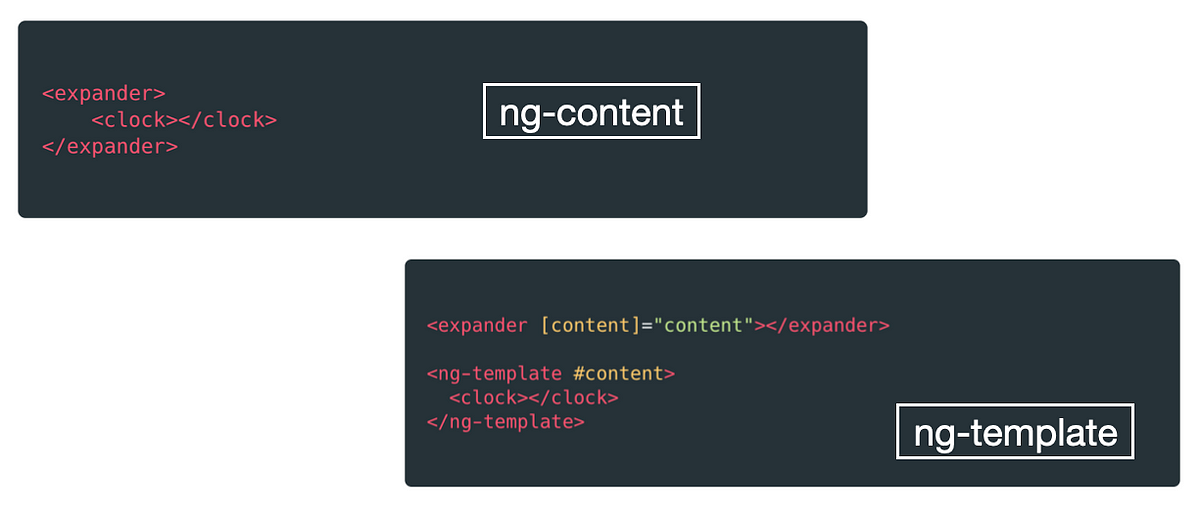
ng-content API vs. ng-template API
With ng-content, it is immediately clear that the clock is being projected into the expander. The ng-template approach hides that relationship.
Getting a friendly API from ng-template
The previous example is the standard way to work with ng-template, but it is not the only way. We can use a technique that gives us an API very close to ng-content. What if the usage looked like this?
<expander>
  <ng-template>
  	<clock></clock>
  </ng-template>
</expander>
To make this work, we access the projected content through @ContentChild instead of an @Input property.
@Input() content: TemplatRef<any>;
// becomes
@ContentChild(TemplateRef) content: TemplateRef<any>;
The result is the best of both worlds: a clean, readable API and lifecycle hooks that are called at the correct time.
Does this mean ng-template is always the right choice?
Not at all. For simple scenarios where content is projected once and not toggled, ng-content is simpler and has a cleaner API.
Reach for ng-template when the projected content needs to be rendered dynamically. In other words, if you find yourself wrapping ng-content in an ngIf, it is worth switching to ng-template.
ng-template is also the right tool when the same content needs to appear in multiple places.