Contents
- Prerequisites
- Setting up Your Nx Workspace
- Generating a New Nx Workspace
- Implementing Your Data Library
- Implementing a Feature Library
- Consuming your Feature Library
- Leveraging Nx Features
- Creating a Dependency Graph
- Using the Build Cache
- E2E-Testing with Cypress: A Sneak Peek
- Access Restrictions
- Final Finishing Touches
- What's next ?!
Nx is a widely adopted extension for the Angular CLI, created by former members of the Angular core team. It offers a solid foundation for structuring large enterprise-scale applications, among other use cases.
In this guide, you'll walk through the initial steps of working with Nx. Starting from an empty workspace, you'll explore the following:
- Scaffolding a new Nx workspace
- Working with the dependency graph
- Identifying affected libraries and applying the build cache
- A brief look at E2E testing using Cypress
- Enforcing architectural boundaries through access restrictions (for me, the most critical part)
By the end, you'll have a project layout similar to this:
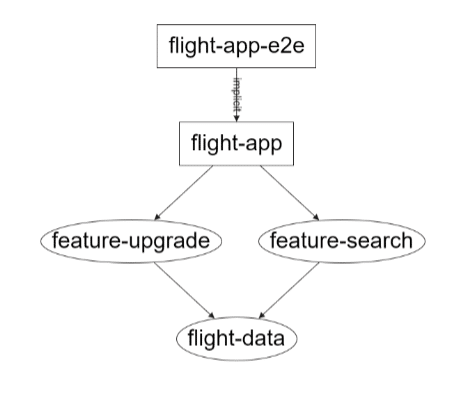
Furthermore, thanks to access restrictions, your architecture remains safeguarded. If a library tries to access another one it shouldn't, you'll encounter an error like this:
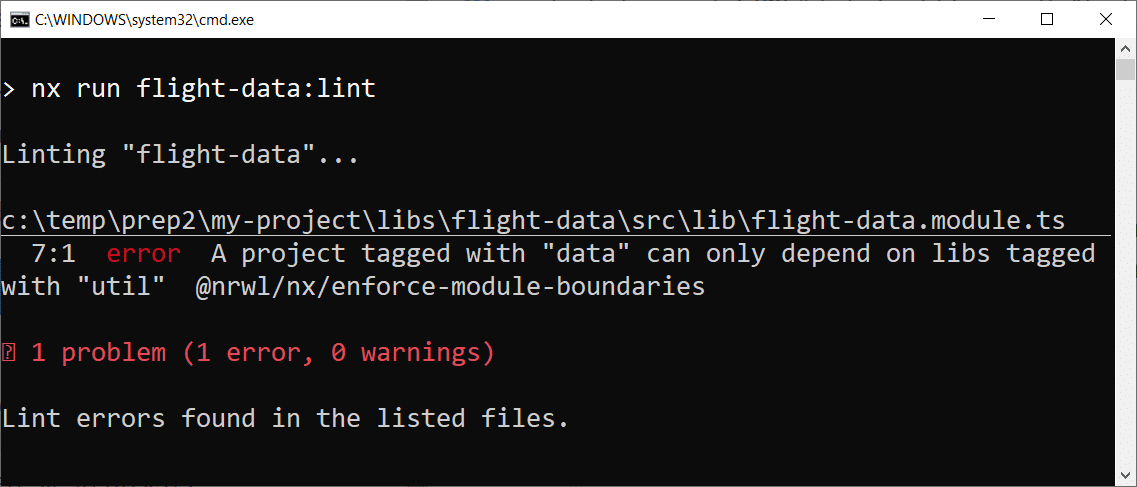
Naturally, the same error appears in your editor or IDE when eslint support is enabled. Since the check also runs on the command line, you can automate it—for instance, blocking merges into your main branch when architectural rules are violated. In other words: no more broken windows!
By the way: The source code for this tutorial's solution is available in my GitHub repository. To make it easy to follow along, there's a separate commit for each section below.
Prerequisites
To work through this tutorial, make sure you have the following tools installed:
- An editor such as Visual Studio Code
- A Git client
- NodeJS in the current LTS version
- Angular CLI (
npm i -g @angular/cli) - Nx CLI (
npm i -g @nrwl/cli)
Setting up Your Nx Workspace
In this part, you'll create an Nx workspace from the ground up and add one data access library along with two feature libraries.
Although these steps are fairly routine, they help clarify how the pieces fit together. In real-world projects, you'd typically automate such tasks using code generators and Nx plugins like @angular-architects/ddd.
Note: Even though the example here is straightforward, the project setup we're using is designed with huge enterprise-scale applications in mind. Keep that in mind if it seems a bit over-engineered.
Tip: It's a good idea to take advantage of your editor's file navigation shortcuts. For example, Visual Studio Code uses CTRL-p to jump quickly between files.
Generating a New Nx Workspace
Let's begin by scaffolding an empty Nx workspace:
-
Use
npm initto create a new Nx workspace:npm init nx-workspace my-projectWhen prompted, provide the following answers:
- What to create in the new workspace: angular
- Application name: flight-app
- Default stylesheet format: scss
- Use Nx Cloud: No
The generation process might take a minute or two.
-
Change into the newly created project directory:
cd my-project -
Generate the required libraries:
ng g lib flight-data --buildable
ng g lib feature-search --buildable
ng g lib feature-upgrade --buildable
Tip: The buildable option allows each library to be built independently. This enables per-library caching, so unchanged libraries don't need to be rebuilt.
Tip: There's also a directory option for organizing your apps and libs into sub-directories. Each sub-directory can represent a specific part (or sub-domain) of your solution.
-
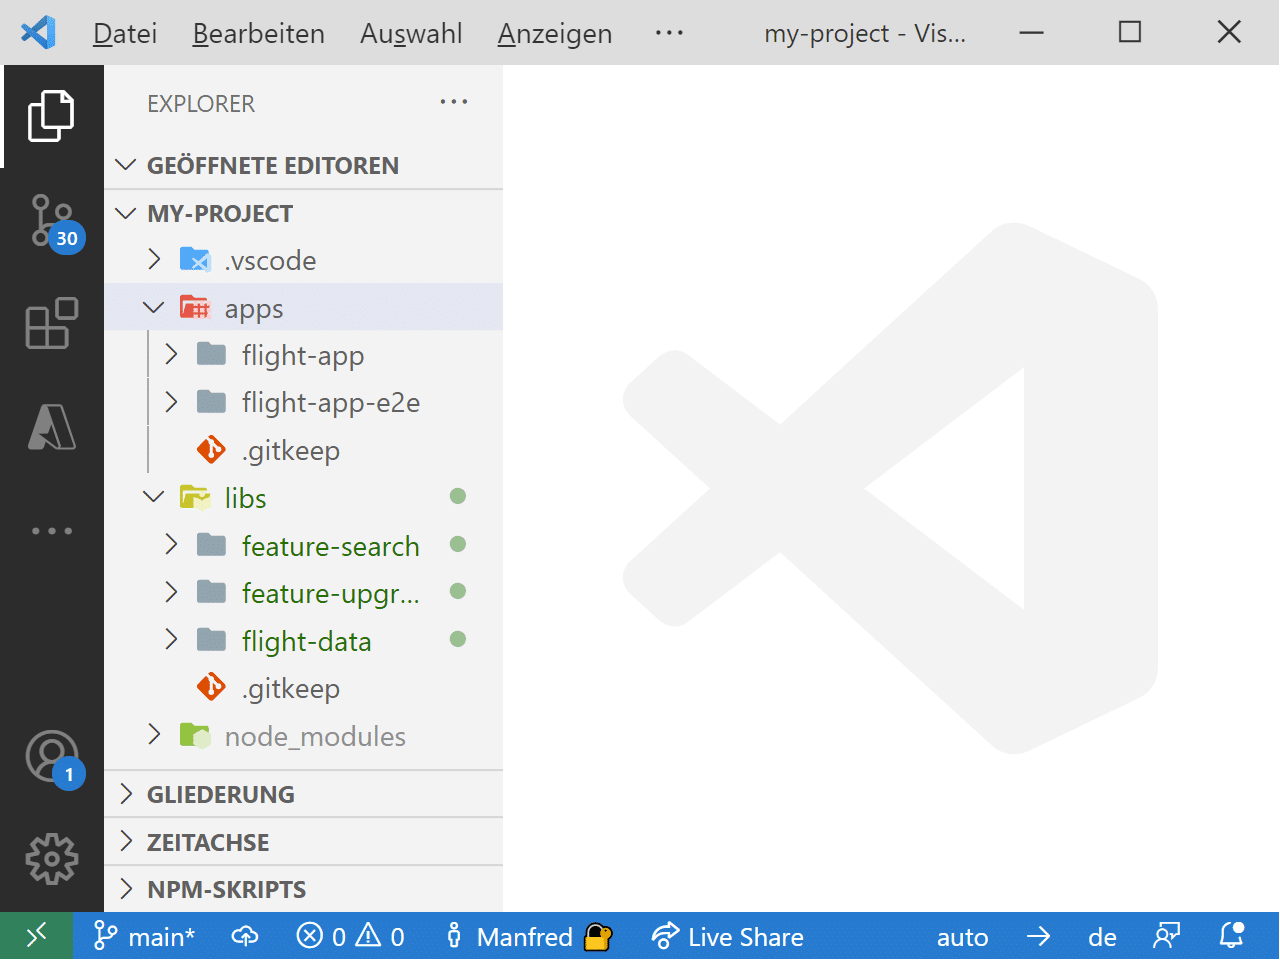
Open the workspace in your editor. You should see the following structure:
Implementing Your Data Library
The first library you'll create handles data access:
-
Within
libs/flight-data/src/lib, create a new subfolder calledmodel: -
Add a
flight.tsfile to themodelfolder you just created:// libs/flight-data/src/lib/model/flight.ts export interface Flight { id: number; from: string; to: string; date: string; } -
Generate a
FlightDataServiceinside yourflight-datalibrary:ng g service flight-data --project flight-data -
Fill in the
FlightDataServicewith the following implementation:// libs/flight-data/src/lib/flight-data.service.ts import { Injectable } from '@angular/core'; import { Observable, of } from 'rxjs'; import { Flight } from './model/flight'; @Injectable({ providedIn: 'root' }) export class FlightDataService { load(): Observable -
Expose your model and service through the library's
index.ts:// libs/flight-data/src/index.ts export * from './lib/flight-data.module'; // Add these lines: export * from './lib/flight-data.service'; export * from './lib/model/flight';
With the data access lib ready, the next step is to use it in one of the feature libraries.
Angular Architecture Workshop (Online)
This subject is one of many covered in our Angular Architecture Workshop. You can reserve a spot in one of our public online sessions or arrange a dedicated workshop for your team.
Implementing a Feature Library
Now, let's add two more libraries to handle specific features:
-
Generate a new
FlightSearchComponentwithin yourfeature-searchlibrary:ng g c flight-search --project feature-search --export -
Update the component to render the flights from your
FlightDataServicein a table.// libs/feature-search/src/lib/flight-search/flight-search.component.ts import { Component } from '@angular/core'; // You might need to add this by hand: import { FlightDataService } from '@my-project/flight-data'; @Component({ selector: 'my-project-flight-search', templateUrl: './flight-search.component.html', styleUrls: ['./flight-search.component.scss'] }) export class FlightSearchComponent { flightList$ = this.flightService.load(); constructor(private flightService: FlightDataService) { } }<h1>Flights</h1> <table class="table"> <tr *ngFor="let flight of flightList$ | async"> <td>{{flight.id}}</td> <td>{{flight.from}}</td> <td>{{flight.to}}</td> <td>{{flight.date | date}}</td> </tr> </table>/* libs/feature-search/src/lib/flight-search/flight-search.component.scss */ td { border: 1px solid black; padding: 10px; } -
Make your new component available by exporting it via the feature library's
index.ts:// libs/feature-search/src/index.ts export * from './lib/feature-search.module'; // Add this line: export * from './lib/flight-search/flight-search.component';
Consuming your Feature Library
With everything in place, it's time to use a feature in your application:
-
Open your
flight-appand bring theFeatureSearchModuleinto yourAppModule:// apps/flight-app/src/app/app.module.ts import { NgModule } from '@angular/core'; import { BrowserModule } from '@angular/platform-browser'; import { AppComponent } from './app.component'; // You might need to add this line by hand: import { FeatureSearchModule } from '@my-project/feature-search'; @NgModule({ imports: [BrowserModule, // Import FeatureSearchModule FeatureSearchModule ], declarations: [AppComponent], providers: [], bootstrap: [AppComponent], }) export class AppModule {} -
Place your feature component in
app.component.html. Replace the existing content entirely:<my-project-flight-search></my-project-flight-search> -
Launch your application:
ng serve flight-app -oYou should see the following output:
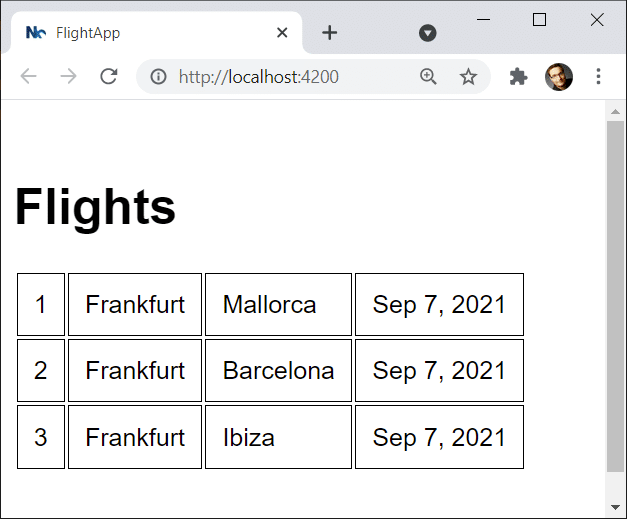
Admittedly, this is a fairly basic app. Still, it's complex enough to illustrate how Nx supports building enterprise-grade Angular applications.
Leveraging Nx Features
Now we can finally experiment with some of the more powerful capabilities Nx offers.
Creating a Dependency Graph
Let's start by generating a dependency graph for your project.
-
Run the following command to display the dependency graph:
nx dep-graphTo see the full picture, click
Select Allon the left-hand side: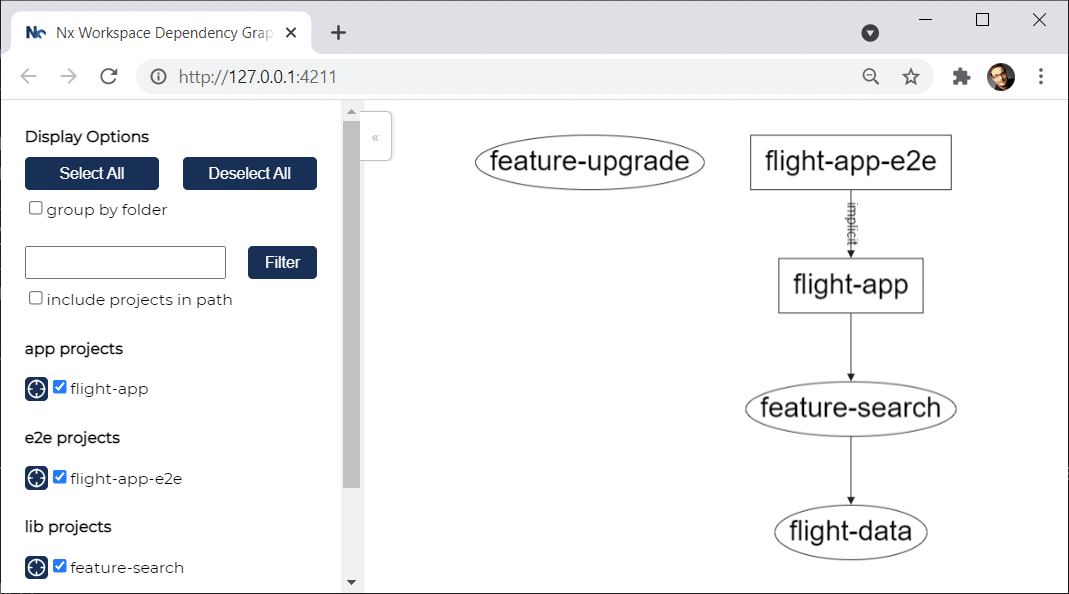
Notice that the
feature-upgradelibrary hasn't been used yet. We'll address that in a later exercise. -
Important: Stop the process that started
nx dep-graphonce you're done—it holds a TCP port needed for subsequent dependency graph views. -
Open
nx.jsonin the root of your workspace. Verify that thedefaultBaseproperty points to your main git branch (oftenmaster; I and many others choosemain):{ "npmScope": "my-project", "affected": { "defaultBase": "main" }, [...] } -
Stage and commit all your changes with git:
git add * git commit -m "Creating a Dependency Graph" -
Make a minor edit to
libs/feature-search/src/lib/feature-search.module.ts—for example, append a blank line at the end. -
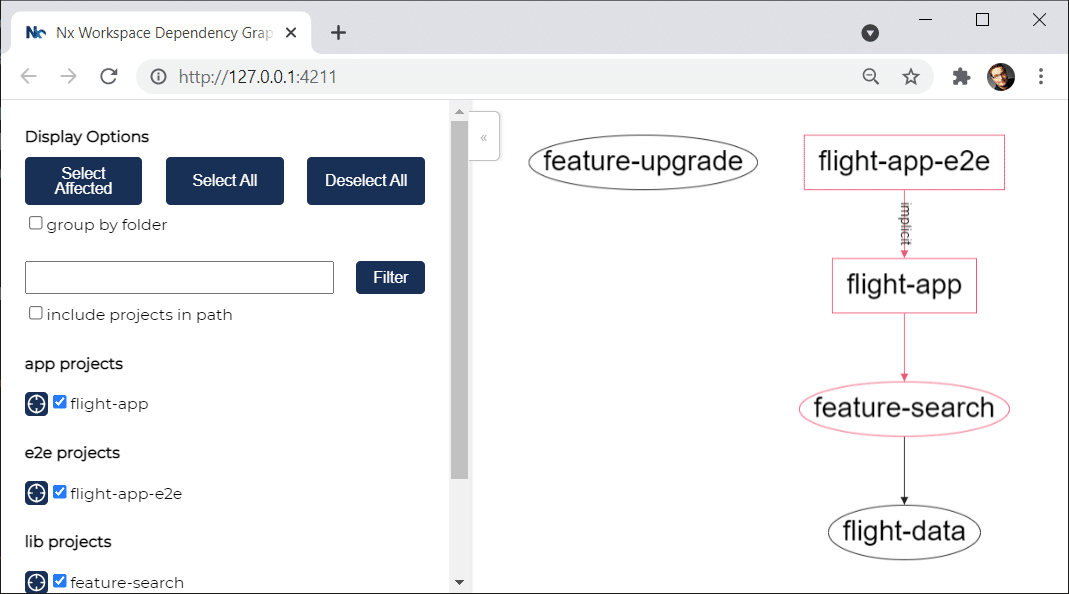
Generate a dependency graph that highlights the affected libraries:
nx affected:dep-graphAfter clicking "Select All," all libraries and applications appear. Those that changed, along with everything affected by the change, show up in red; the rest remain black:
-
Alternatively, you can view the same information directly in your terminal:
nx affected:apps
nx affected:libs
Using the Build Cache
With the build cache, you only need to rebuild (retest and relint) the parts of your repository that actually changed.
-
Build your application:
nx build flight-app -
Run the build again—this time, notice that the result comes straight from the cache:
nx build flight-app -
Once more, modify
libs/feature-search/src/lib/feature-search.module.tsby adding a line break at the end. -
Rebuild the application to see that only the updated lib and the app depending on it are rebuilt:
nx build flight-app
Tip: By default, your build cache lives in node_modules\.cache\nx.
E2E-Testing with Cypress: A Sneak Peek
A great advantage of Nx is its automatic integration with popular community tools and de-facto standards like Cypress for E2E testing. Here's a quick preview:
-
Modify the E2E test for your
AppComponentas shown:// apps/flight-app-e2e/src/integration/app.spec.ts describe('flight-app', () => { beforeEach(() => cy.visit('/')); it('should display welcome message', () => { cy.get('h1').contains('Flights'); cy.screenshot('result'); cy.get('table').screenshot('table'); }); }); -
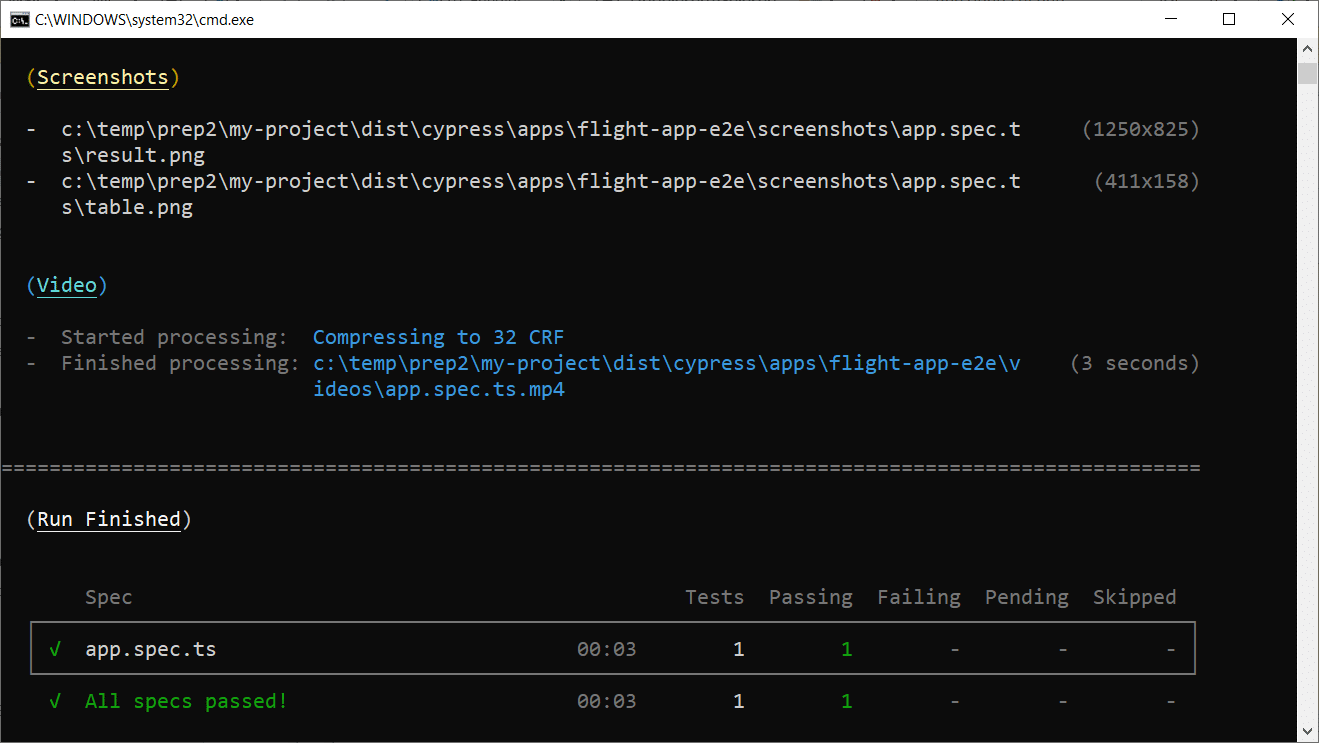
Execute your E2E test:
nx e2e -
Ensure the test passes and examine the screenshots and video generated (the file paths are printed in the terminal).
Access Restrictions
This is by far the most valuable feature for sustainable enterprise architecture: Access Restrictions. They prevent unintended coupling between libraries. You define which library may depend on which other libraries:
-
Open
nx.jsonat the project root and add the following tags:[...] "projects": { "feature-search": { "tags": ["feature"] }, "feature-upgrade": { "tags": ["feature"] }, "flight-app": { "tags": ["app"] }, "flight-app-e2e": { "tags": [], "implicitDependencies": ["flight-app"] }, "flight-data": { "tags": ["data"] } } [...] -
Add these constraints to your
.eslintrc.json:"@nrwl/nx/enforce-module-boundaries": [ "error", { "enforceBuildableLibDependency": true, "allow": [], "depConstraints": [ { "sourceTag": "app", "onlyDependOnLibsWithTags": ["feature"] }, { "sourceTag": "feature", "onlyDependOnLibsWithTags": ["data"] }, { "sourceTag": "data", "onlyDependOnLibsWithTags": ["util"] } ] } ] -
Intentionally break the architecture by importing the
FeatureUpgradeModuleinto yourFlightDataModule:// libs/flight-data/src/lib/flight-data.module.ts import { NgModule } from '@angular/core'; import { CommonModule } from '@angular/common'; // You might need to add this by hand: import { FeatureUpgradeModule } from '@my-project/feature-upgrade'; @NgModule({ imports: [ CommonModule, // Import FeatureUpgradeModule // (to break your architecture) FeatureUpgradeModule ], }) export class FlightDataModule {} -
Run the linter to see the violation being reported:
nx lint flight-dataWith an eslint plugin installed, you should see the same linting error in your editor. You may need to restart your editor so it picks up the updated configuration files.
Final Finishing Touches
Let's fix the incorrect import from the previous section and wrap up the tutorial.
-
Remove the
FeatureUpgradeModulefrom theFlightDataModuleto clear the linting error:// libs/flight-data/src/lib/flight-data.module.ts import { NgModule } from '@angular/core'; import { CommonModule } from '@angular/common'; // Remove this: // import { FeatureUpgradeModule } from '@my-project/feature-upgrade'; @NgModule({ imports: [ CommonModule, // Remove this: //FeatureUpgradeModule ], }) export class FlightDataModule {} -
Instead, import the
FlightDataModuleinto theFeatureUpgradeModule:// libs/feature-upgrade/src/lib/feature-upgrade.module.ts import { NgModule } from '@angular/core'; import { CommonModule } from '@angular/common'; // You might need to add this by hand: import { FlightDataModule } from '@my-project/flight-data'; @NgModule({ imports: [ CommonModule, // Add this line: FlightDataModule ], }) export class FeatureUpgradeModule {} -
Additionally, add the
FeatureUpgradeModuleto yourAppModule:// apps/flight-app/src/app/app.module.ts import { NgModule } from '@angular/core'; import { BrowserModule } from '@angular/platform-browser'; import { AppComponent } from './app.component'; import { FeatureSearchModule } from '@my-project/feature-search'; // You might need to add this line by hand: import { FeatureUpgradeModule } from '@my-project/feature-upgrade'; @NgModule({ imports: [ BrowserModule, FeatureSearchModule, // Add this line: FeatureUpgradeModule ], declarations: [AppComponent], providers: [], bootstrap: [AppComponent], }) export class AppModule {} -
Generate a dependency graph to confirm the setup:
nx dep-graphThe final structure should look like this:
What's next ?!
So far, we've looked at how Nx helps you build enterprise-scale Angular applications. Still, some questions remain open:
- What criteria should guide the division of a large application into libraries and sub-domains?
- Which access restrictions are meaningful in practice?
- Which proven design patterns should we apply?
- How can we gradually move towards a micro frontend architecture?
Our free eBook (roughly 100 pages) addresses all of these topics and more:
Feel free to grab your copy here now!