Signals and RxJS: Interop Through a Real-World Typeahead
Signals represent Angular's new reactive primitive, promising to reshape both the developer experience and the way change detection operates within our applications. This article walks through building an Angular Typeahead component using signals, demonstrating two key conversions along the way:
- Transforming an RxJS observable into a signal
- Transforming a signal back into an observable
A quick visual preview of our target component.
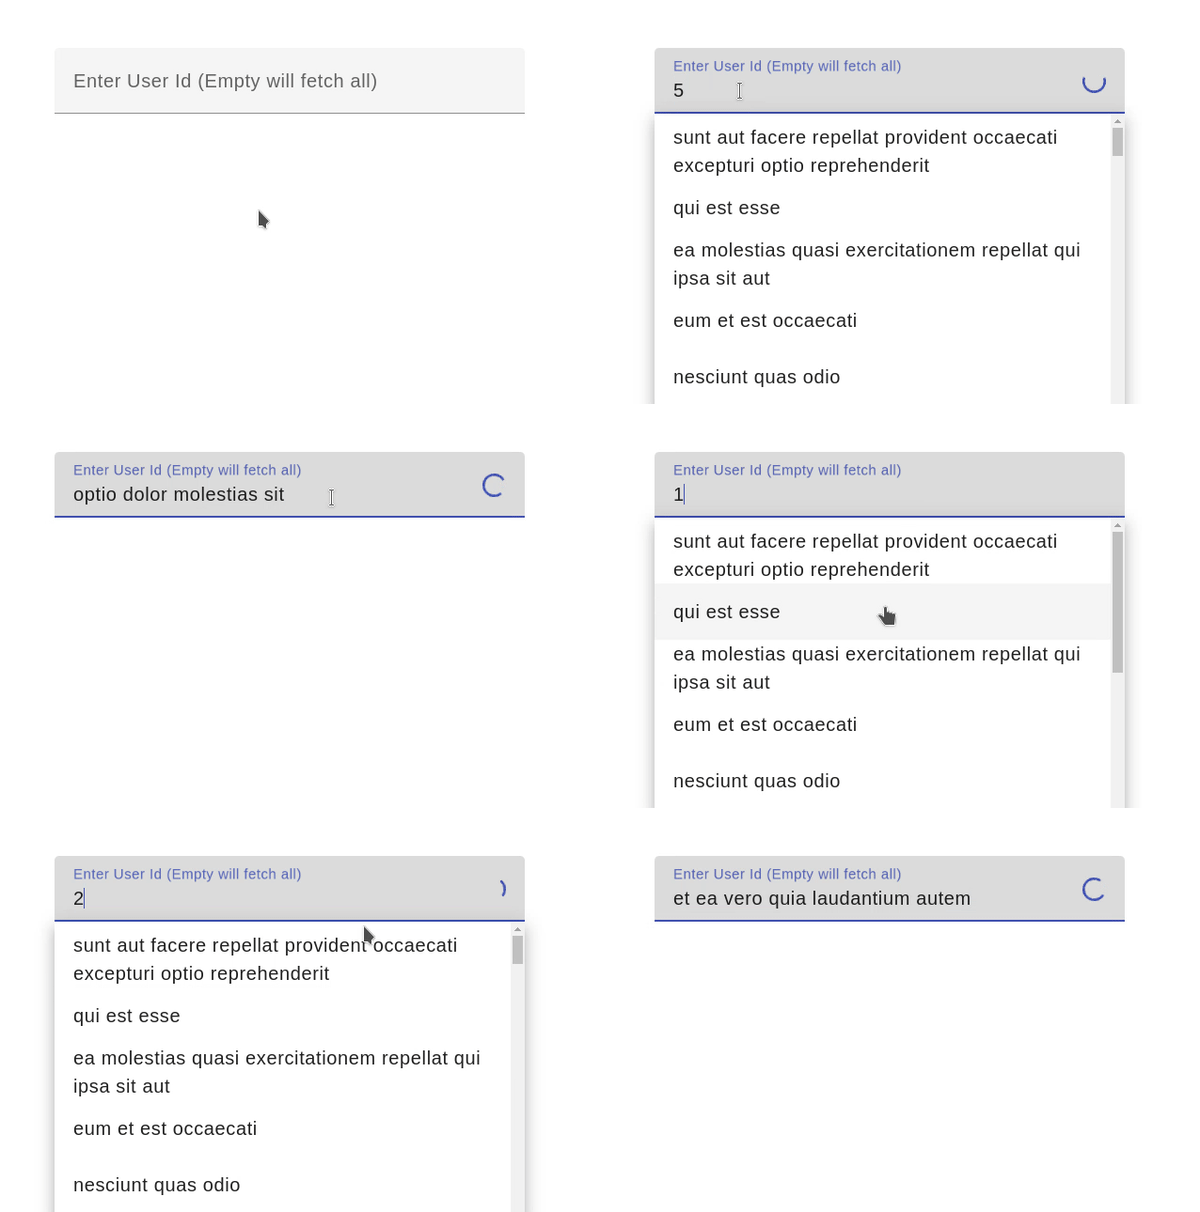
The code snippet below serves as our foundation. We'll progressively enhance it, introducing signal-based bindings as we move forward.
<div class="page-container">
  <mat-form-field class="page-container--form-field">
    <mat-label>Enter User Id (Empty will fetch all)</mat-label>
    <input matInput type="text" [matAutocomplete]="autoComplete" />

    <mat-spinner
      *ngIf="false"
      matSuffix
      class="page-container--spinner"
    ></mat-spinner>

    <mat-autocomplete #autoComplete="matAutocomplete">
      <mat-option> Option 1 </mat-option>
      <mat-option> Option 2 </mat-option>
      <mat-option> Option 3 </mat-option>
    </mat-autocomplete>
  </mat-form-field>
</div>
From Observable to Signal
To begin, let's retrieve data from a service, convert it into a signal, and use that signal to construct the autocomplete options by iterating over the items.
import { HttpClient } from '@angular/common/http';
import { Injectable, inject } from '@angular/core';
import { Observable, delay, throwError } from 'rxjs';
import { Post } from './post.type';


@Injectable({
  providedIn: 'root',
})
export class PostsService {
  private http = inject(HttpClient);

  get(userId?: number): Observable<Post[]> {
    if (userId == 100) {
      return throwError(() => new Error('User not found'));
    }
    return this.http
      .get<Post[]>('https://jsonplaceholder.typicode.com/posts', {
        params: {
          ...(userId ? { userId: userId.toString() } : {}),
        },
      })
      .pipe(delay(2000));
  }
}
Here's how the get() method operates:
- It takes a
userIdas its parameter - It deliberately throws an error for
userIdequal to 100 (a manual mechanism to illustrate basic error management) - It introduces an artificial delay, helping us showcase the loading indicator
As promised, we'll explore each detail step by step.
In the following code, the toSignal method comes into play. It takes an observable and returns a Signal populated by the observable's emitted values. Crucially, the subscription to that observable is handled automatically, and its cleanup happens when the surrounding injection context is destroyed.
@Component({...})
export class PostsComponent {
  private postsService = inject(PostsService);
  posts = toSignal(this.postsService.get());
}
Next, we iterate over the post items in the HTML template. Notice the use of parentheses to extract the signal's value. This might seem concerning, as we're accustomed to method calls inside bindings triggering on every change detection cycle—but signals operate differently, avoiding that performance pitfall.
<mat-autocomplete #autoComplete="matAutocomplete">
  <mat-option *ngFor="let post of posts()" [value]="post.title">
    {{ post.title }}
  </mat-option>
</mat-autocomplete>
With the toSignal method, we've accomplished the first goal. Now, let's capture the user's input and pass it along to the service.
From Signal to Observable
Our input field's binding will also rely on a signal. We'll call it unserID, initializing it to undefined.
export class PostsComponent {
  private postsService = inject(PostsService);
  userId = signal<number | undefined>(undefined);
  posts = toSignal(this.postsService.get());
}
We need two-way binding here. Since the "banana in a box" syntax isn't available for signals yet, we'll split it into separate property and event bindings. (Note: this article is written when Angular is at version 16.0.4.)
<input
  [ngModel]="userId()"
  (ngModelChange)="userId.set($event)"
  matInput
  type="text"
  [matAutocomplete]="autoComplete"
/>
To trigger an HTTP request whenever the userId signal changes, we can pair the effect method with a BehaviorSubject, as shown below.
import { effect, signal } from '@angular/core';
import { takeUntilDestroyed } from '@angular/core/rxjs-interop';
import { BehaviorSubject } from 'rxjs';

@Component({...})
export class PostsComponent {
  private postsService = inject(PostsService);
  userId = signal<number | undefined>(undefined);
  userId$ = new BehaviorSubject<number | undefined>(undefined);

  constructor() {
    this.userId$
      .pipe(
        // Do something here,
        takeUntilDestroyed()
      )
      .subscribe();

    effect(() => {
      this.userId$.next(this.userId());
    });
  }
}
This approach works, but it's somewhat verbose and places the burden of subscription management on the developer.
Despite this, it represents a common pattern when mixing a Signal with various RxJS operators. Recognizing this, the Angular team introduced the toObservable method—a utility designed to bridge signals and observables. It converts a signal into an observable while managing subscriptions and unsubscriptions automatically, leading to cleaner, more concise code.
export class PostsComponent {
  private postsService = inject(PostsService);
  userId = signal<number | undefined>(undefined);
  private posts$ = toObservable(this.userId).pipe(
    switchMap((userId) => this.postsService.get(userId))
  );
  posts = toSignal(this.posts$);
}
Notice the posts$ class field in the code above. Its lifecycle is short-lived because it's immediately converted back into a signal via toSignal. We can refine this further by introducing the debounceTime operator as well.
export class PostsComponent {
  private postsService = inject(PostsService);
  userId = signal<number | undefined>(undefined);
  posts = toSignal(
    toObservable(this.userId).pipe(
      debounceTime(500),
      switchMap((userId) => this.postsService.get(userId))
    )
  );
}
Now that our signal is expressed as an observable, we have the full power of RxJS operators at our disposal for handling loading states and errors. The loading indicator is managed through a dedicated isLoading signal of type Signal.
export class PostsComponent {
  private postsService = inject(PostsService);
  isLoading = signal<boolean>(false);
  userId = signal<number | undefined>(undefined);
  posts = toSignal(
    toObservable(this.userId).pipe(
      debounceTime(500),
      tap(() => this.isLoading.set(true)),
      switchMap((userId) =>
        this.postsService.get(userId).pipe(catchError(() => of([])))
      ),
      tap(() => this.isLoading.set(false))
    )
  );
}
That wraps up the implementation.
Before concluding, here are some practical recommendations:
- Avoid the async pipe in templates whenever possible—it can increase the frequency of change detection cycles
- Shift your component's state management toward signals
- Don't hesitate to leverage RxJS operators where they provide value
- Reserve the
effectfunction for genuine side effects, like logging or direct DOM manipulation
A companion video covering this exact example is available on my YouTube channel: Learn Angular Signals RxJS Interop From a Practical Example.
Thank you for reading.