Building Your Own Standalone Angular Library
As organizations scale, their codebases often split into multiple sub-projects. This mirrors the concept of micro frontends, a popular term for browser-based microservices.
Both approaches lead to a common need: sharing functionality across projects. This is where libraries come in—they enable teams to reuse common pieces like logging or API services.
This guide walks through creating an Angular library. While the official documentation covers the topic thoroughly, it assumes some prior knowledge. Along the way, we'll touch on dependency linking and peer dependencies.
Scaffolding the Library
The Angular CLI handles project generation, building, running, and deployment. It's the right tool for this task.
$ npm install --global @angular/cli

$ ng new my-lib --create-application=false

$ cd my-lib
$ ng generate library my-lib
$ ng build
Running ng new by default creates an application. Adding a library later would place both in the same repository. That setup is awkward when publishing to an npm registry—other teams would struggle to locate the relevant repository for library changes.
The cleaner approach starts with an empty workspace. Then, a separate command generates the library. For those curious about the generated files, the workspace and project structure docs offer detailed explanations.
Managing Dependencies
With the library created, suppose you need the lodash concat function. JavaScript arrays already have a concat method, but other lodash packages are already part of Angular's setup.
One caution: the workspace root contains a package.json meant for sharing dependencies across projects. Resist the urge to use it. Declaring library-specific dependencies belongs in the library's own package.json.
$ cd ./projects/my-lib
$ npm install lodash.concat
Add lodash.concat and then import it into my-lib.service. Build the library to verify everything compiles.
import concat from 'lodash.concat';

@Injectable({ providedIn: 'root' })
export class MyLibService {
  doSomething() {
	// Make sure tree shaking won't remove the lib during the build
	console.log(concat([1], 2))
  }
}
Angular responds with a warning. The error message suggests whitelisting, but that's not a recommended practice. Ignore that suggestion.
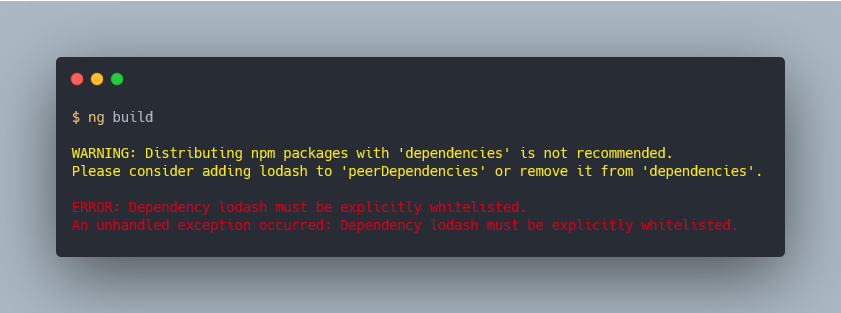
The warning's advice is to declare lodash.concat as a peer dependency. But why? What makes a peer dependency different?
A peer dependency communicates: "I need this package, so ensure it's available when I'm used." Libraries don't run alone—they operate within an application that consumes them.
The consuming application is responsible for supplying dependencies its libraries need. This prevents version mismatches where both app and library pull in different versions of the same package. Such conflicts lead to Heisenbugs and subtle incompatibilities.
{
  "name": "my-lib",
  "version": "0.0.1",
  "peerDependencies": {
    "@angular/common": "^7.2.0",
    "@angular/core": "^7.2.0",
    "lodash.concat": "^4.5.0"
  }
}
Move lodash.concat from dependencies to peerDependencies in the library's package.json. Also remove node_modules/lodash.concat—the app will provide it. But the build fails because the module can't be located.
The peer dependencies section of Angular's documentation clarifies the situation:
While developing a library, you must install all peer dependencies through
devDependenciesto ensure that the library compiles properly
Add lodash.concat to dev dependencies and recompile. The build succeeds. This dual declaration—both dev and peer dependency—is the expected pattern for library dependencies.
$ npm install lodash.concat --save-dev

$ ng build
$ ng test
Publishing the Library
The terminal output from the build shows the Angular package being compiled from source into the dist directory.
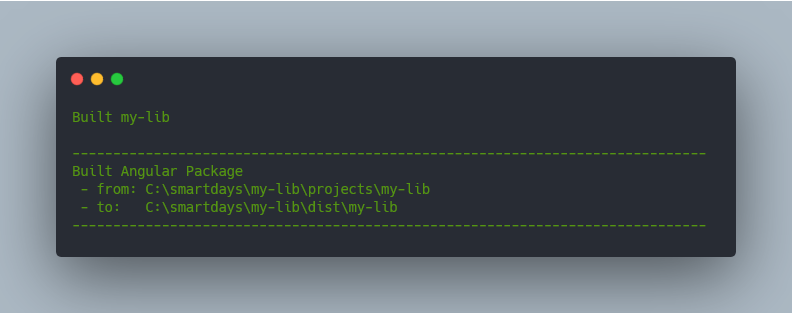
Check the generated package.json in the build output. Its version reads 0.0.1, which is the library version—not the workspace's 0.0.0. Notice that devDependencies are stripped out; only peer dependencies remain.
Run npm publish to push the package to a registry. If needed, configure npm to use your company's registry. This command creates a tarball from the compiled output—similar to npm pack—then uploads it to the configured registry.
The critical detail: publish from the compiled library directory (dist), not from the source in projects/my-lib. To consume the library, run npm install my-lib in an Angular application. The package name comes from the package.json.
Consuming the Library Locally
Skip adding an app to the library workspace. Create it in a fresh workspace instead, again using the CLI:
$ ng new my-app

$ cd my-app
$ ng build
The app builds without issues. Now we want to test the local library rather than the published copy. This proves useful when iterating on library changes alongside app development.
The link command serves this purpose. Like publishing, it runs from the library's dist directory. It registers a symlink in npm's local registry pointing to the compiled library.
$ cd ./dist/my-lib
$ npm link

$ cd my-app
$ npm link my-lib
Connect the app to the local library by running npm link with the library name. Then examine the app's node_modules—there should be a symlink (my-link) pointing to the library's dist directory.
Now import the library into the app component.
import { MyLibService } from 'my-lib';

@Component({ /* ... */ })
export class AppComponent {
  constructor(myLibService: MyLibService) {
	myLibService.doSomething();
  }
}
The build fails with errors about resolving lodash.concat in a file from my-lib.
This should look familiar: lodash.concat is the peer dependency declared earlier. As discussed, the app must provide peer dependencies for its libraries.
$ npm install lodash.concat
Still broken? The issue only appears when the library is linked. Consulting Angular documentation again provides the fix.
Use TypeScript path mapping to tell TypeScript that it should load some modules from a specific location. List all the peer dependencies that your library uses in the workspace TypeScript configuration file
./tsconfig.json, and point them at the local copy in the app'snode_modulesfolder.
This describes exactly our scenario: linking a library with peer dependencies into an app. Update the tsconfig file to direct the library toward app-provided dependencies.
{
  "compilerOptions": {
    "paths": {
      "lodash.concat": [
        "./node_modules/lodash.concat"
      ]
    }
  },
  "angularCompilerOptions": {
    "preserveSymlinks": true
  }
}
my-app/tsconfig.json
The preserveSymlinks option might be necessary too—it's not in the docs but sometimes required. Run ng serve and verify the console.log output from your library works. Success!
Now you could delete the node_modules inside my-lib to confirm the library strictly uses app dependencies. Hold off though—the bonus section has a useful trick.
The Angular docs close with a handy tip worth trying.
The idea: edit library source code and see live results in the app via a watcher. No manual rebuild or relinking needed between the library dist and the app.
$ cd my-lib
$ ng build --watch

$ cd my-app
$ ng serve
$ firefox http://localhost:4200
Stop the app server before launching ng build with the watch flag. Run it from the workspace root, not the dist folder. Restart the app server, then modify library service code. The library rebuilds and the app recompiles upon detecting changes in its node_modules.
Final Thoughts
That covers creating an Angular library and integrating it into an application. The official documentation contains all this information, though it took some effort to piece together initially.
Angular continues to evolve, and so will its documentation. With these fundamentals, you're equipped to navigate future changes. Feel free to share your own experiences in the comments.