My good friend Martina and I share a deep affection for cats. While chatting about potential joint projects one day, we stumbled upon a delightfully quirky idea: KittyGram, a bare-bones Instagram clone restricted to cat photo uploads. That’s exactly what this article covers, kicking off a series where we build KittyGram step by step.
In this installment, our focus will be on integrating Google Sign-In alongside routing. If you need a refresher, I’ve put together a YouTube Playlist that walks you through Firebase fundamentals.
This guide suits readers of varied skill levels. Still, I’ve included a TL;DR; section below as a safeguard for those who want to jump straight to a particular topic.
TL;DR;
- Not a fan of reading?
- Project Overview
- Setting up a Firebase Project
- Setting up an Angular App
- Implementing the Angular App
- Bringing it all together with Routing
- Next Steps
- Closing Notes
Not a fan of reading?
Ah! You’re cut from the same cloth as me. Reading alone never quite does it for me either. No worries—I’ve crafted a video that demonstrates this App while explaining each piece.
Check out this Pair Programming video, where Martina and I build this App and narrate our process as we go.
That video belongs to @PairAngular, an awesome YouTube Channel where @Martina and I will feature more pair programming sessions like this one. Enjoy what you see? Hit subscribe on the PairAngular YouTube Channel to catch all upcoming episodes.
Project Overview
Given that this is a stripped-down Instagram Clone, we won’t dive into Instagram’s finer details or niche features. Our goal is simply to let users:
- Log in through Google, and also log out.
- Upload a cat picture—this is the CREATE action.
- Browse cat images from other users and interact with them, with unlimited reactions—this is the FEED.
Since the sole focus here is nailing Google Sign-In, we’ll use stand-in images for both the CREATE and FEED parts.
Once everything is wired up, the result should behave and look roughly like this:
Here’s the demo illustrating the App we’re assembling in this article.
From the video above, you’ll notice the App has several distinct components.
On the UI side, we’ll require a CreateComponent, a FeedComponent, a HeaderComponent, and a ProfileCardComponent. Angular Material will be utilized across the majority of these components.
When it comes to routing, there’s a /create path and a /feed path. Access to the /create path must be restricted for unauthenticated users, so we’ll need to apply a guard to that route.
You might be wondering, “How would we implement Google Sign-In then?” The OAuth flow, token management, and integration with Google APIs can get quite intricate.
However, there’s no need to handle these complexities yourself. Google has encapsulated all of that logic and made it available as a service, which we can use with little effort. This service is known as Firebase Authentication, and that’s the tool we’ll rely on for this app. For a brief overview of Firebase Authentication, take a look at this video.
Great! With a clear picture of the whole application and its components, we can now dive into building everything from the ground up.
Setting up a Firebase Project
To get started with Firebase Authentication, we’ll have to establish a Firebase Project. This requires a Firebase Account, which you can create simply by signing into the Firebase Console with your Google credentials.
Watch this short video, roughly 1 minute long to see how to create the Firebase Project. Feel free to save the configuration you receive—we’ll need it in a bit.
With the project configured, let’s move on to promptly enabling Authentication. Watch this video to understand the steps.
Now that our Firebase Project is fully configured and Google Sign-In is activated, we can proceed to set up the Angular application.
Setting up an Angular App
Let’s begin by scaffolding a new Angular App. Ensure that the Angular CLI version you’re using is up to date.
Install the latest Angular CLI version with:
npm i -g @angular/cli@latest
After the installation completes, you can check your current version by executing ng --version:
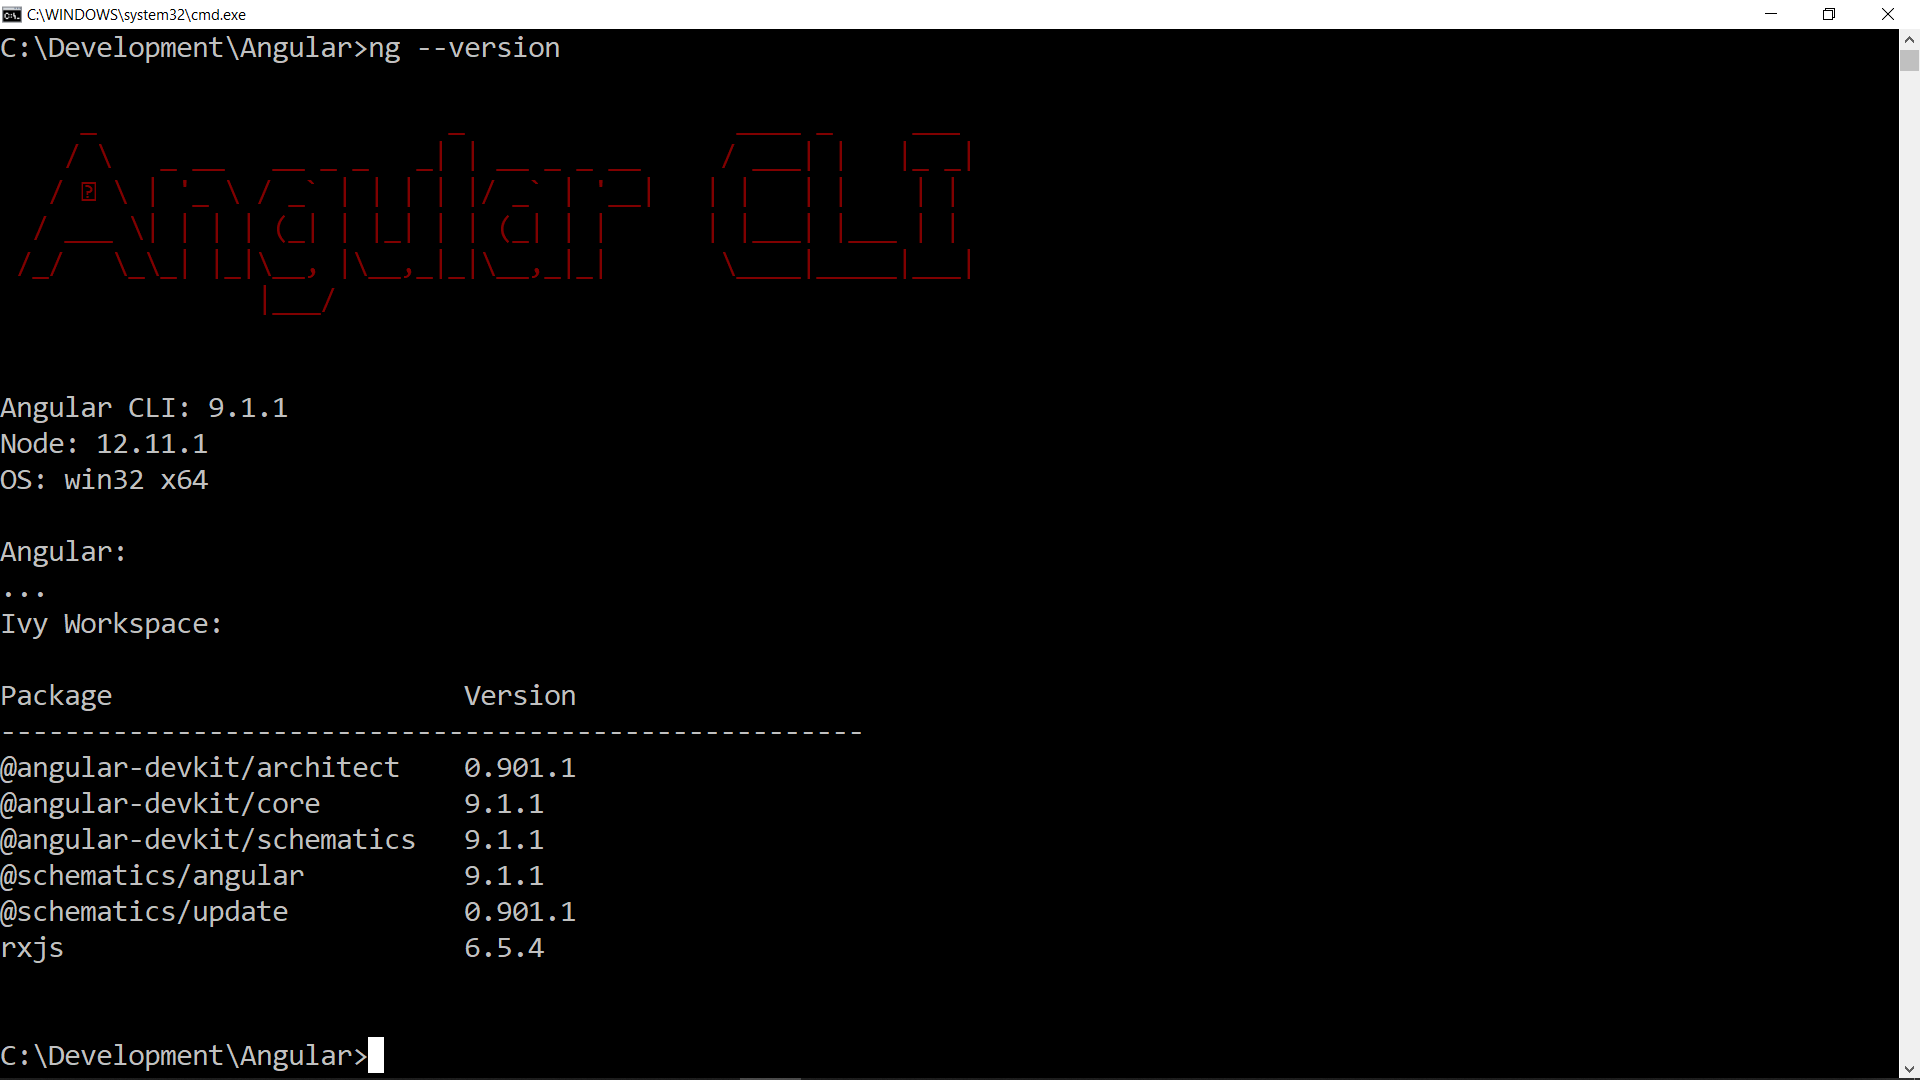
Run **ng --version** to see which Angular CLI version you have on your system.
Great—time to scaffold a fresh Angular app with this command: ng new KittyGram
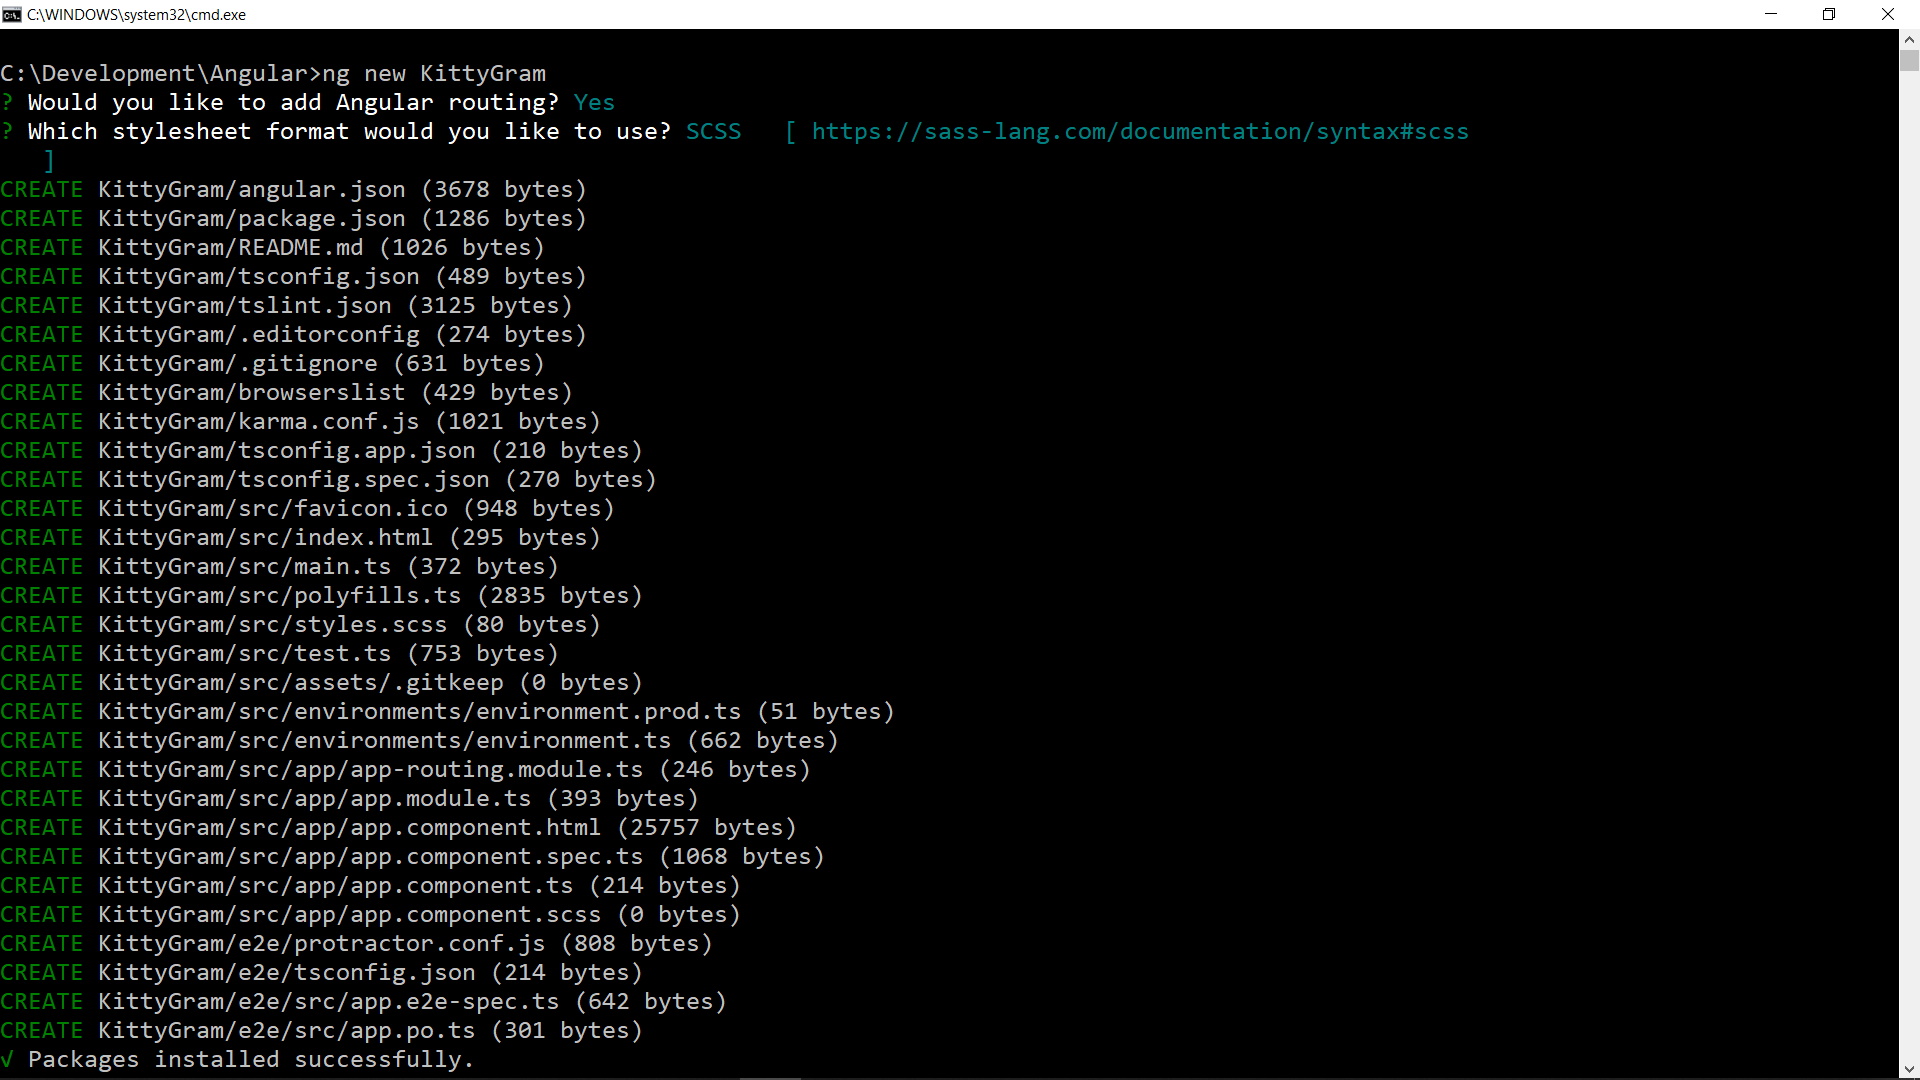
Start by generating a fresh Angular project with the command **ng new KittyGram**.
Afterwards, switch into the newly created project directory using cd KittyGram(on Windows).
As demonstrated in the Project Overview section, our app relies on Angular Material. Therefore, our next step is to configure the application to incorporate it.
Set up AngularMaterial
Run the following command to configure @angular/material:
ng add @angular/material
The setup wizard will present a few configuration queries, including your preferred theme, typography options, and whether to enable animations. Simply respond following the choices indicated in the screenshot that follows.
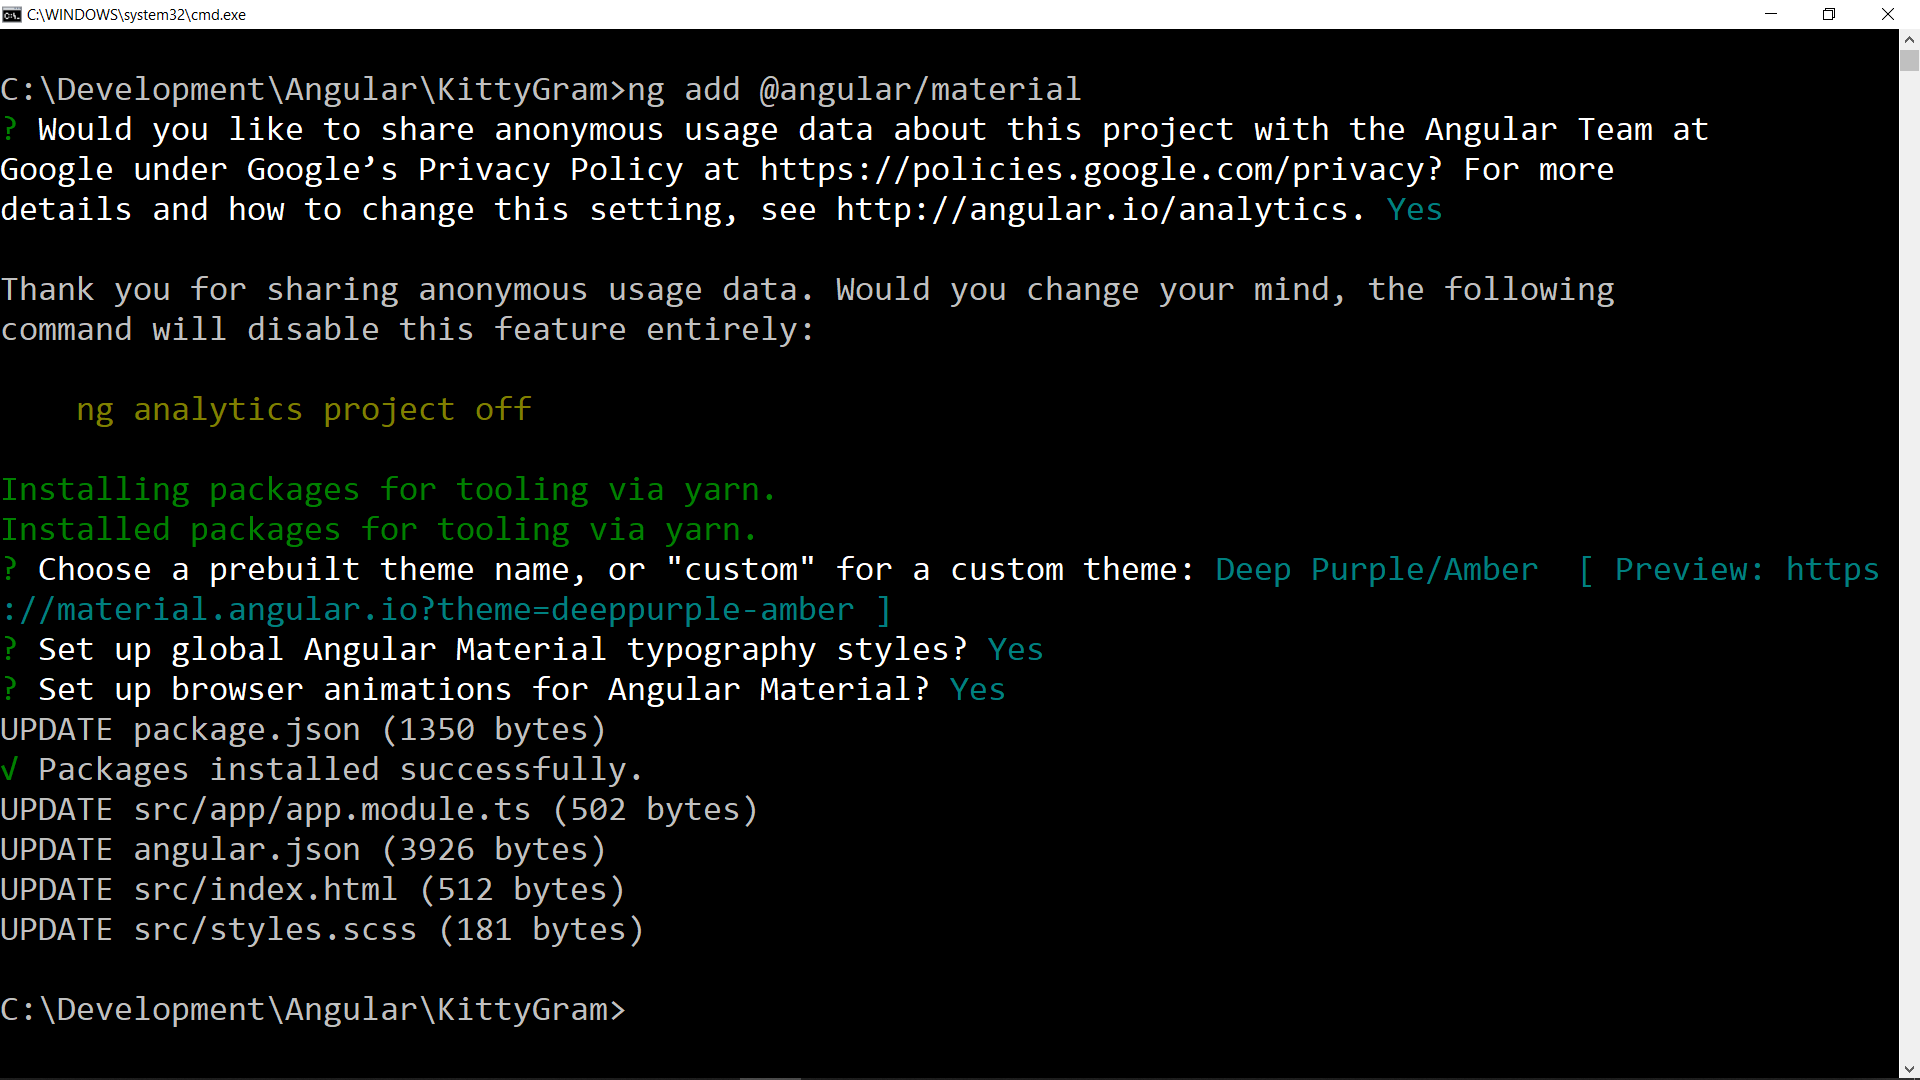
Bootstrap AngularMaterial into your project using the command **ng add @angular/material**.
After that, I’ll reorganize the code a bit to match the conventions I tend to follow. That’s purely a personal preference, though, so feel free to skip it.
Relocate Theme References from angular.json into styles.scss
It bugs me when angular.json is cluttered with stylesheet entries when a styles.scss file already exists. So we’ll just pull those CSS imports straight in.
Locate the deeppurple-amber.css entry inside angular.json, then delete those path references. Remove this URL:
"./node_modules/@angular/material/prebuilt-themes/deeppurple-amber.css",
Before the refactoring step, the same URL is expected to appear twice in your project. Once the refactoring is complete, the styles array within your angular.json file should resemble the following:
{
  "...": "...",
  "projects": {
    "KittyGram": {
      "...": "...",
      "architect": {
        "build": {
          "...": "...",
          "options": {
            ...
            "styles": [
              "src/styles.scss"
            ],
            ...
          },
          ...
        },
        ...
        "test": {
          ...
          "options": {
            ...
            "styles": [
              "src/styles.scss"
            ],
            ...
          }
        },
        ...
      }
    }
  },
  ...
}
The **angular.json** file is where we begin.
Next, take that URL and place it inside styles.scss. Once you have made this adjustment, the contents of styles.scss should resemble the following:
/* You can add global styles to this file, and also import other style files */

html,
body {
  height: 100%;
}
body {
  margin: 0;
  font-family: Roboto, "Helvetica Neue", sans-serif;
}

@import "~@angular/material/prebuilt-themes/deeppurple-amber.css";
**styles.scss**
Set up AppMaterialModule
This setup was already explained in a previous article, so I’ll keep it brief. The only extra step I’m taking here is to also re-export the BrowserAnimationsModule from this module.
Here’s what our AppMaterialModule ends up looking like:
import { BrowserAnimationsModule } from '@angular/platform-browser/animations';
import { MatButtonModule } from '@angular/material/button';
import { MatDividerModule } from '@angular/material/divider';
import { MatIconModule } from '@angular/material/icon';
import { MatMenuModule } from '@angular/material/menu';
import { MatToolbarModule } from '@angular/material/toolbar';
import { MatTooltipModule } from '@angular/material/tooltip';
import { MatSnackBarModule } from '@angular/material/snack-bar';
import { NgModule } from '@angular/core';

@NgModule({
  exports: [
    BrowserAnimationsModule,
    MatButtonModule,
    MatDividerModule,
    MatIconModule,
    MatMenuModule,
    MatToolbarModule,
    MatTooltipModule,
    MatSnackBarModule,
  ],
})
export class AppMaterialModule {}
**app-material.module.ts**
After that, we need to add AngularFire.
Configure AngularFire
For the login feature, Firebase must be integrated into our Angular application. The official SDK for this purpose is @angular/fire, which is maintained by Angular. So, that's our next move. Install @angular/fire by running this command:
ng add @angular/fire
During the setup, Firebase might prompt you for permissions regarding analytics data collection, CLI usage statistics, and error reporting. Additionally, it could ask you to enter an Authorization code, triggering a pop-up window where you sign in with the Gmail account linked to your Firebase registration.
Depending on whether your auth-code entry succeeds, you may also need to execute firebase login --reauth to complete the process.
When everything works as expected, you'll be presented with a list of existing Firebase Projects from the console, and you'll need to choose your app from that selection. The interface would appear similar to this:
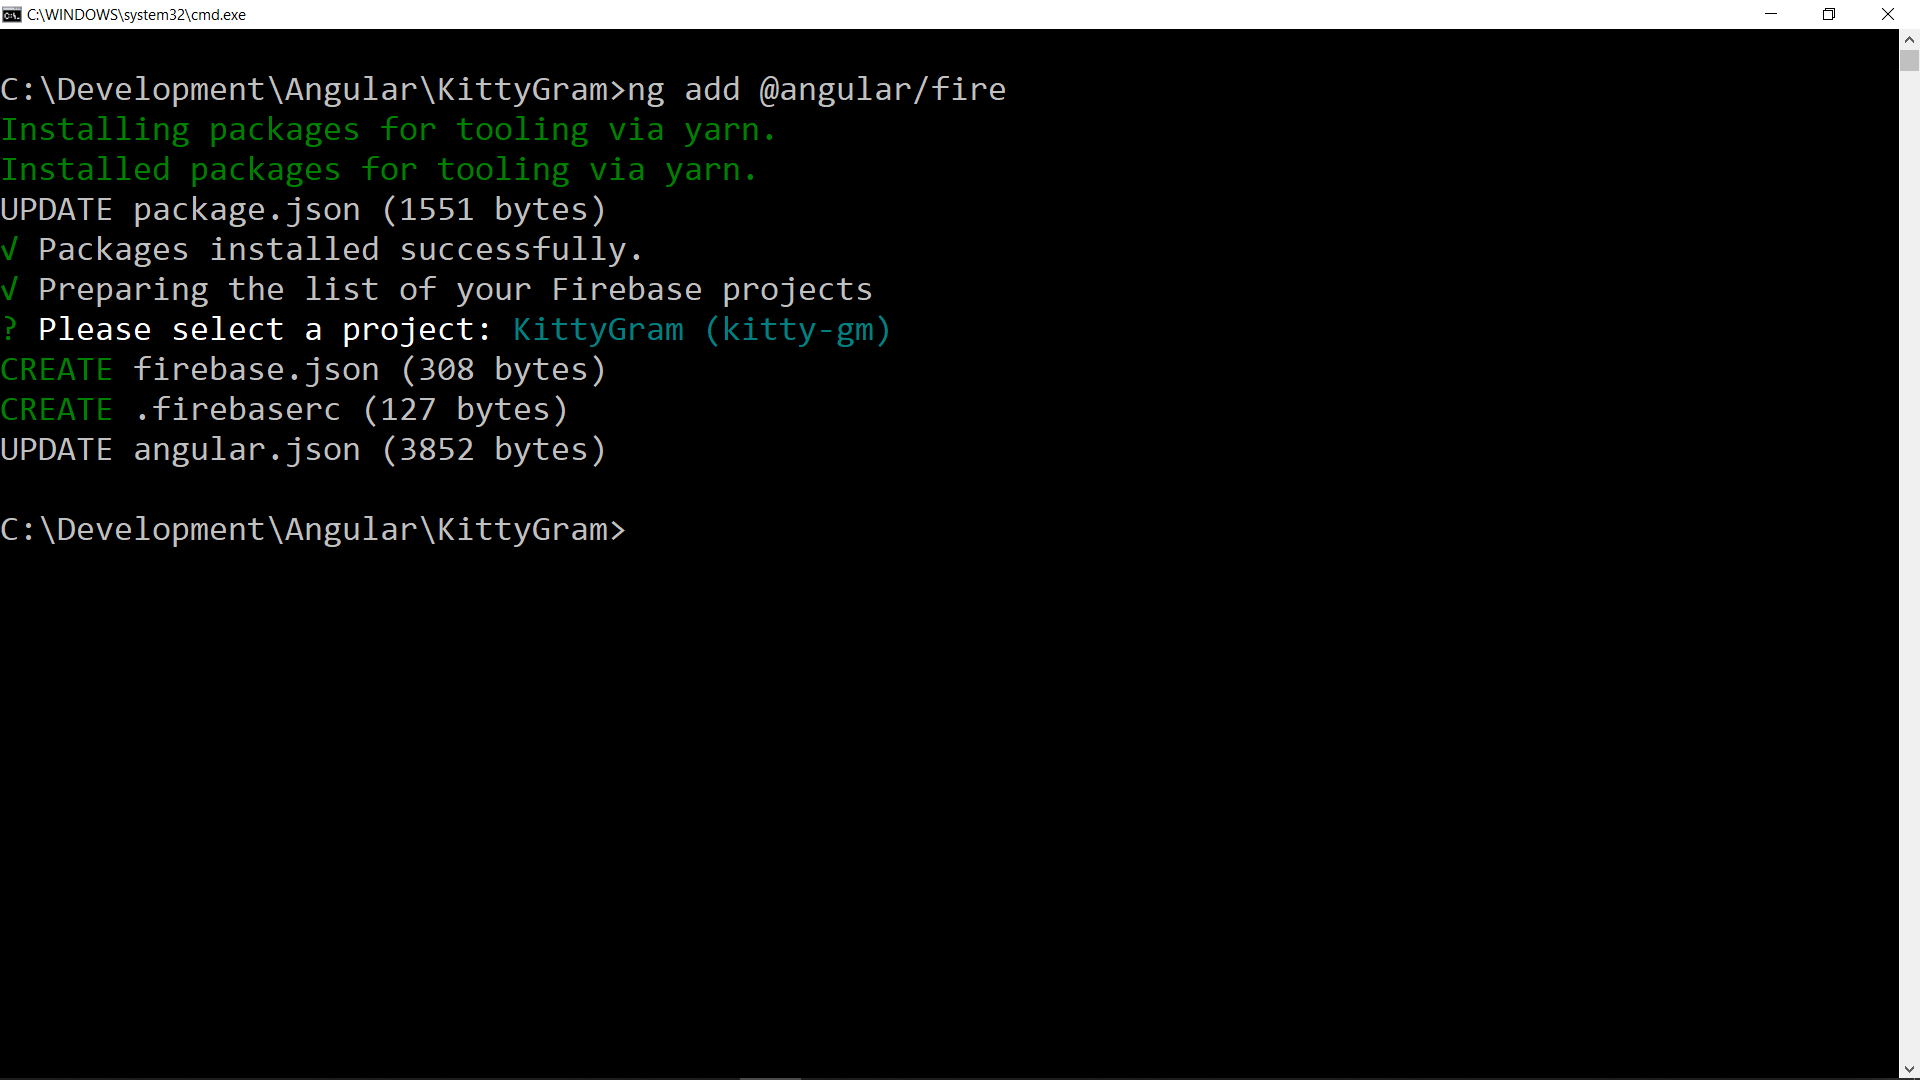
Add Angular Material to your project with the command **ng add @angular/fire**.
After that, I’ll make a few tweaks to align everything with my preferred setup. The first step is to generate an AppFirebaseModule.
Generating an AppFirebaseModule
To create this module, I’ll use ng g m app-firebase. This command places the module in its own directory, so I’ll relocate it and remove the now-empty folder.
During the Firebase project setup, you likely saved the configuration details. We’ll need them at this point. Store that configuration in an object called firebase within both environments.ts and environments.prod.ts:
export const environment = {
  production: false,
  firebase: {
    apiKey: 'YOUR apiKey HERE',
    authDomain: 'YOUR authDomain HERE',
    databaseURL: 'YOUR databaseURL HERE',
    projectId: 'YOUR projectId HERE',
    storageBucket: 'YOUR storageBucket HERE',
    messagingSenderId: 'YOUR messagingSenderId HERE',
    appId: 'YOUR appId HERE',
    measurementId: 'YOUR measurementId HERE',
  },
};
**environment.ts**
This configuration must remain confidential and never be exposed publicly.
Next, inside our AppFirebaseModule, we’ll configure the AngularFire modules required for Google Sign-In.
To start, we need the AngularFireModule, which serves to hook our Firebase project into the Angular application. Additionally, the AngularFireAuthModule provides all the utilities necessary for handling authentication, including login and logout operations.
We configure it by invoking the initializeApp function on AngularFireModule, supplying the settings from the environment constant. Following that, we can provide both the AngularFireModule and AngularFireAuthModule for use throughout the app. Here’s what this setup looks like in code:
import { AngularFireAuthModule } from '@angular/fire/auth';
import { AngularFireModule } from '@angular/fire';
import { NgModule } from '@angular/core';

import { environment } from '../environments/environment';

@NgModule({
  imports: [AngularFireModule.initializeApp(environment.firebase)],
  exports: [AngularFireModule, AngularFireAuthModule],
})
export class AppFirebaseModule {}
app-firebase.module.ts
With AngularMaterial and AngularFire fully configured, we’re ready to bring AppFirebaseModule and AppMaterialModule into the AppModule via imports.
...
import { AppFirebaseModule } from './app-firebase.module';
import { AppMaterialModule } from './app-material.module';
...

@NgModule({
  ...
  imports: [
    ...
    AppFirebaseModule,
    AppMaterialModule,
    ...
  ],
  ...
})
export class AppModule {}
app.module.ts
Setting Up the Angular Application
Building the Angular application is quite simple. For this article, we’ll require four components:
- The
HeaderComponentacting as our main navigation bar. It will include login, post-creation, and user-profile-card buttons. Their visibility will depend on the user’s authentication state. - The Profile Card Component, which displays user data along with a logout button.
- The
FeedCompoentfor the/feedroute, plus a matchingCreateComponentfor the/feedroute.
Generate them using this command:
ng g c components/create --module=app && ng g c components/feed --module=app && ng g c components/profile-card --module=app && ng g c components/header --module=app
Running this command will generate all four components inside a directory called components.
For CreateComponent and FeedComponent, only placeholder visuals are required. I sourced these graphics from Undraw, created by Katerina Limpitsouni. After placing them in the assets folder, we reference them within the Component Templates for:
<img alt="Create Post" class="placeholder-image" src="/assets/create.png" />
create.component.html
<img alt="Feed" class="placeholder-image" src="/assets/feed.png">
feed.component.html
The two remaining Components need a way to handle user authentication before we can build them out. AngularFire simplifies this considerably. It ships with an AngularFireAuthModule that provides an AngularFireAuth service, injectable as a dependency. Calling its methods allows us to trigger sign-in and sign-out flows.
This same service also furnishes an authState Observable, which carries details about the current user’s session. So we can create a dedicated service offering login and logout functions, along with a user$ Observable for tracking authentication status. The implementation can be as straightforward as this:
import { AngularFireAuth } from '@angular/fire/auth';
import { auth } from 'firebase/app';
import { BehaviorSubject, Observable, from } from 'rxjs';
import { Injectable } from '@angular/core';
import { switchMap } from 'rxjs/operators';

@Injectable({
  providedIn: 'root',
})
export class AuthService {
  private user: BehaviorSubject<
    Observable<firebase.User>
  > = new BehaviorSubject<Observable<firebase.User>>(null);
  user$ = this.user
    .asObservable()
    .pipe(switchMap((user: Observable<firebase.User>) => user));

  constructor(private afAuth: AngularFireAuth) {
    this.user.next(this.afAuth.authState);
  }

  loginViaGoogle(): Observable<auth.UserCredential> {
    return from(this.afAuth.signInWithPopup(new auth.GoogleAuthProvider()));
  }

  logout(): Observable<void> {
    return from(this.afAuth.signOut());
  }
}
auth.service.ts
The logic here is quite simple. If anything is unclear, drop a comment below.
Now we’ve got a service we can inject into HeaderComponent. That component can use these methods and the user$ stream to decide what to render in the navbar. It will also subscribe to the Observables returned by loginViaGoogle and logout to trigger snackbar alerts.
To keep things tidy, we’ll apply the take operator, so there’s no need for manual unsubscribe calls.
import { catchError, take } from 'rxjs/operators';
import { Component } from '@angular/core';
import { EMPTY, Observable, of } from 'rxjs';
import { MatSnackBar } from '@angular/material/snack-bar';
import { Router } from '@angular/router';

import { AuthService } from '../../services/auth/auth.service';
import { FEED } from './../../consts/routes.const';

@Component({
  selector: 'app-header',
  templateUrl: './header.component.html',
  styleUrls: ['./header.component.scss'],
})
export class HeaderComponent {
  user$: Observable<firebase.User> = this.auth.user$;

  constructor(
    private readonly auth: AuthService,
    private readonly snackBar: MatSnackBar,
    private readonly router: Router,
  ) {}

  login() {
    this.auth
      .loginViaGoogle()
      .pipe(
        take(1),
        catchError((error) => {
          this.snackBar.open(`${error.message} ?`, 'Close', {
            duration: 4000,
          });
          return EMPTY;
        }),
      )
      .subscribe(
        (response) =>
          response &&
          this.snackBar.open(
            `Oh! You're here. I demand that you feed me, Hooman. ?`,
            'Close',
            {
              duration: 4000,
            },
          ),
      );
  }

  logout() {
    this.auth
      .logout()
      .pipe(take(1))
      .subscribe((response) => {
        this.router.navigate([`/${FEED}`]);
        this.snackBar.open('Come back soon with treats! ?', 'Close', {
          duration: 4000,
        });
      });
  }
}
Here's how the header.component.ts logic breaks down. It's quite simple: once the logout flow finishes, we steer the user straight to the /feed page.
Note that in a production codebase, those snack bar messages would likely live in a separate constants file.
Moving to the template, the UI adapts to the auth state. When logged in, it renders the ProfileCardComponent alongside a Create icon; otherwise, it simply displays a Login icon.
<mat-toolbar color="primary">
  <mat-toolbar-row>
    <button
      mat-button
      routerLink="/feed"
      matTooltip="?Gram Home">
      ?Gram
    </button>
    <span class="spacer"></span>
    <ng-container *ngIf="user$ | async as user; else loginIcon">

      <button
        mat-icon-button
        routerLink="/create"
        matTooltip="Post a cute ?"
        >
        <mat-icon
          aria-hidden="false"
          aria-label="Post a cute ?"
          >
          cloud_upload
        </mat-icon>
      </button>

      <app-profile-card
        [user]="user"
        (logoutClick)="logout()">
      </app-profile-card>

    </ng-container>
    <ng-template #loginIcon>
      <button
        mat-icon-button
        (click)="login()"
        matTooltip="Login"
        >
        <mat-icon
          aria-hidden="false"
          aria-label="Login"
          >
          fingerprint
        </mat-icon>
      </button>
    </ng-template>
  </mat-toolbar-row>
</mat-toolbar>
header.component.html
Here, the ProfileCardComponent is clearly being used as a child component. It’s a presentation component that takes a user via an @Input property and fires an event on the logoutClick @Output property whenever the logout button is clicked.
Now, let’s check the structure of ProfileCardComponent:
import { Component, EventEmitter, Input, Output } from '@angular/core';

@Component({
  selector: 'app-profile-card',
  templateUrl: './profile-card.component.html',
  styleUrls: ['./profile-card.component.scss'],
})
export class ProfileCardComponent {
  @Input() user: firebase.User;
  @Output() logoutClick: EventEmitter<null> = new EventEmitter<null>();

  logout() {
    this.logoutClick.emit();
  }
}
The TypeScript file for this component is located at profile-card.component.ts.
As for the HTML markup, here’s a possible structure for the template:
<button
  mat-mini-fab
  color="primary"
  class="avatar-button"
  [matMenuTriggerFor]="beforeMenu"
>
  <img
    [alt]="user.displayName"
    [src]="user.photoURL"
    class="avatar" />
</button>
<mat-menu #beforeMenu="matMenu" xPosition="before">
  <div class="profile-card">
    <img
      [alt]="user.displayName"
      [src]="user.photoURL"
      class="big-avatar" />
    <h4>{{ user.displayName }}</h4>
    <p>{{ user.email }}</p>
    <mat-divider></mat-divider>
    <button mat-stroked-button (click)="logout()">
      Sign Out
    </button>
    <mat-divider></mat-divider>
    <p class="profile-footer">
      Made with ? by <a href="https://twitter.com/SiddAjmera">@SiddAjmera</a>
    </p>
  </div>
</mat-menu>
profile-card.component.html
With all modules, components, and the service ready, it’s time to wire everything together through routing.
Wiring It All Together with Routing
To accomplish this, we must set up routing by configuring our AppRoutingModule. As we’ve established, there are two routes to define:
- The
/feedroute sends the user to theFeedComponent. - The
/createroute sends the user to theCreateComponent.
However, the /create route must be off-limits to unauthenticated users. Without AngularFire, we’d rely on a CanActivate Guard for this purpose. Fortunately, @angular/fire provides an AngularFireAuthGuard, which we can set up using its redirectUnauthorizedTo helper. This configuration lets us specify where Angular should redirect unauthorized users.
Here’s how that looks in code:
import {
  AngularFireAuthGuard,
  redirectUnauthorizedTo,
} from '@angular/fire/auth-guard';
import { NgModule } from '@angular/core';
import { Routes, RouterModule } from '@angular/router';

import { BASE, CREATE, FEED } from './consts/routes.const';
import { CreateComponent } from './components/create/create.component';
import { FeedComponent } from './components/feed/feed.component';

const redirectUnauthorizedToLogin = () => redirectUnauthorizedTo([FEED]);

const routes: Routes = [
  {
    path: BASE,
    redirectTo: `/${FEED}`,
    pathMatch: 'full',
  },
  {
    path: FEED,
    component: FeedComponent,
  },
  {
    path: CREATE,
    component: CreateComponent,
    canActivate: [AngularFireAuthGuard],
    data: { authGuardPipe: redirectUnauthorizedToLogin },
  },
];

@NgModule({
  imports: [RouterModule.forRoot(routes)],
  exports: [RouterModule],
})
export class AppRoutingModule {}
app-routing.module.ts
With this, the Angular application is fully configured for Google sign-in and routing.
The complete project source is available on GitHub.
What’s Ahead
KittyGram is packed with functionality, and this setup represents only a small fraction of its capabilities. Every ambitious project starts from a modest foundation, much like the one we’ve created here. In the upcoming article, we’ll build the CreateComponent using a Reactive Form. Additionally, we’ll integrate Firebase Storage to enable image uploads to a Firebase Storage Bucket. Keep an eye out for it. This post will be refreshed as soon as Martina completes the draft.
We’ve now arrived at the conclusion of this guide. Thank you for staying with me throughout. I trust you found it valuable. A heartfelt appreciation goes to Martina Kraus for reviewing the content and partnering with me on this endeavor. I’m equally thankful to Akhil and Rajat for their thorough proofreading and constructive suggestions that enhanced the quality of this piece.
The initial version of this article was authored by me, appearing under the Angular Publication on DEV.TO